59
Online Software
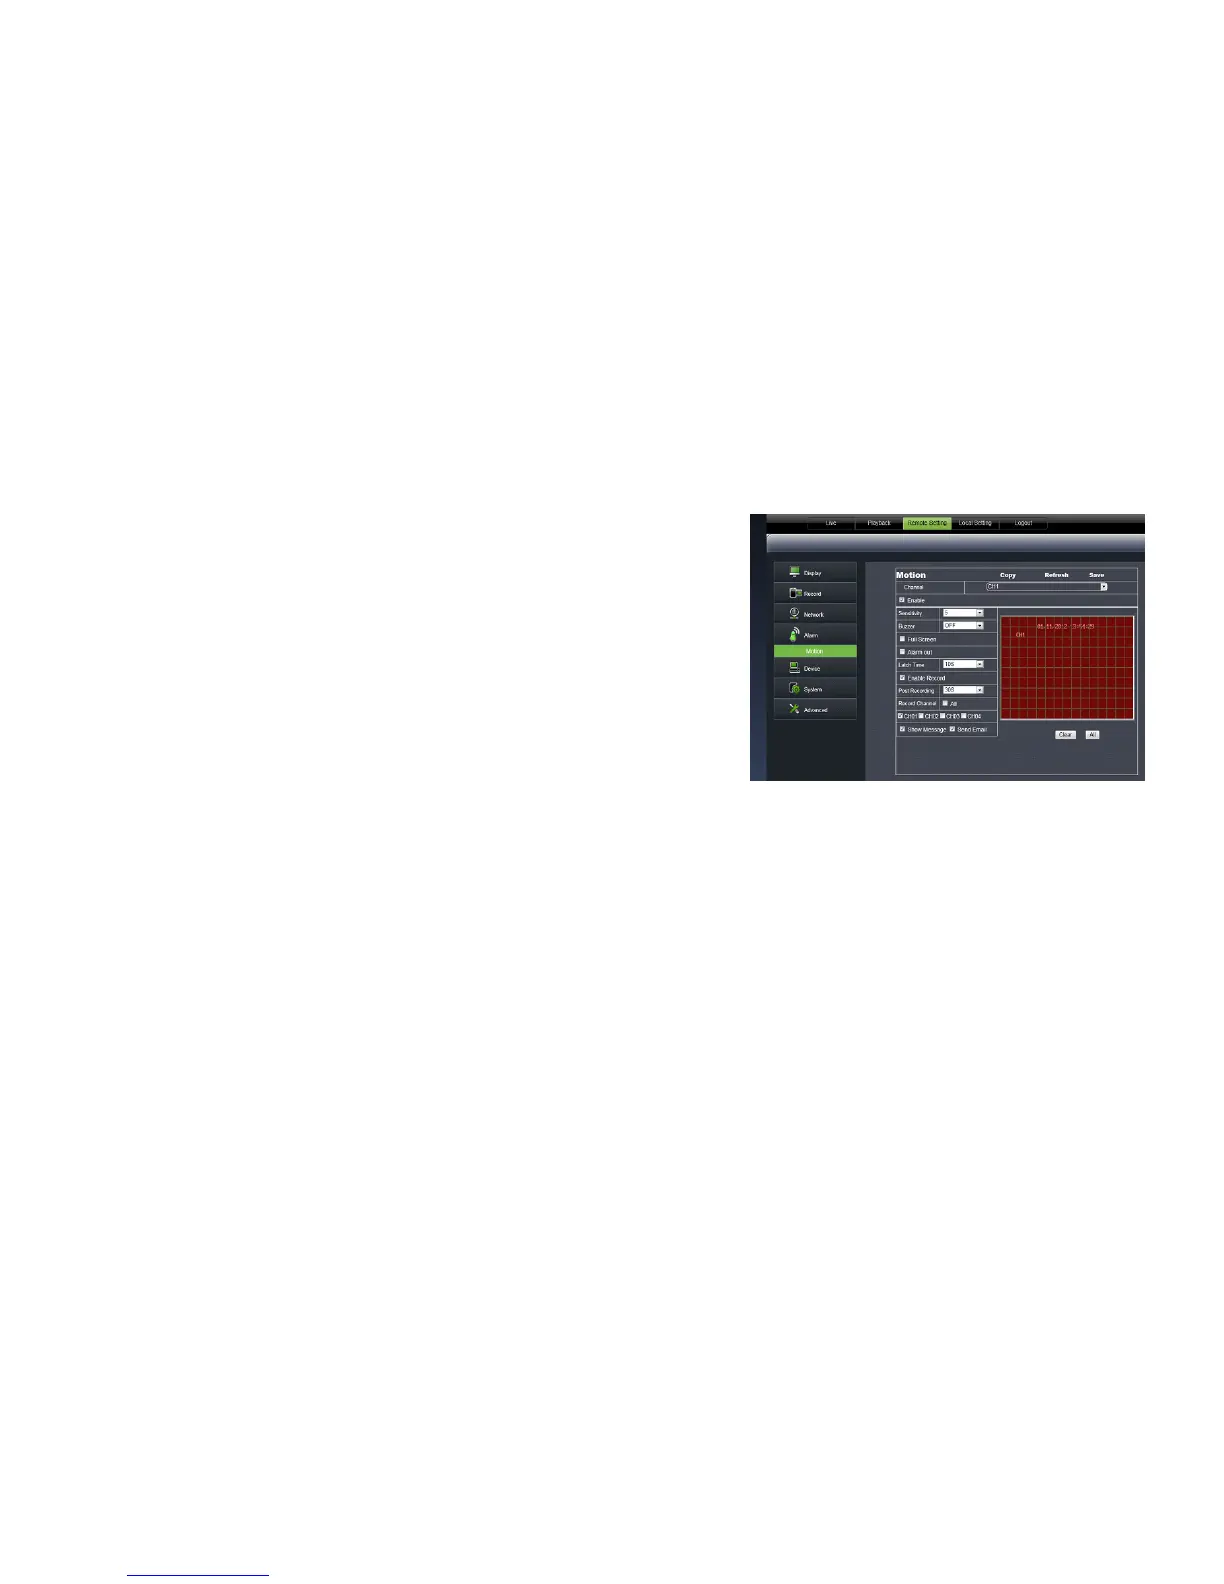
Alarm
Enable or disable motion detection, adjust the motion detection area as well as enable the alarm and the length of it.
Motion
To enable/disable the status of MOTION DETECTION for each camera:
1. Select the CHANNEL drop down list and choose the camera.
2. Click the ENABLE checkbox to turn the motion detection on for that camera.
3. Select the SENSITIVITY drop down list to adjust the motion detection sensitivity. Select 1 to 8 from the drop
down list to adjust the sensitivity. 1 being the lowest sensitivity and 8 being the highest sensitivity.
4. Click SAVE in the upper right corner to save your changes.
5. Repeat for all desired cameras.
Setting the MOTION DETECTION area:
1. The screen is fully RED; this is because the DVR is automatically
set to detect motion throughout the whole screen.
2. To adjust the MD area for the desired cameras, highlight the
squares where you do NOT want motion detected and click the
mouse. When the area is no longer shaded in red, the area will
no longer detect motion.
3. Click SAVE in the upper right corner to save your changes.
Device
The DEVICE tab allows you to view hard drive information such as HDD status and available space. You can also set
the overwrite setting. This is a useful menu when troubleshooting your DVR.
HDD
• HDD Status: Displays the current operating status of the hard drive. If the hard drive is functioning normally it
will display OK.
• Avail Space: Tells you how much space is available to record on the HDD.
• Total Space: Tells you the total amount of space on your HDD.
• Available Time: Amount of remaining time available to record.
Overwrite
When the HDD has overwrite enabled, it will record over the oldest footage once the HDD is full instead of stopping
the recording. This way the DVR is always recording. If you want to stop recording when the HDD is full, set overwrite
to Close.
Enable/disable OVERWRITE mode:
1. Select the OVERWRITE drop down list and choose either AUTO to turn overwrite on, (you can also set the DVR to
overwrite for just a few hours or days) or choose CLOSE to turn overwrite off.
2. Click SAVE in the upper right corner to save your changes.