Back to Contents Page
Heatsink Assembly
Dell™Latitude™E4200ServiceManual
Removing the Heatsink Assembly
Replacing the Heatsink Assembly
Removing the Heatsink Assembly
1. Follow the instructions in Before Working on Your Computer.
2. Remove the service panel (see Removing the Service Panel).
3. Remove the WLAN and WWAN cards (see Removing the WLAN/WiMax Card and Removing a WWAN Card).
4. Remove the memory module (see Removing the Memory Module).
5. Remove the solid state drive (see Removing the Solid State Drive and Cable Assembly).
6. Remove the LED cover (see Removing the LED Cover).
7. Remove the keyboard (see Removing the Keyboard).
8. Remove the module with Bluetooth
®
wireless technology (see Removing the Card With Bluetooth Wireless Technology).
9. Remove the display assembly (see Removing the Display Assembly).
10. Remove the coin-cell battery (see Removing the Coin-Cell Battery).
11. Remove the palm rest assembly (see Removing the Palm Rest Assembly).
12. Remove the DC power cable (see Removing the DC Power Cable).
13. Remove the system board assembly (see Removing the System Board Assembly).
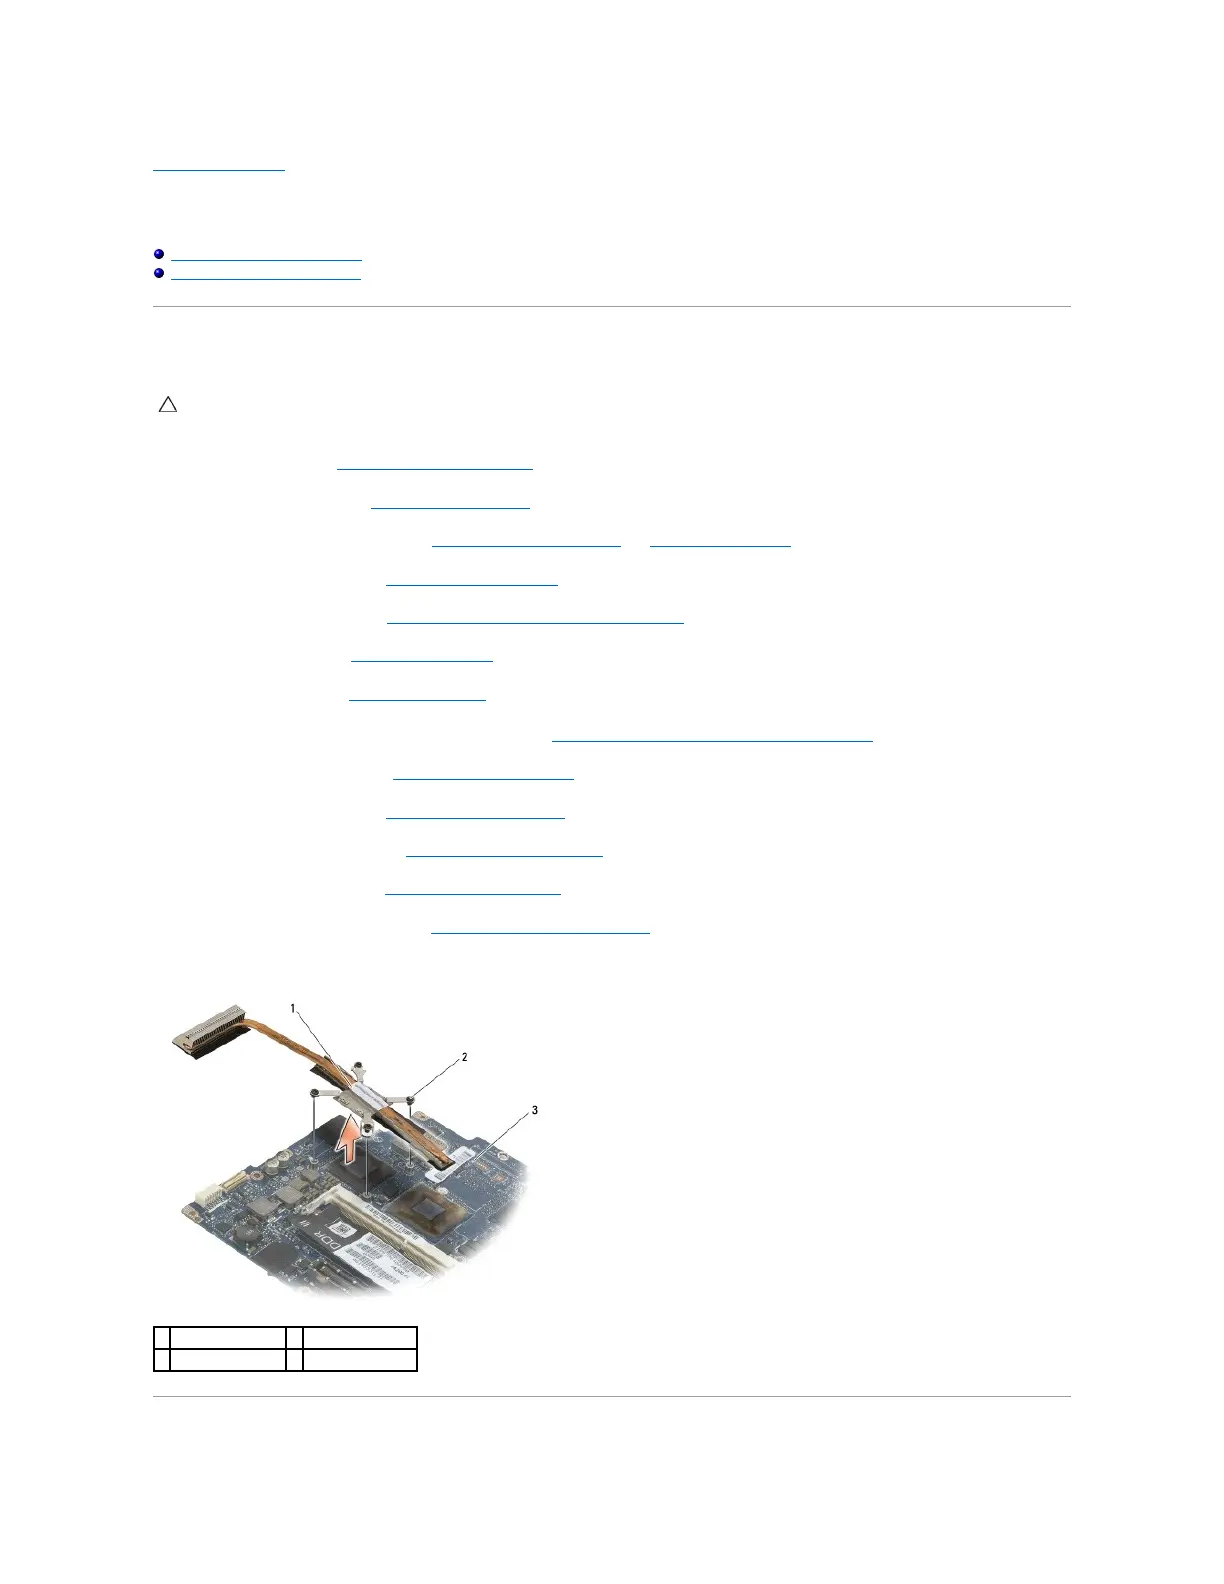
14. In sequential order, loosen the four numbered captive screws that secure the heatsink assembly to the system board, and carefully lift the heatsink
assembly away from the system board.
CAUTION: Before working inside your computer, read the safety information that shipped with your computer. For additional safety best
practices information, see the Regulatory Compliance Homepage on www.dell.com at: www.dell.com/regulatory_compliance.