Back to Contents Page
LED Boards
Dell™Latitude™E4200ServiceManual
Removing the Left LED Board
Replacing the Left LED Board
Removing the Right LED Board
Replacing the Right LED Board
Removing the Left LED Board
1. Follow the procedures in Before Working on Your Computer.
2. Remove the LED cover (see Removing the LED Cover).
3. Remove the keyboard (see Removing the Keyboard).
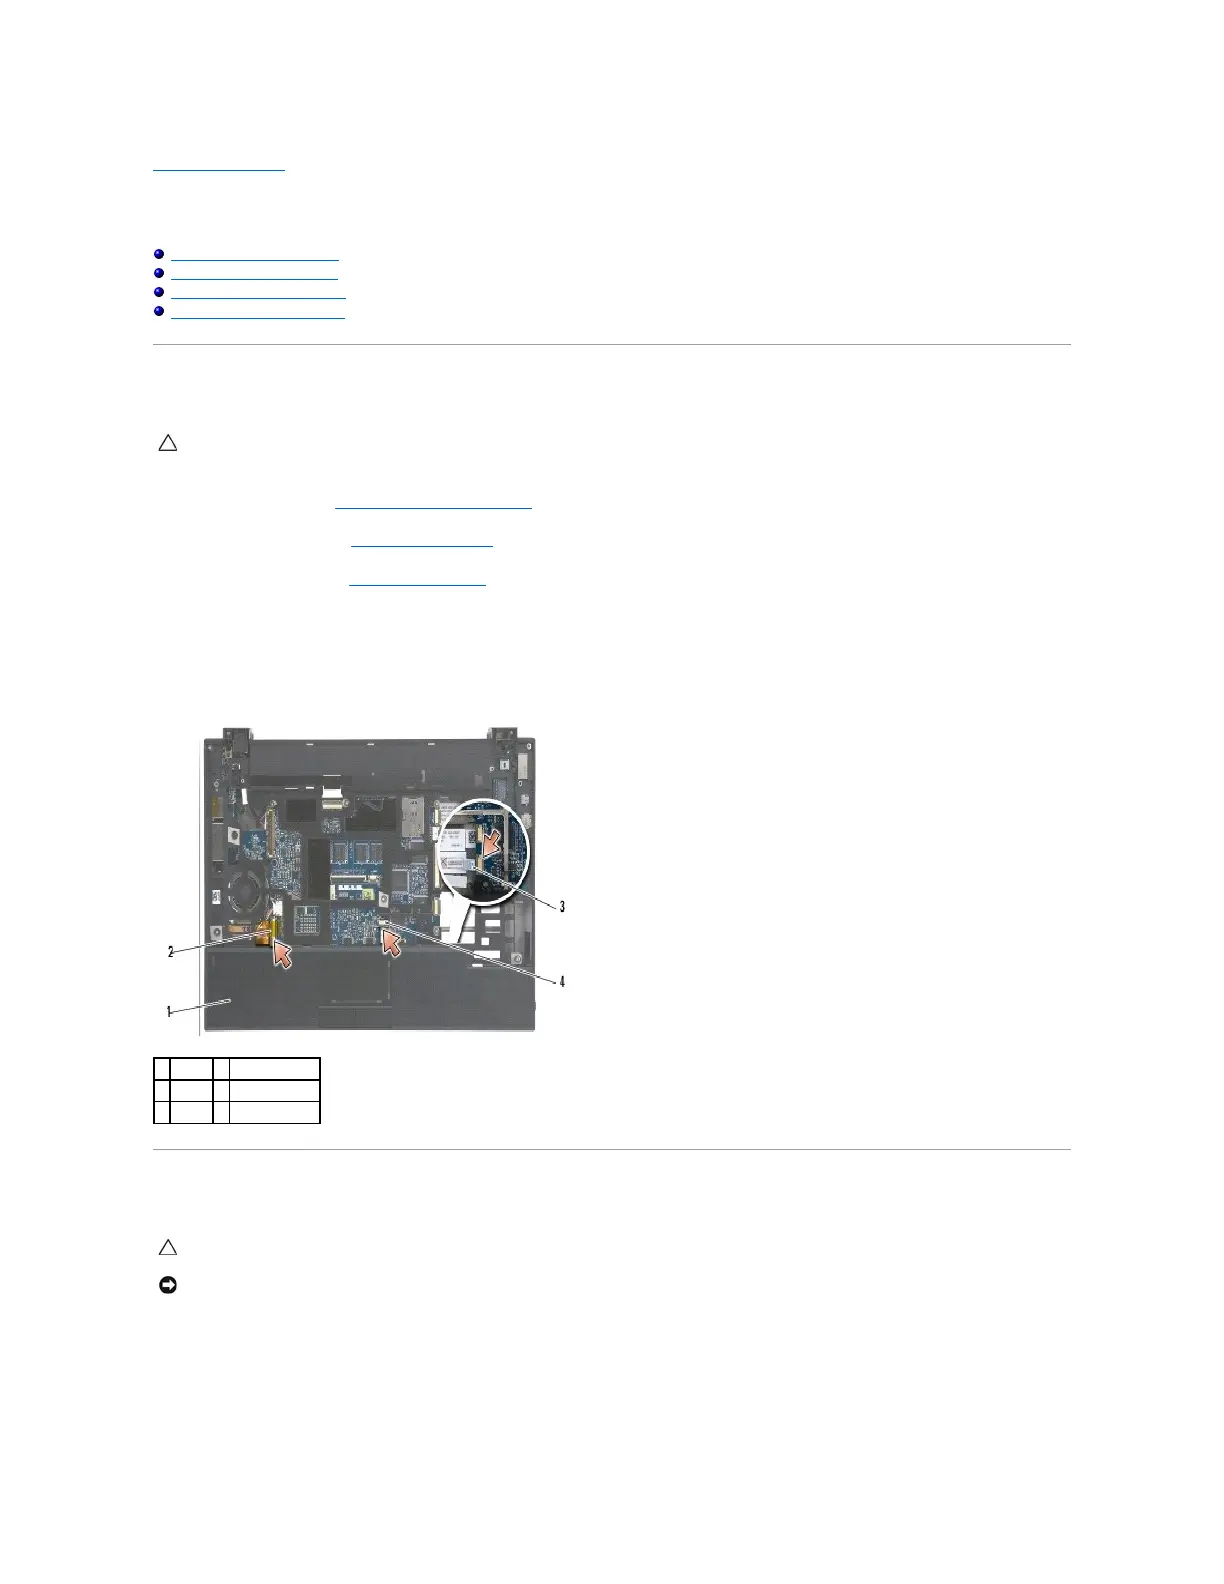
4. Remove the M2 x 3-mm screw on the left side of the LED board.
5. Slide the LED board towards the front of the computer to release it from the tabs on the palm rest.
6. Disconnect the cable to the system board by gently pulling up on the release latch.
Replacing the Left LED Board
1. Holding the LED board with the cable on the upper right side, slide the back edge of the board under the tabs on the palm rest.
2. Connect the cable to the system board by gently pressing on the release latch.
3. Replace the M2 x 3-mm screw on the left side of the LED board.
CAUTION: Before working inside your computer, read the safety information that shipped with your computer. For additional safety best
practices information, see the Regulatory Compliance Homepage on www.dell.com at: www.dell.com/regulatory_compliance.
CAUTION: Before working inside your computer, read the safety information that shipped with your computer. For additional safety best
practices information, see the Regulatory Compliance Homepage on www.dell.com at: www.dell.com/regulatory_compliance.