244 Desktop Computer Parts
6
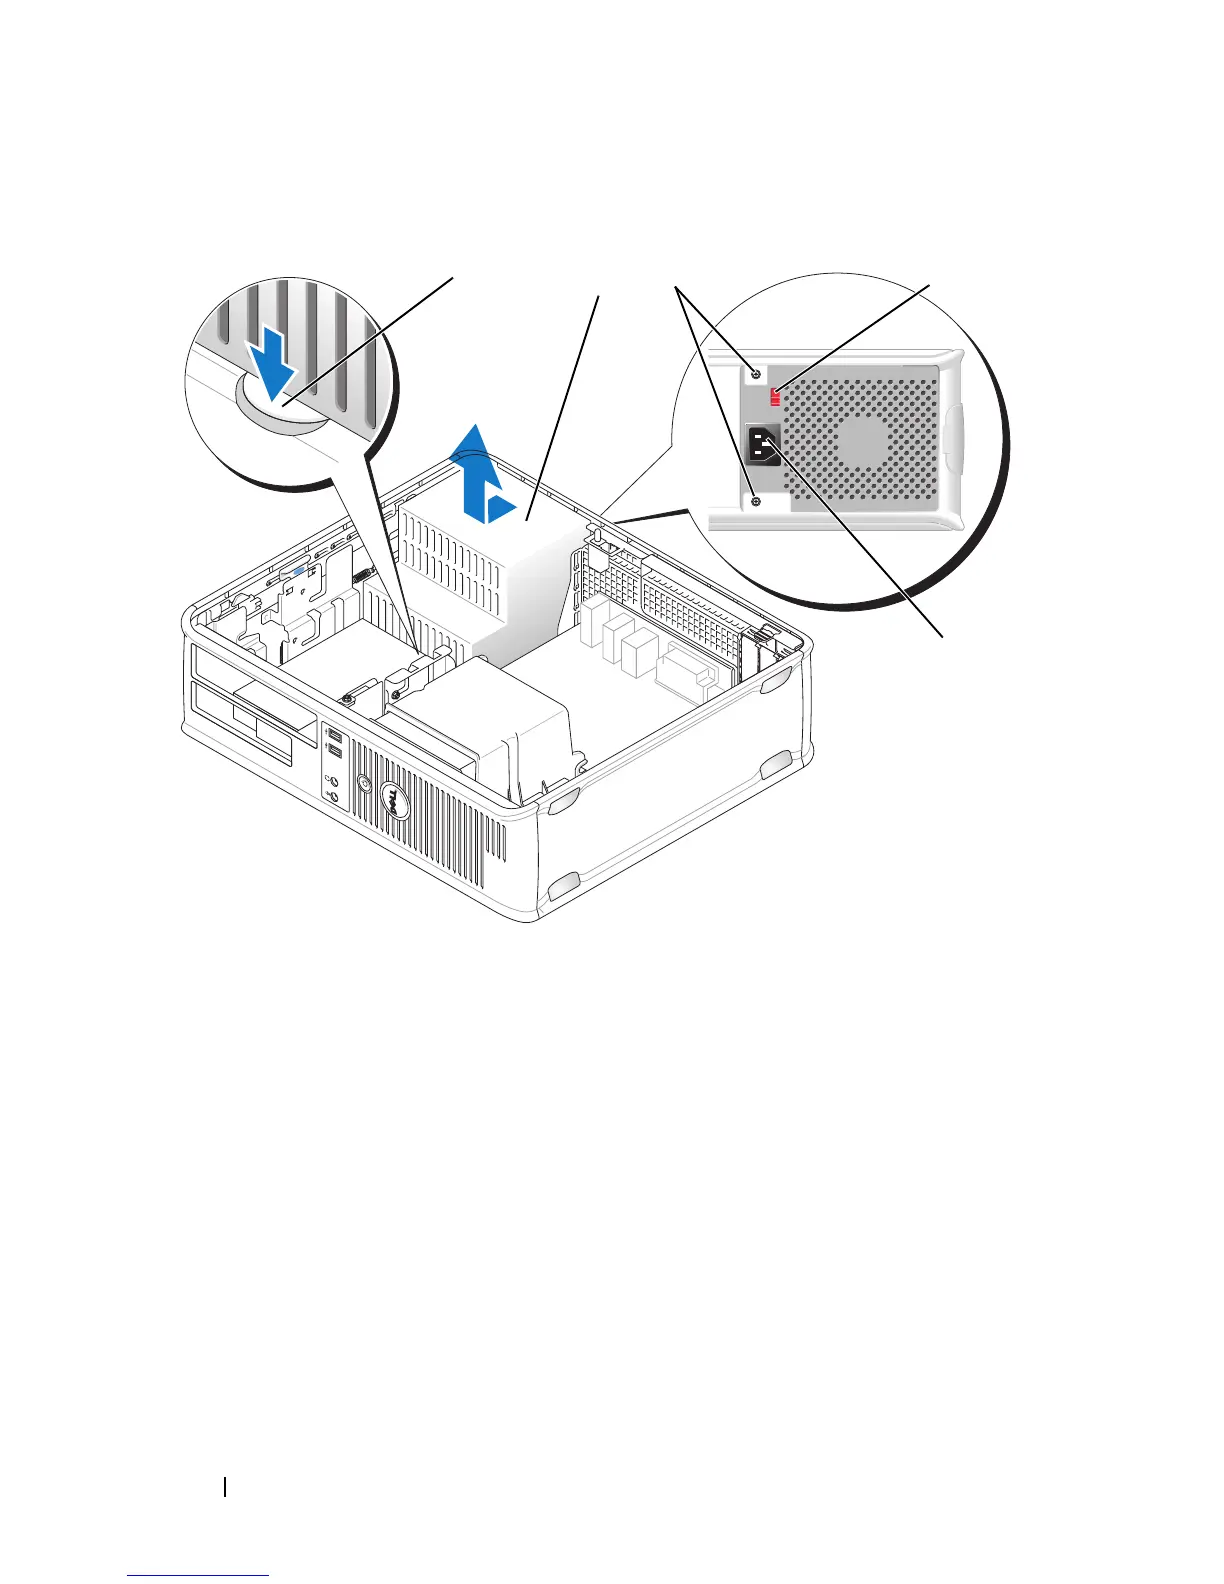
Press the release button located on the floor of the computer chassis.
7
Remove the optical drive and carefully set it aside (see "Optical Drive" on
page 237).
8
Slide the power supply toward the front of the computer by approximately
1 inch.
9
Lift the power supply up and out of the computer.
10
Slide the replacement power supply into place.
1 release button 2 power supply
3 screws (2) 4 voltage selection switch (red)
5 AC power connector
1
2
3
5
4