248 Desktop Computer Parts
3
Carefully disconnect and move any cables that are routed over the heat
sink assembly.
4
Loosen the captive screw on each side of the heat sink assembly.
CAUTION: Despite having a plastic shield, the heat sink assembly may become
very hot during normal operation. Be sure that it has had sufficient time to cool
before you touch it.
NOTICE: A strong thermal grease bond may exist between the processor and heat
sink. Do not use excessive force to separate the heat sink assembly from the
processor to avoid damaging the processor.
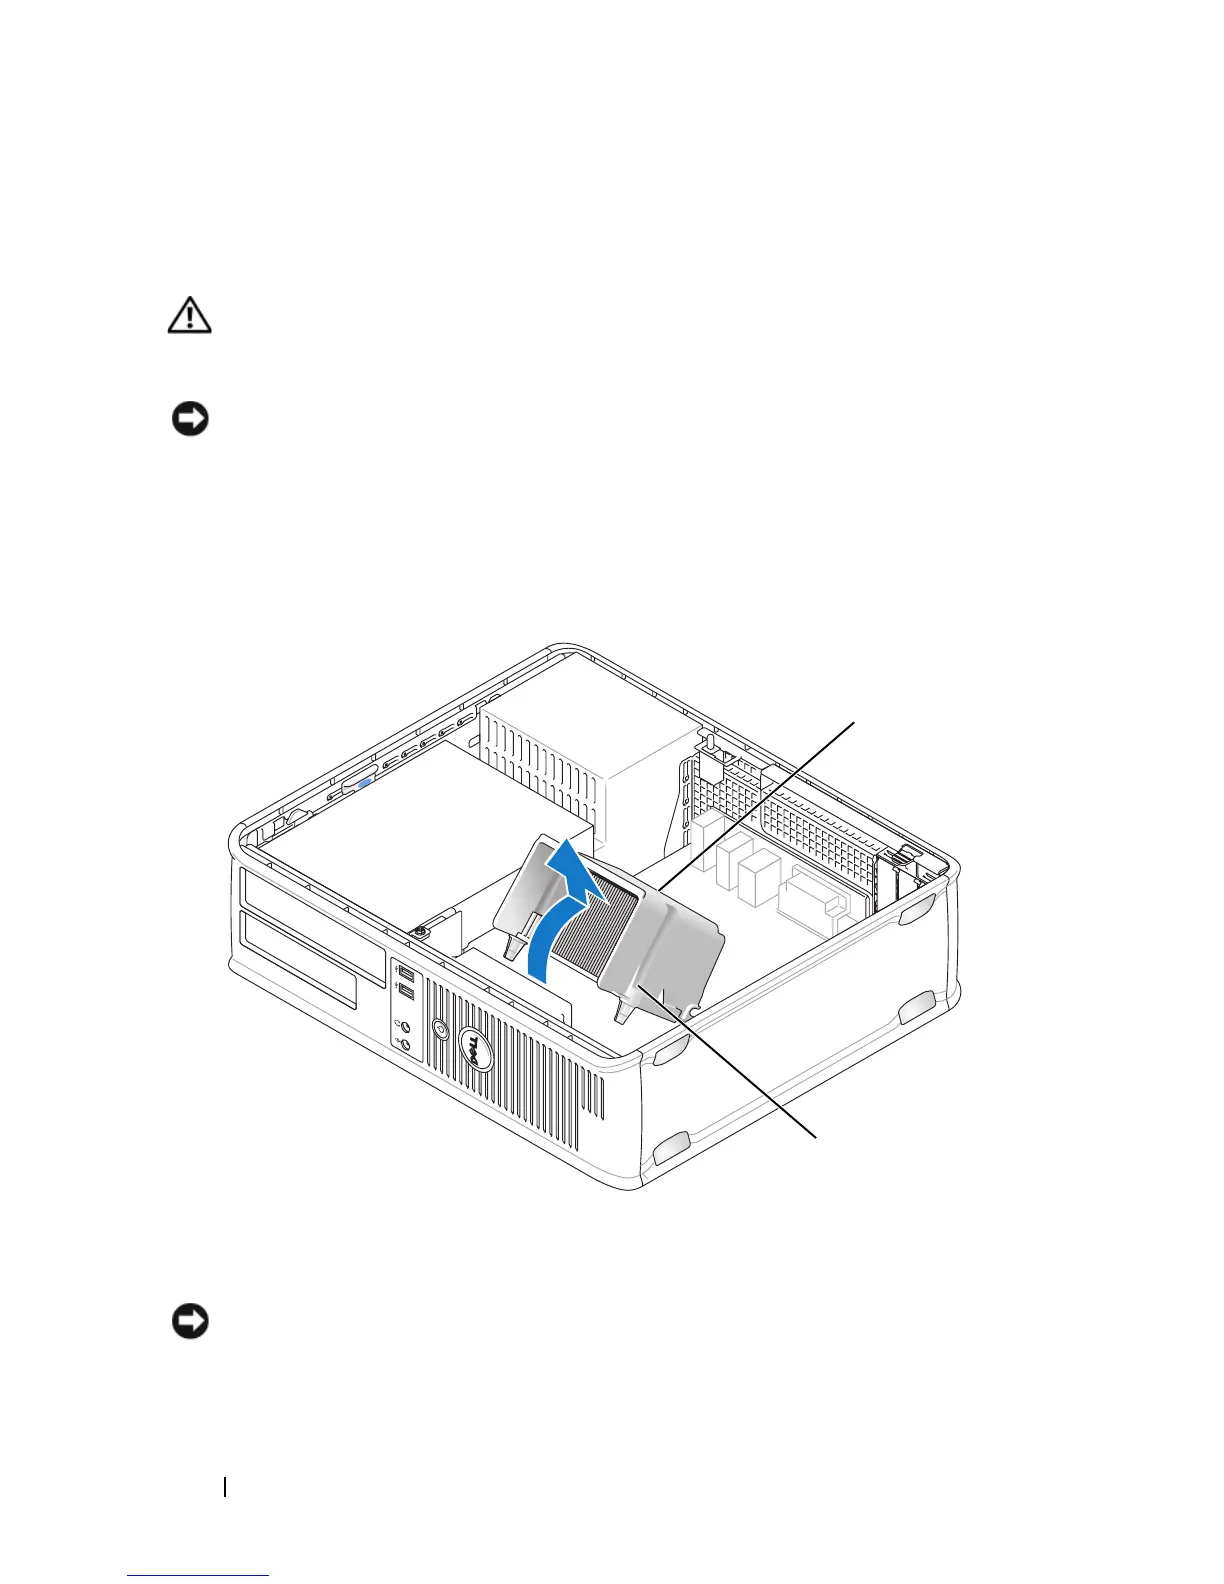
5
Rotate the heat sink assembly upward, and remove the assembly from the
computer.
NOTICE: Unless a new heat sink is required for the new processor, reuse the
original heat sink assembly when you replace the processor.
6
Open the processor cover by sliding the release lever from under the center
1 heat sink assembly 2 captive screw housing (2)
1
2