6. Adhere the tape that secures the touchscreen cable to the palm-rest and keyboard assembly.
7. Slide the touchscreen cable into the connector on the system board and close the latch to secure the cable.
8. Adhere the tape that secures the touchscreen cable to the heat sink.
9. Route the I/O-board cable through the routing guides on the fan.
10. Connect the I/O-board cable to the connector on the I/O board.
Next steps
1. Install the base cover.
2. Follow the procedure in After working inside your computer.
System board
Removing the system board
Prerequisites
1. Follow the procedure in Before working inside your computer.
2. Remove the base cover.
3. Remove the battery.
4. Remove the coin-cell battery.
5. Remove the memory modules.
6. Remove the M.2 2230 solid-state drive or M.2 2280 solid-state drive, as applicable.
7. Remove the fan.
8. Remove the heat sink.
About this task
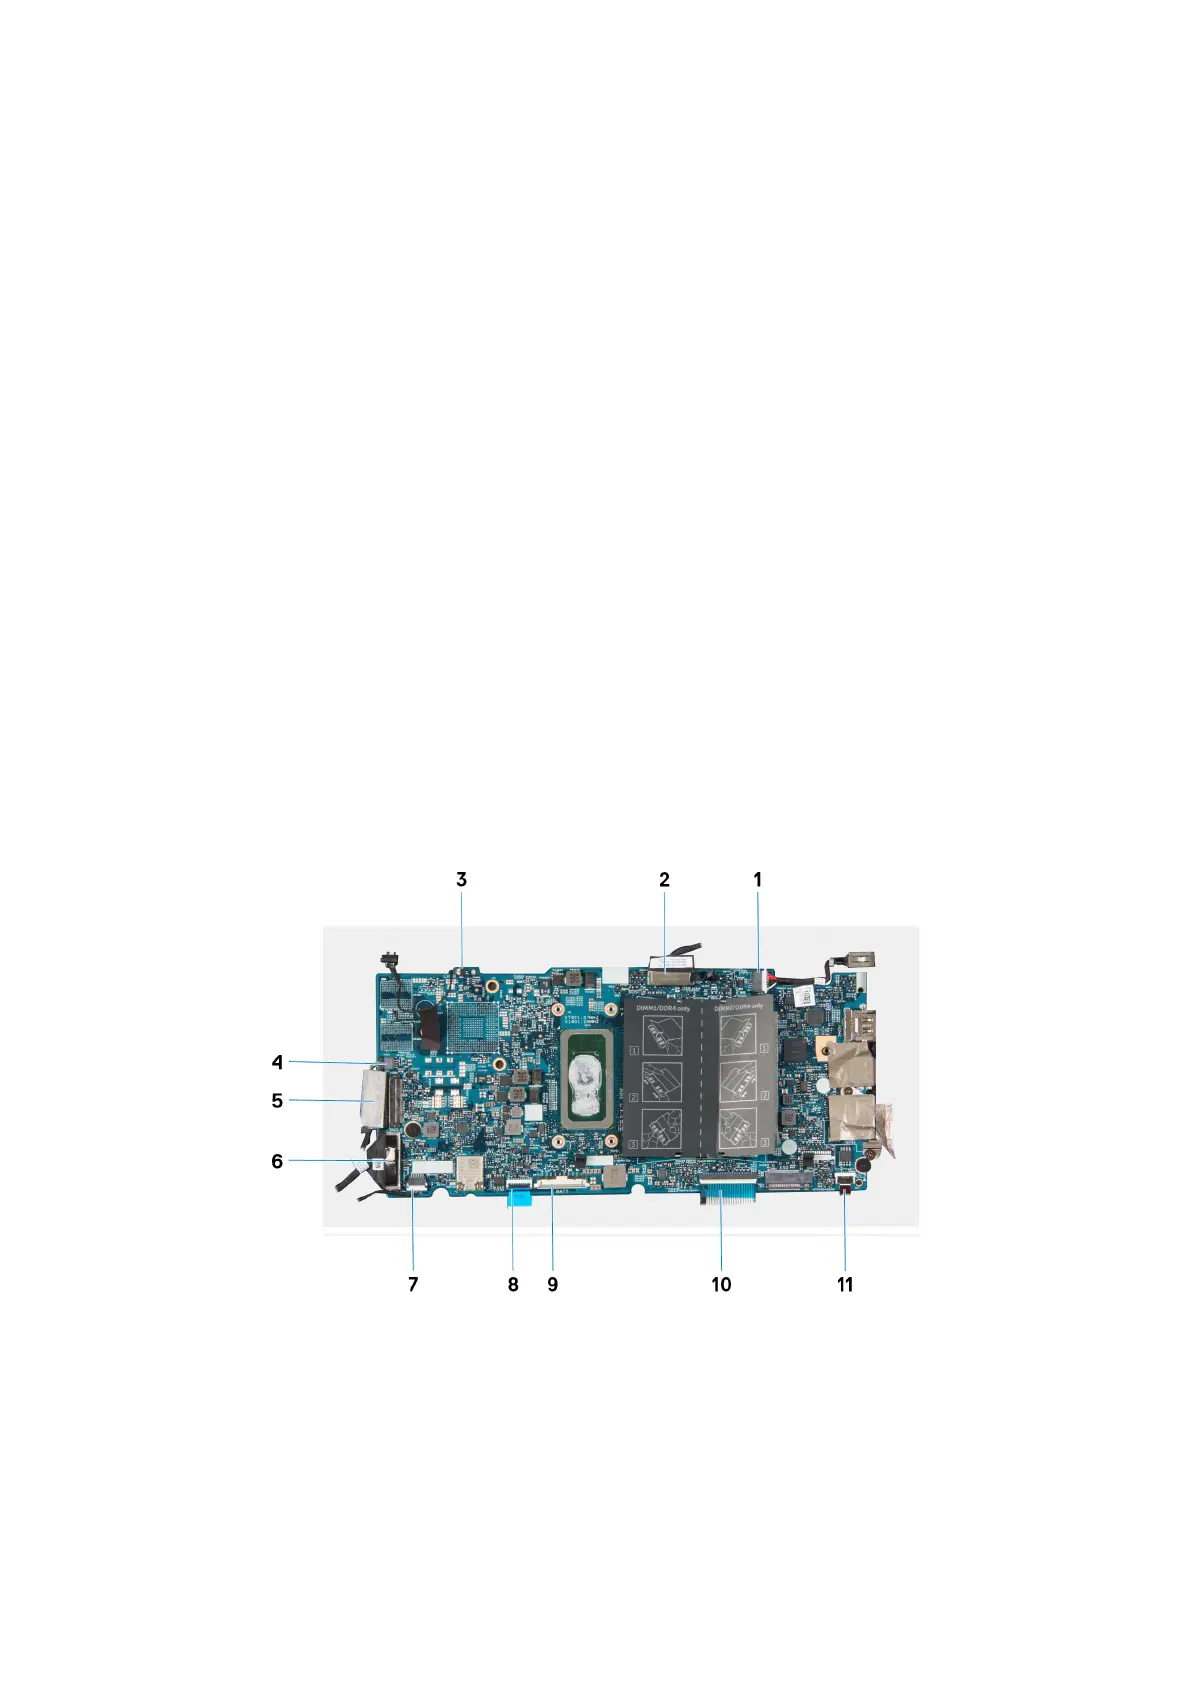
The following image indicates the connectors on your system board.
Figure 1. System-board connectors
1.
Power-adapter port cable 2. Display cable
3. Pen-garage cable 4. Fan cable
5. Touchscreen cable 6. I/O board cable
7. Speaker cable 8. Touchpad cable
9. Battery cable 10. Keyboard cable
11. Keyboard backlit cable
48 Removing and installing components