12. If metal shields are present in your computer, install the vented metal insert over the FlexBay and the empty space beneath it (see About the Metal
Shields Present in Some Drive Configurations for more information):
a. Insert the metal insert's two upper screws and its two lower screws into the corresponding slots inside the FlexBay.
b. Push the vented metal insert until it clicks into place and its metal tabs rest flush against the chassis surface.
13. Reinstall the drive panel (see Replacing the Drive Panel).
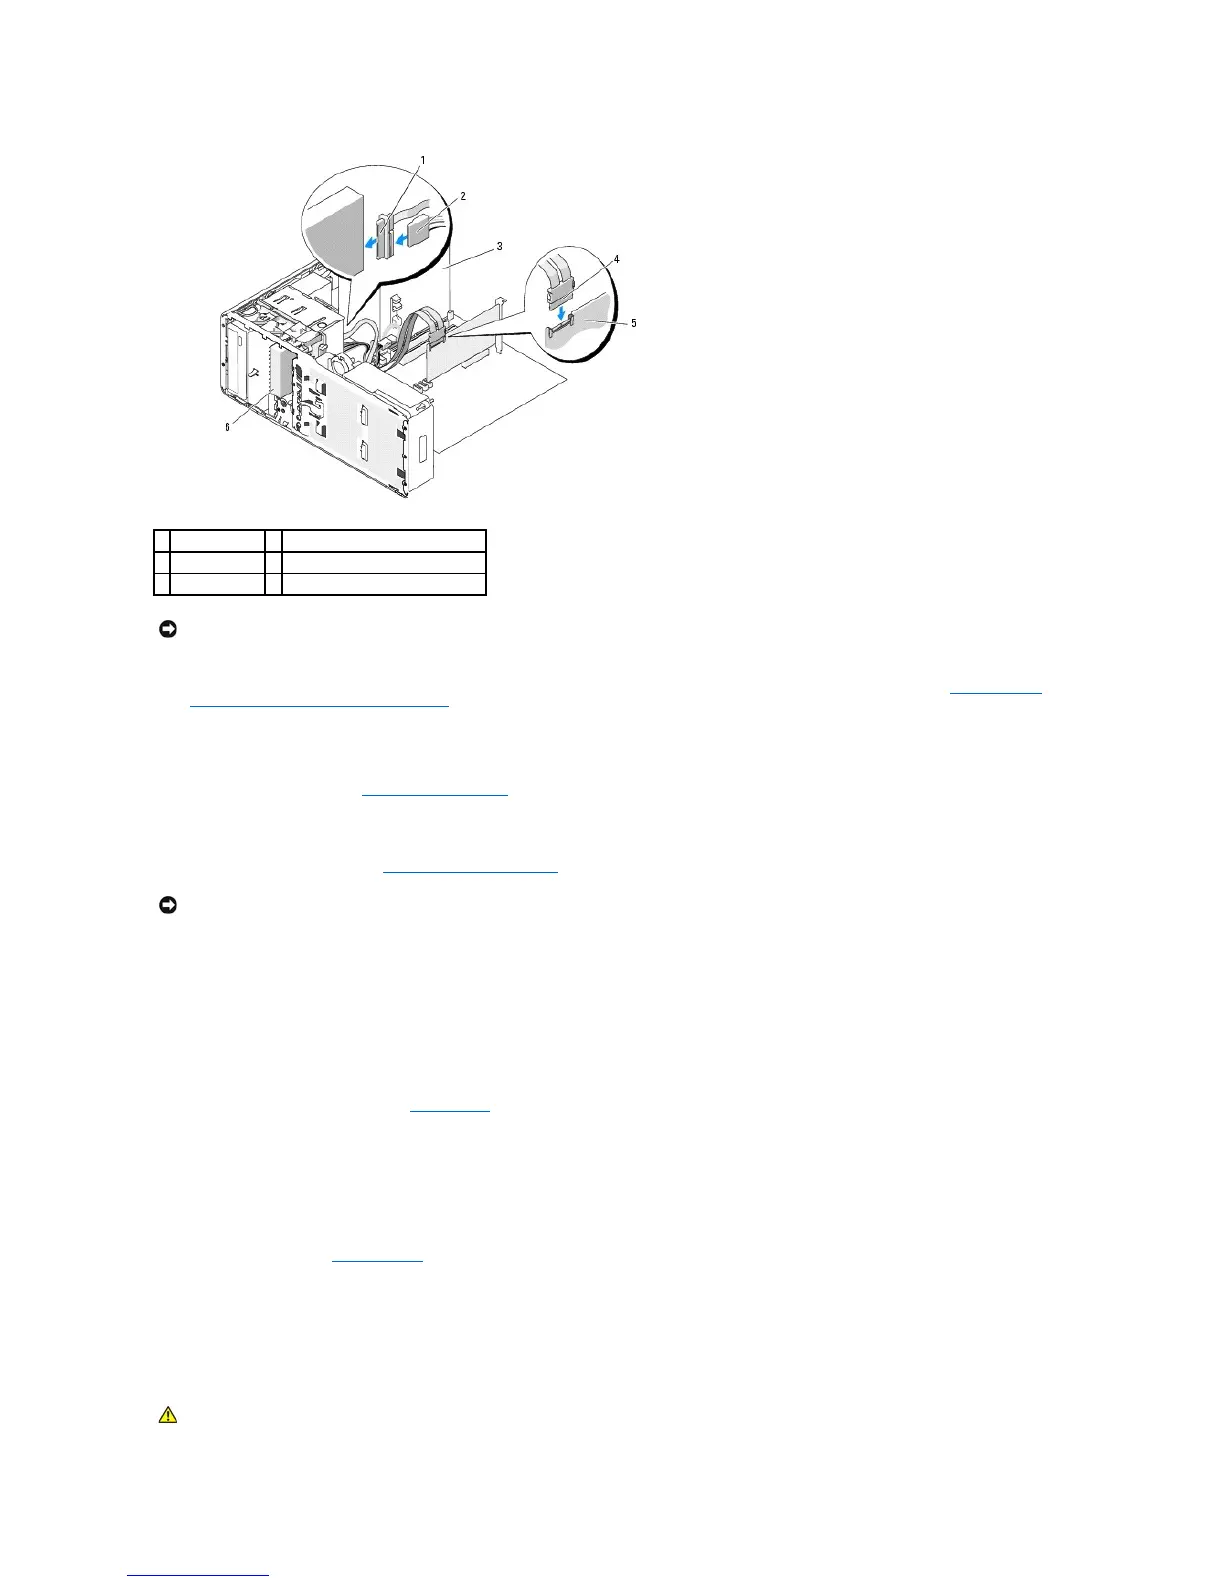
14. Ensure that all connectors are properly cabled and firmly seated.
15. Replace the computer cover (see Replacing the Computer Cover).
16. Connect the computer and devices to electrical outlets, and turn them on.
See the documentation that came with the drive for instructions on installing any software required for drive operation.
17. If the drive you just installed is the primary drive, insert bootable media into drive A.
18. Turn on the computer.
19. Enter the system setup program (see System Setup) and update the appropriate Drive option.
20. Exit the system setup program, and reboot the computer.
21. Partition and logically format your drive before you proceed to the next step.
See the documentation for your operating system for instructions.
22. Test the hard drive. See Dell Diagnostics for instructions.
23. If the drive you just installed is the primary drive, install your operating system on the hard drive.
Removing an Optional SATA Third Hard Drive (Desktop Computer Only)