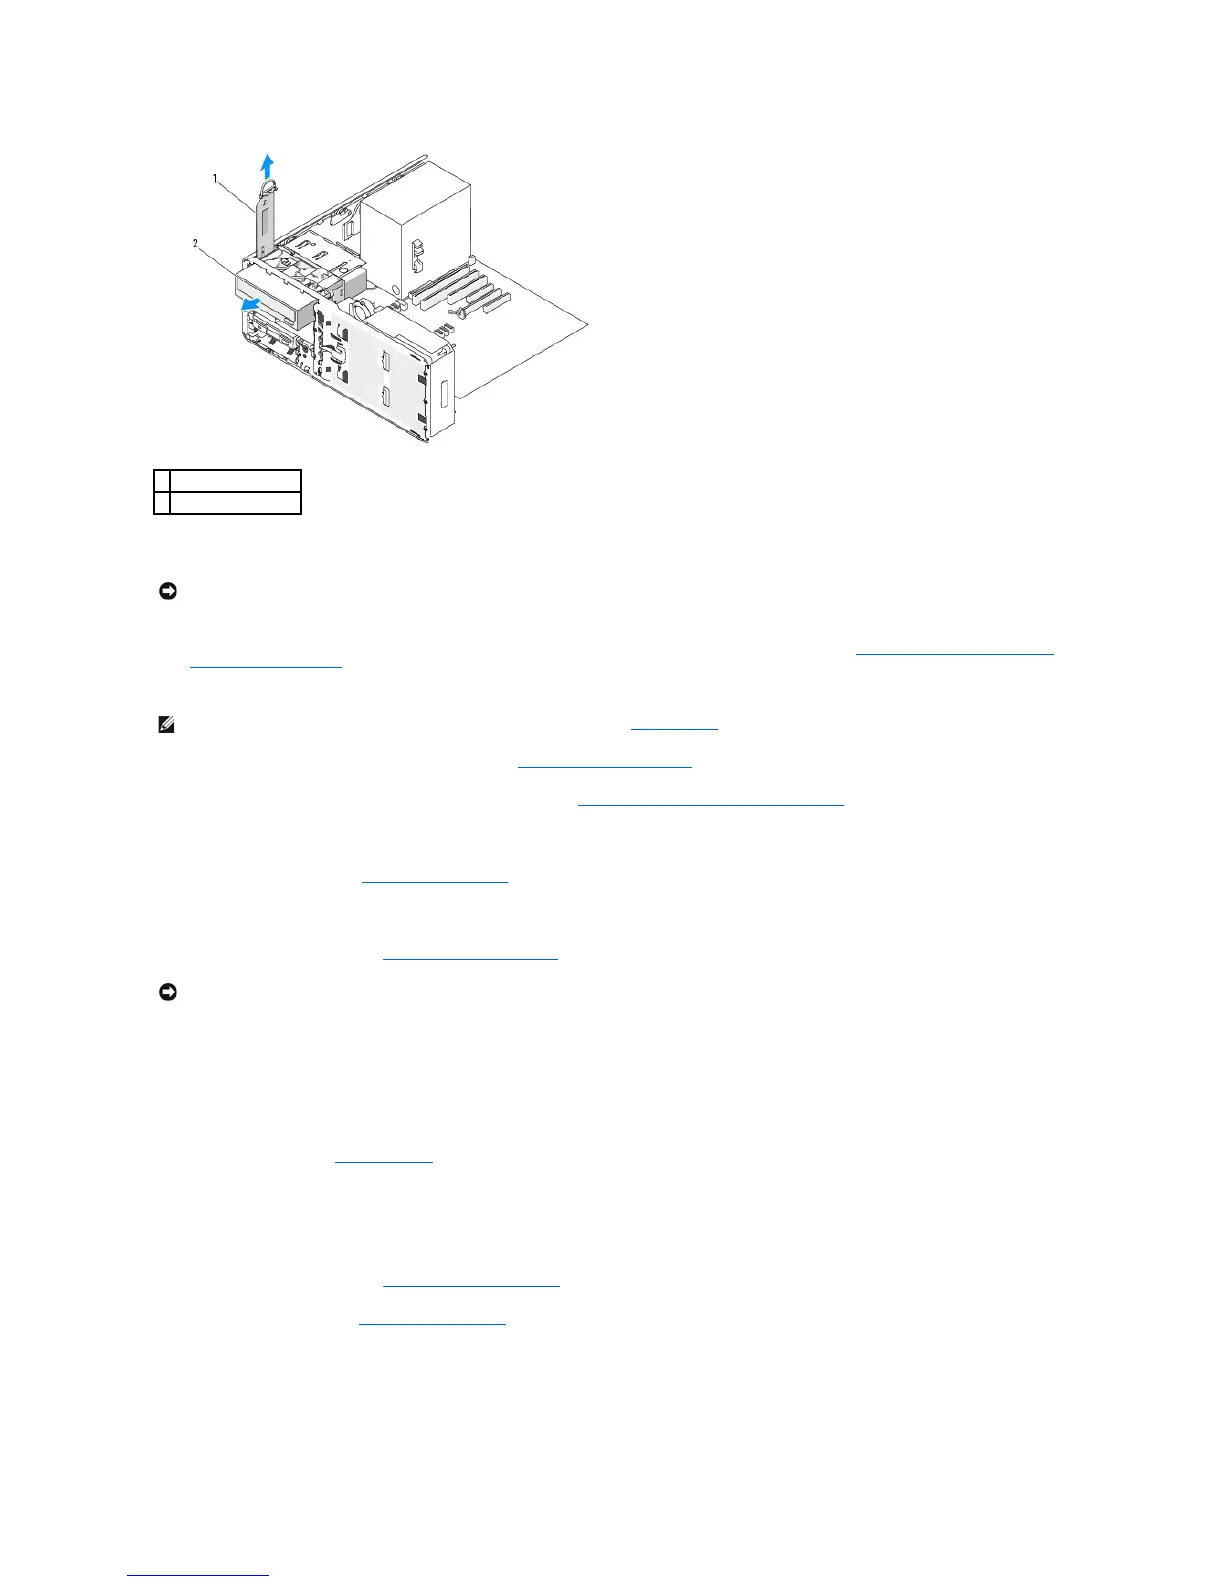
7. Remove the CD/DVD drive from the drive bay.
8. If you are not installing another drive in the CD/DVD drive bay and metal shields are present in your computer (see About the Metal Shields Present in
Some Drive Configurations):
a. Install the 5.25-inch metal shield in its place; align its screws in the metal rails and push the shield back until it clicks into place.
b. Install a drive-panel insert over its drive bay (see Replacing a Drive-Panel Insert).
9. If you are installing another drive in the CD/DVD drive bay, see the Installing a CD/DVD Drive (Desktop Computer).
10. Replace the desktop drive retention insert and fold down its handle.
11. Reinstall the drive panel (see Replacing the Drive Panel).
12. Ensure that all connectors are properly cabled and firmly seated.
13. Replace the computer cover (see Replacing the Computer Cover).
14. Connect the computer and devices to electrical outlets, and turn them on.
Installing a CD/DVD Drive (Desktop Computer)
1. Follow the procedures in Before You Begin.
2. If you are installing a new drive, unpack the drive and prepare it for installation.
Check the documentation that accompanied the drive to verify that the drive is configured for your computer. If you are installing an IDE drive, configure
the drive for the cable select setting.
3. Remove the computer cover (see Removing the Computer Cover).
4. Remove the drive panel (see Removing the Drive Panel).
5. Pull the desktop drive retention insert out by the handle and set it aside in a safe place.