Chapter 4 Configuring the Joint Parameters
58
4.6.4 Configuring Robot Joints
The SMT7 controller is capable of controlling a maximum of eight joints (incl. optional
extended-joints) that can be configured as robot joints or extended-joints.
Up to four joints can be selectively configured as robot joints using the teach pendant
or in WINCAPSIII with the following procedures.
Joints not configured as robot joints are regarded as extended-joints.
Note: Modifying the robot joint configuration initializes the arm group and link
information settings.
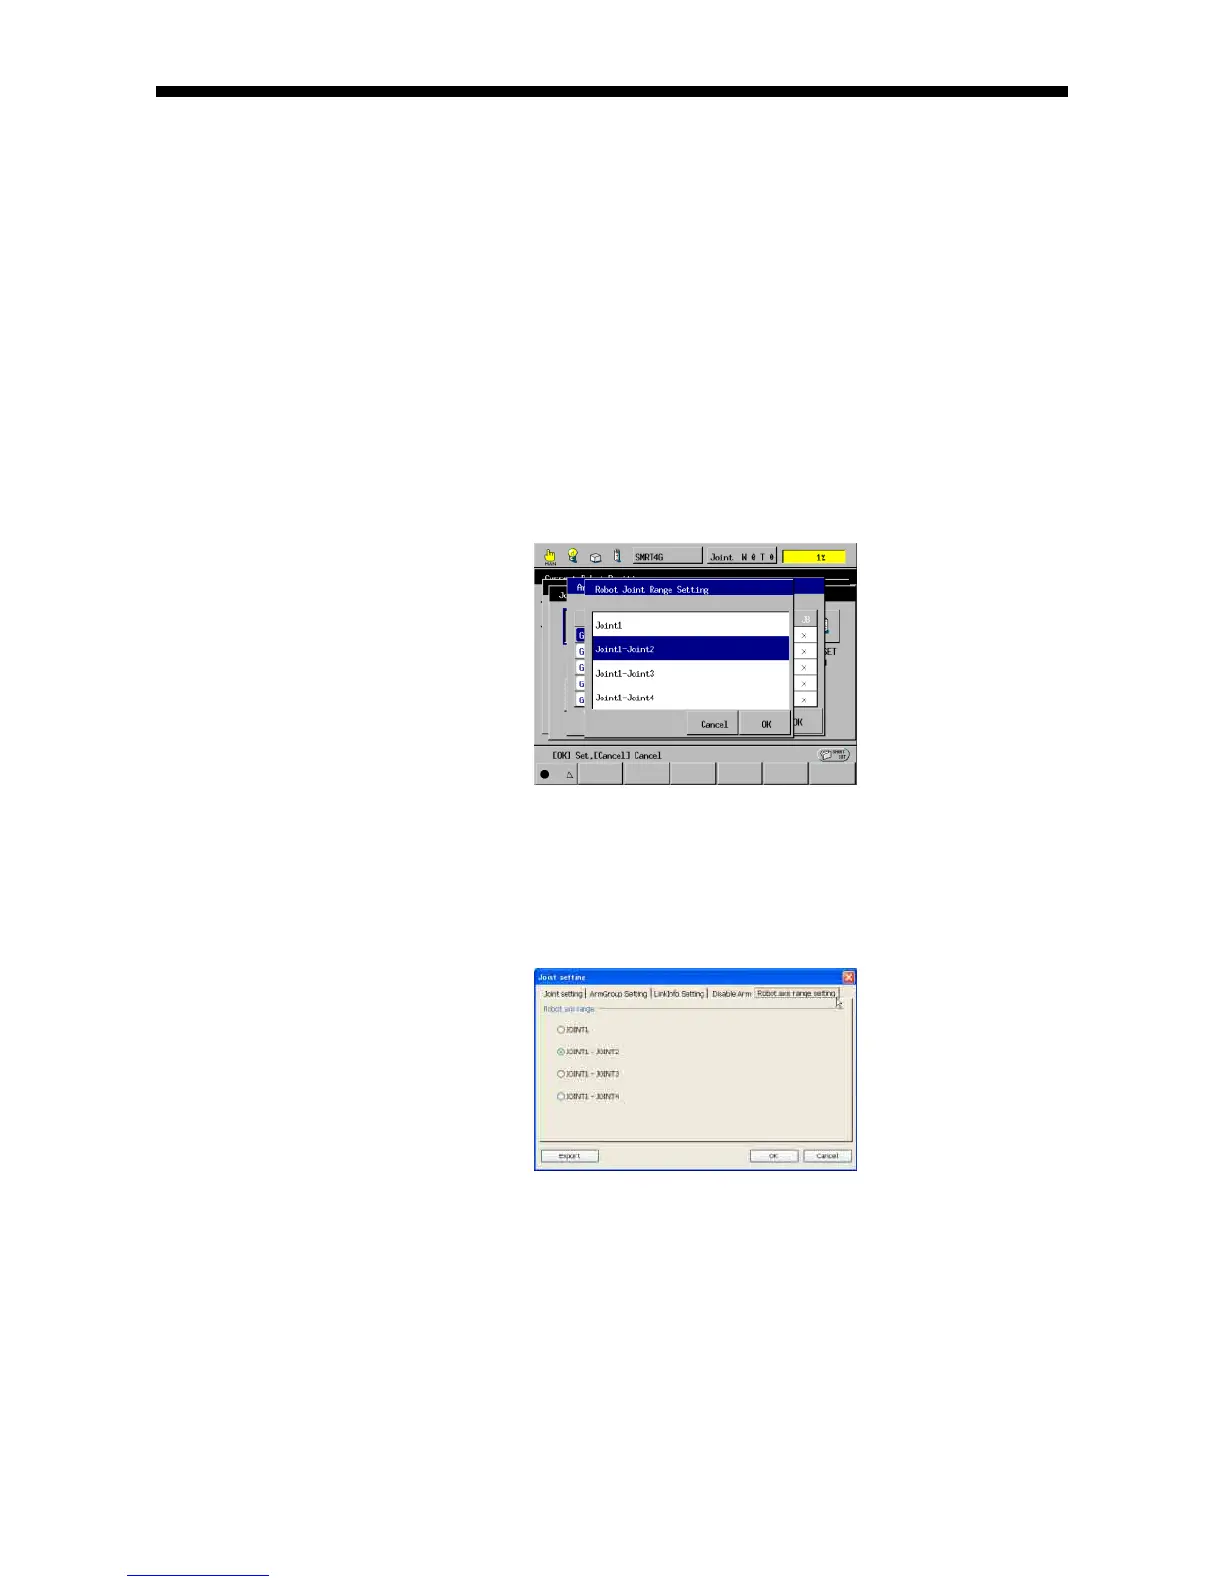
Configuring using the teach pendant
Access: [F2 Arm]--[F12 Maint.]--[F7 Joints]--[F1 ArmGroup]--[F6 RobotJoints]
Select joints to be configured as robot joints and press OK.
Configuring in WINCAPSIII
Access: Project | Joint Setting Table (This displays the Joint setting window.)
Choose the Selecting Robot Joint tab. Select joints to be configured as robot joints
and press OK.
Choose Connect | Transfer data to display the Transfer data window. In the
WINCAPSIII pane, select Parameters | Arm parameters and then press Send to
transfer the data to the robot controller.