Originalbetriebsanleitung Allgemein EN-21
14.1.1 Clipless pedals
Warnings
Seriousfallsandaccidentscausedbyinsucient
bicycle control.
▪ Use clipless pedals only with the designated cleats
and shoes. Using other shoes may cause you to slip
o the pedals.
▪ First practice clicking into the pedal and releasing
the shoe from the pedal while standing.
▪ Read the pedal and shoe manufacturer’s operating
instructions 5. Component guides Page EN-10.
Clipless pedals enable a rm connection between the foot
and pedal. Clipless pedal systems are primarily used in the
racing bike and MTB eld.
14.2 Lights
Warning
Serious accidents caused by lack of lighting.
▪ A failure or malfunction of the lighting device can
lead to serious accidents when riding in the dark.
Have any faults rectied at a specialist workshop
before riding again.
14.2.1 Fitting lighting
Equip your bicycle in accordance with the provisions in the
country in which you want to ride 7. Legal requirements
for use on public roads Page EN-13. If the reectors are
supplied unassembled, you can t these by holding them
from the outside between two spokes and then moving
them inwards until they click onto both spokes.
14.2.2 Bicycles: switching the
lightsonando
Our motorless bicycles are usually tted with a hub
dynamo. These are located on the hub of the front wheel,
and generate electricity while you ride. On certain models,
you can operate the lighting using an on/o switch on the
spotlight. This also switches the rear light on or o at the
same time.
14.2.3 Pedelecs/S-Pedelecs: switching the
lightsonandoand/orcontinuouslighting
requirement
Pedelecs and S-Pedelecs get the
power for their lighting from
the e-system. This is usually
switched on and o using the
display and control element. On
S-Pedelecs, however, the lighting
cannot be switched o. These are
subject to a continuous lighting
requirement. Please also note the
explanations in 4.2 Pedelec/S-
Pedelec: Original operating
instructions – System Page EN-10.
Certain models also come with a button on the handlebars
with which to switch high beam on and o. Even when
motor assistance is no longer possible, a certain amount
of residual current will still be available for the lighting.
You should, however, ensure that you do not suddenly nd
yourself in the dark without a light, e.g., by always having
a spare battery or planning your trip in such a way that the
battery can be recharged on the way.
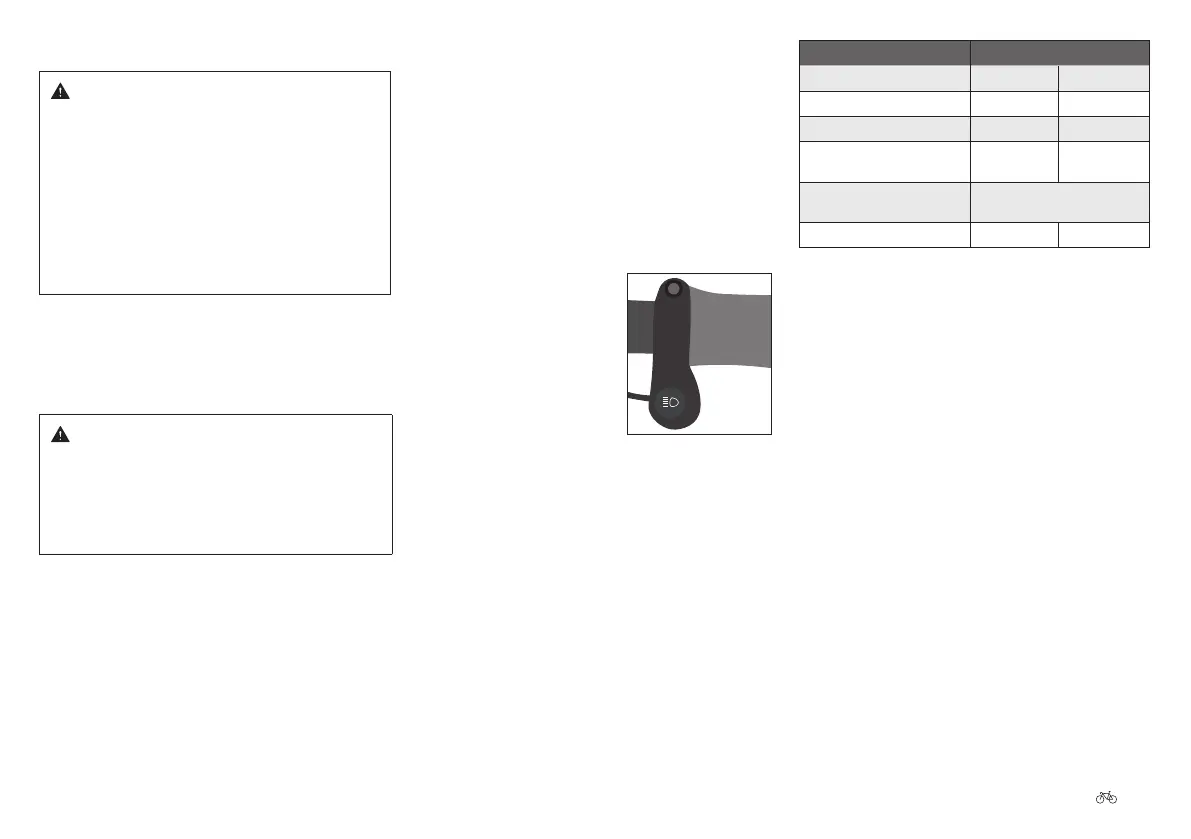
14.3 Replacement bulbs
The replacement bulbs you will need depend on the lighting
device tted on your bike. The table below tells you what
type of light you will need:
Fig. 14 High beam
Lighting type Power supply
Spotlight (bulb) 6 V 2.4 W
Halogen spotlight 6 V 2.4 W
Rear light 6 V 0.6 W
Rear light with parking
light
6 V 0.6 W
Lighting
with LED lamps
LED lamps are not
replaceable
Hub dynamo 6 V 3 W
14.4 Conguringtheindividualsettings
Before riding your bicycle for the rst time, your bicycle
dealer or you should adjust it to your height. To sit
comfortably and safely on the bicycle, you can:
▪ Adjust the height of the seat
17.1 Setting the height of the seat Page EN-24
▪ Adjust the position and angle of the saddle
18. Adjusting the position and angle of the saddle Page
EN-26
▪ Change the position and height of the handlebars
19. Adjusting the handlebars and front stems Page
EN-28
▪ Change the position of the handlebar grips
20. Adjusting the position of the position of the
handlebar grips Page EN-29
▪ Change the position of the brake lever
23.4 Brake lever(s) Page EN-34
▪ Change the position of the gear levers 24.1 Adjusting
the position of the control elements Page EN-37
Once your bicycle has been adjusted to suit you, please use
section 15. Before every trip Page EN-22 to check whether
your bicycle is ready for use.

 Loading...