Originalbetriebsanleitung Allgemein EN-35
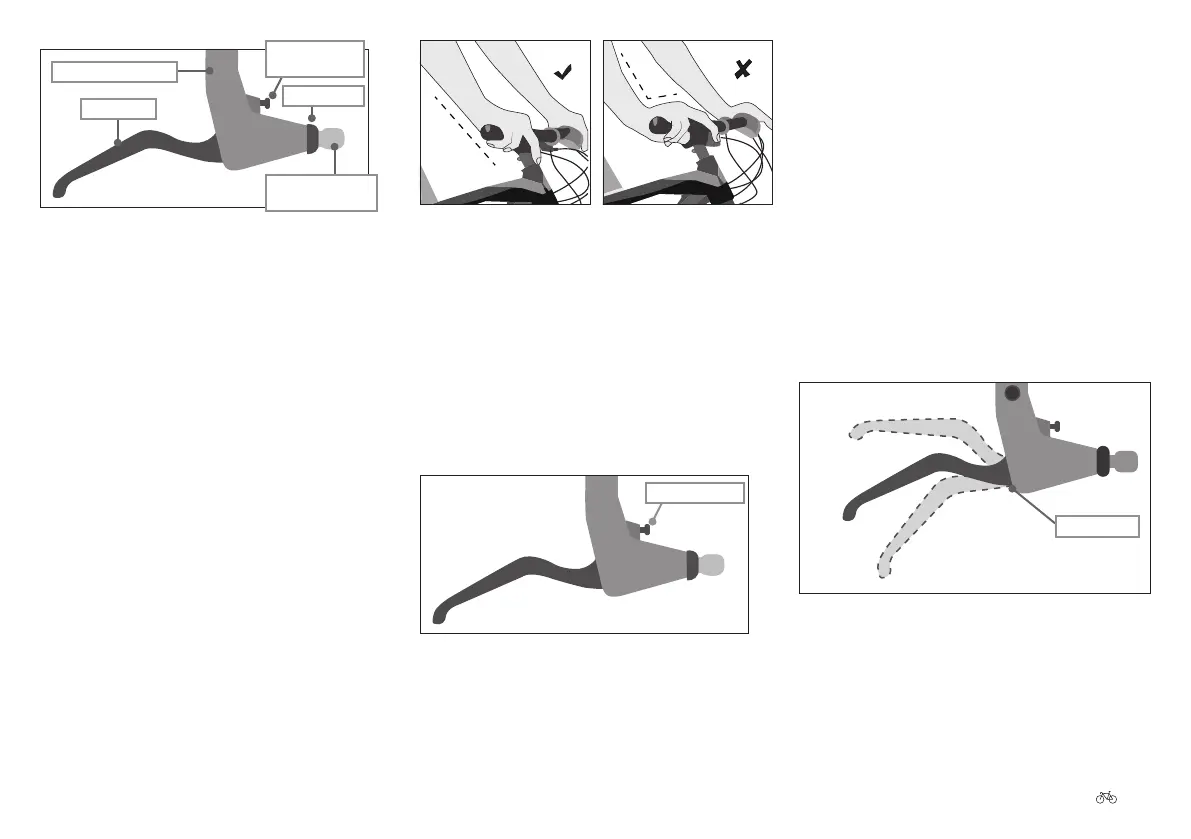
Fig. 46 Brake grip
Fastening screw
Brake lever
Lock nut
Lever width
adjustment screw
Brake cable tension
adjustment screw
A special feature are grips with which you can both brake
as well as change gear (e.g., Dual Control levers from
Shimano 24.3.1.3 Shimano dual control lever Page EN-40).
Ask your specialist workshop to show you exactly how
these brake levers work.
23.4.1 Adjusting the position of the brake
levers
Proceed as follows to adjust the position of the brake levers
on the handlebars:
1. Loosen the fastening screw by turning it one or two
turns counterclockwise.
2. To move the brake grip, move it to the left or right into
the desired position. You may need to move the gear
lever slightly inward 24.3.1.1 Shimano standard
gear lever: version 1 Page EN-39.
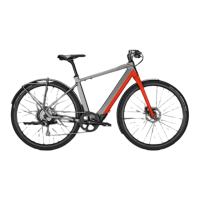
3. To adjust the angle of the brake lever, place one or two
ngers on the brake lever. Now turn the grip downward
until your nger, wrist and forearm are in a line.
4. Then, tighten the fastening screw clockwise to
the specied torque using a torque wrench 13.
Tightening torques for threaded connections Page EN-19.
Fig. 48 Incorrect brake lever
position
Fig. 47 Correct brake lever
position
23.4.2 Adjustingtheleverwidth
On most brake levers, the grip width, i.e. the distance
between the lever and the handlebars, can be adjusted
using an adjustment screw. This screw is usually located on
the inside or outside of the brake grip. The distance from
the lever to the handlebars should be large enough that the
lever can accommodate the rst joint of your nger.
1. To reduce the lever width, turn the adjustment
screw clockwise. To increase the lever with, turn the
adjustment screw counterclockwise.
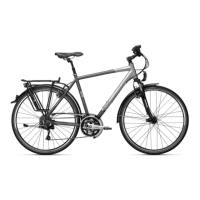
Fig. 49 Lever width adjustment screw
Adjustment screw
23.4.3 Changing the pressure point
The pressure point marks the moment at which the lever
locks when the manual brake is actuated, i.e., when the
brake pads contact the rim (rim brakes) or the brake disc
(disc brakes) and the bicycle brakes. We recommend
setting the pressure point as short as possible, so that you
can use the full braking power before the brake lever rests
on the handlebar grip. Make sure that you are familiar with
the braking eect! The pressure point is too low if you can
pull the brake lever more than half of the lever stroke to the
handlebars before the brakes are applied. We recommend
setting a pressure point at approx. 30% of the lever stroke.
A low pressure point may also be caused by worn brake
pads. Check for wear on the brake pads before adjusting
the brake cable tension for cable brakes 14.5 Practising
braking Page EN-22. To adjust the brake line on hydraulic
rim or disc brakes, get in touch with your specialist
workshop.
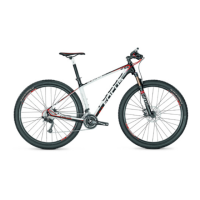
Fig. 50 Recommended pressure point setting
Pressure point
30%
70%