EN-26 Originalbetriebsanleitung Allgemein
18. Adjusting the position and angle of
the saddle
Warnings
Serious falls due to incorrect adjustments.
▪ We recommend leaving all assembly and adjustment
work to a specialist workshop. If you want to screw
something on by yourself, be sure to observe
13. Tightening torques for threaded connections
Page EN-19.
Serious falls due to breaking seat stays.
▪ Never clamp the saddle in the curve of the saddle
rail; always do it in the straight section. Only shift
the saddle within the straight section and within the
marking.
Serious falls because the clamping screws are torn from
the nuts.
▪ Screw the clamping screws fully in a straight
position in the nuts.
A bicycle saddle consists of a rear main seat surface and a
front saddle nose. The saddle is usually secured to the seat
post using one or two clamping screws. You can adjust the
position and angle of the saddle by loosening and tighten-
ing the clamping screw(s).
17.3.1 Suspension adjustment screw
If the suspension adjustment screw protrudes from the seat
post, it is important to correct this:
Suspension
adjustment
screw
Fig. 22
Suspension seat post
The adjustment screw
must not protrude
from the seat post
1. Remove the seat post
17.1 Setting the height of the seat Page EN-24.
2. If the suspension adjustment screw protrudes from the
seat post, this can be corrected by turning it clockwise
using an Allen key.
3. Reinstall the seat post
17.1 Setting the height of the seat Page EN-24.
17.4 Cleaning and care
Dirt often collects on the seat post and the upper area of
the seat tube. Clean both with a slightly damp cloth. You
may need to remove the seat post to do this. If you own a
bicycle with an aluminium frame and aluminium seat post,
you can coat the interior of the seat tube with a thin coat
of suitable grease. Please use an appropriate carbon paste
on carbon or aluminium frames with a carbon or aluminium
seat post. Ask your specialist workshop if you are unsure
what grease or carbon paste to use.
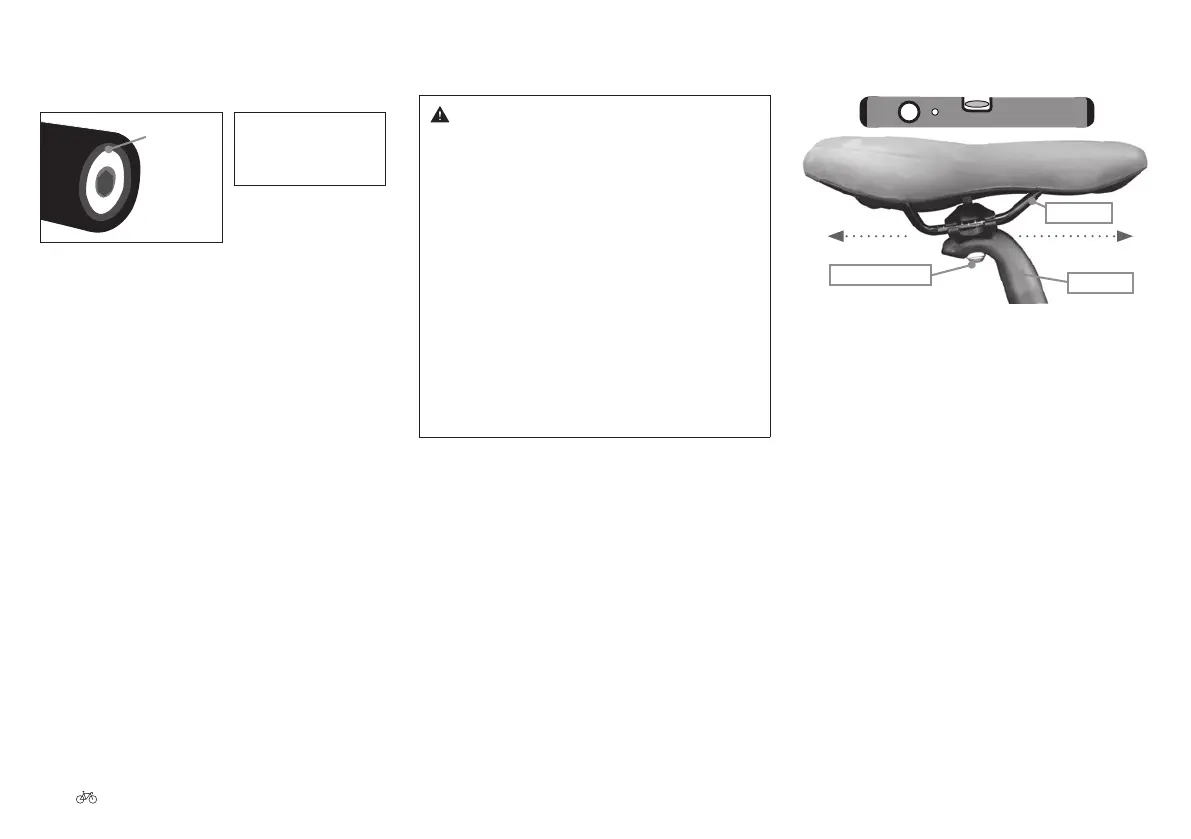
18.1 Single-screw seat post: adjusting the
seating position
Clamping screw
Seat post
Seat stay
Fig. 23 Setting the seating position
1. Movingthesaddle: Loosen the clamping screw by
turning it anticlockwise. Turn the screw completely
two to three times at most or the whole mechanism
could fall apart.
2. Move the saddle horizontally. Stay within the marking
and ensure (e.g., using a spirit level) that the saddle
is horizontal.
3. Tilting the saddle: Most riders prefer a horizontal
saddle. Should you prefer your saddle to be slightly
inclined, skip the horizontal alignment in item 2 and
adjust as required.
4. Secure the clamping screw by tightening it clockwise
to the specied torque using a torque wrench
13. Tightening torques for threaded connections Page
EN-19. Ensure that the clamping screw is straight and
completely screwed into the nut.
5. Ensure that the newly-tightened saddle does not
tip; test it by pressing down on the front and back
alternately. After approximately 50 km, tighten the
saddle clamping screw again 13. Tightening torques
for threaded connections Page EN-19.