UTM-00339 | Rev 19
Page 201 of 253
DetNet South Africa Copyright © 2021
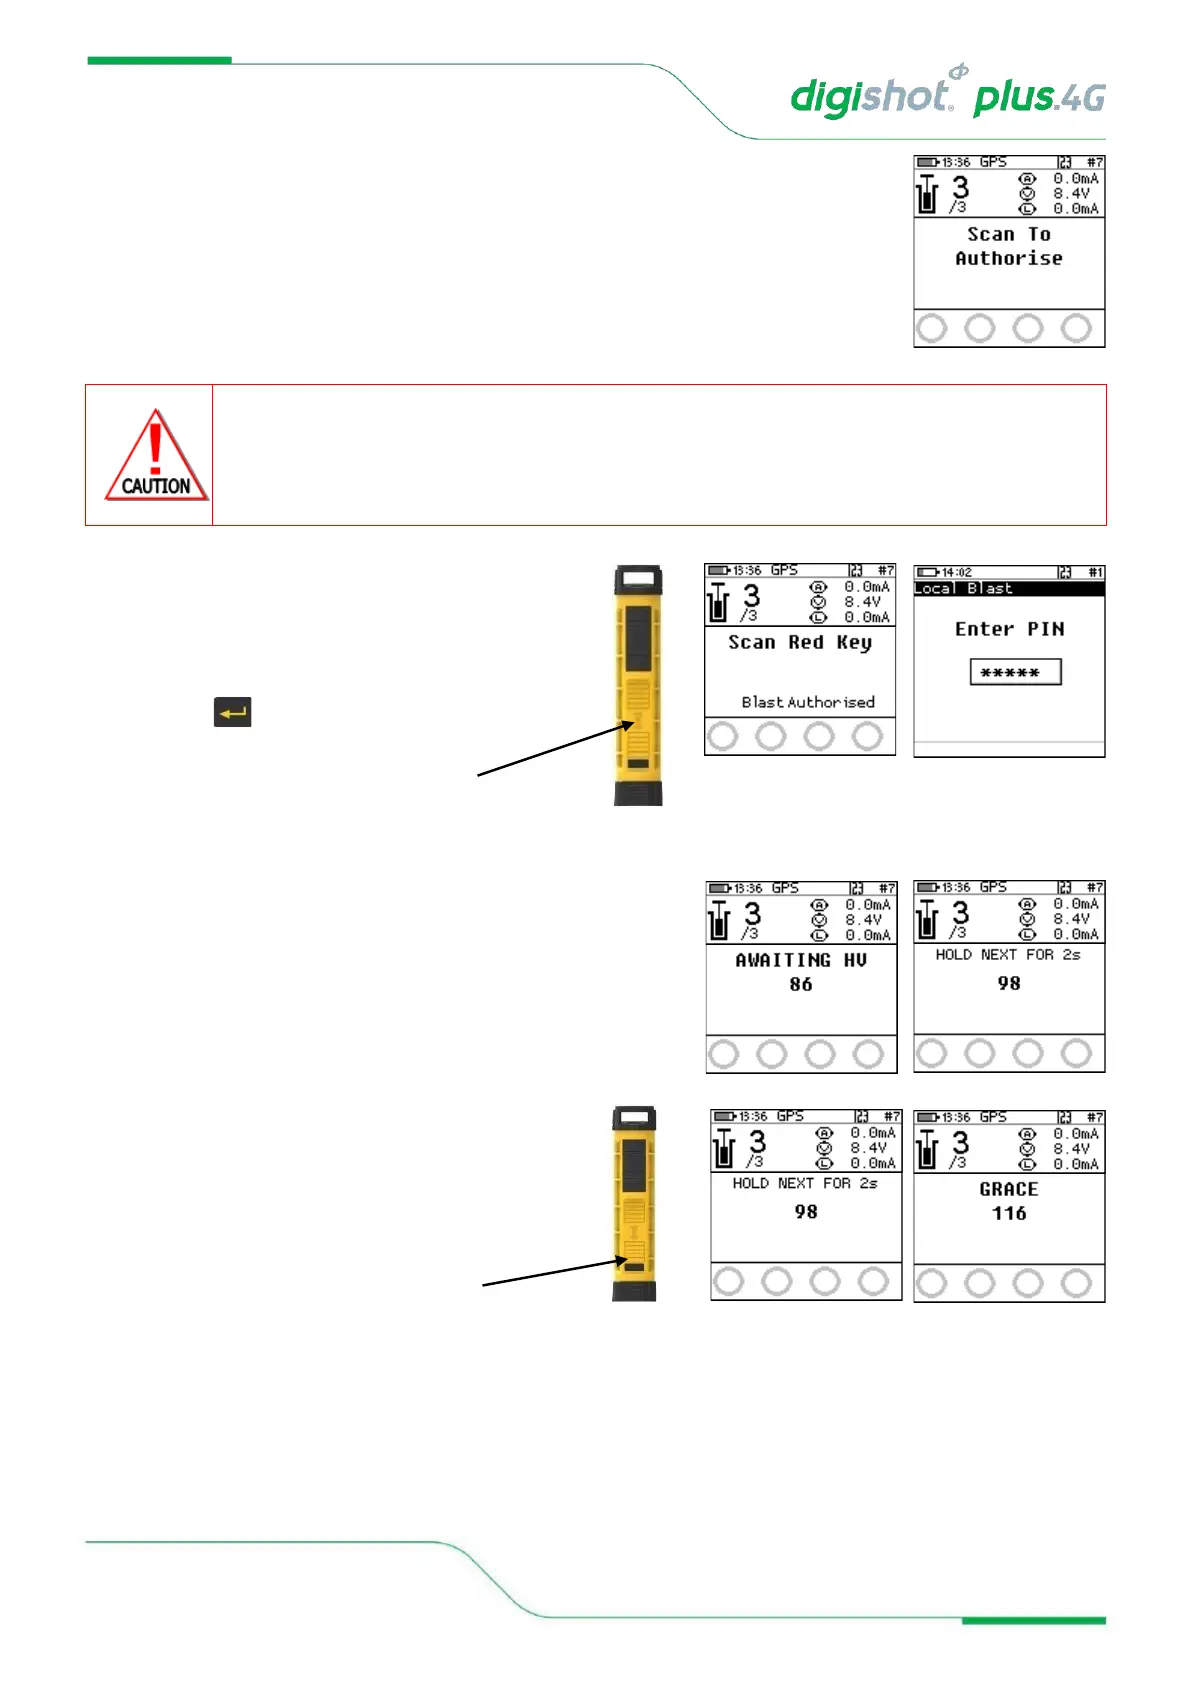
9. Scan to Authorise
• The user will be prompted to scan an Authorise Card programmed with the
authorised token from the 3rd party application to start the blasting process.
• Scan the Authorise Card at the back of the DigiShot
®
Plus 4G Commander.
• Once the Authorised key is scanned and the token is validated, the Commander
will allow the user to scan the Red BlastCard
ARM AND FIRE COMMANDS FOR DETONATORS WILL NOT INITIALLY BE KNOWN TO THE DIGISHOT
®
PLUS 4G
COMMANDER AT POWER ON. THESE COMMANDS ARE ONLY AVAILABLE FROM THE BLASTING (RED)
BLASTCARD AND WILL BE ISSUED TO THE DIGISHOT
®
PLUS 4G COMMANDER WHEN NECESSARY, EITHER
DIRECTLY FROM THE RED BLASTCARD (IN CASE OF A LOCAL BLAST) OR REMOTELY FROM THE BASE. ARM
AND FIRE BLASTING COMMANDS WILL BE ERASED FROM THE COMMANDER MEMORY AFTER USE.
10. Local Blast
• User will be prompted to Scan Key,
• Scan the Red BlastCard at the back of the
DigiShot
®
Plus 4G Commander,
• Enter the associated PIN,
• Press to continue.
• The screen will alternate between displaying awaiting high voltage and
prompting the User to press NEXT for 2 seconds.
• The time displayed indicates the time remaining to press NEXT before it
‘disarms’.
11. Local Blast
• Press and hold the NEXT button on the front of the
DigiShot
®
Plus 4G Commander for 2 seconds.