1592022750 Quick reference guide IC 200CX Rel. 1.1 25/05/2009
Pag. 10/58
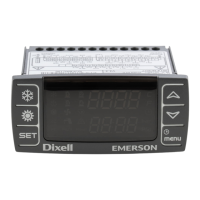
3.3 MEANING / FUNCTIONNING OF THE BOTTOM DISPLAY LED
Led # 1 – 2 (With RTC)
If the bottom display shows the RTC the leds are both blinking.
Led # 1 – 2 In function Menu
During the time counting to the next defrost for one or both circuits the leds are both blinking.
LED during parameters programming
In Pr2 level: led #3 indicates the visibility of the parameter; the led #1 and #2 show if the parameter
can be modified or not.
In Pr3 level: led #3 and #4 indicate the visibility of the parameter; the led #1 and #2 show if the
parameter can be modified or not.
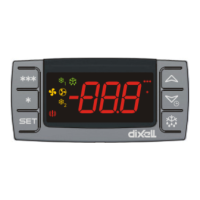
4 DISPLAY LAYOUT
4.1 HOW TO READ THE MEASUREMENT LIST
With the icon Cir1 on, push UP or Down keys to display the labels of the information of the circuit 1.
With the icon Cir2 on, push UP or Down keys to display the labels of the information of the circuit 2.
Each measurement is defined by a label that indicates which if it is a pressure a temperature or a time.
4.2 READ PROBE VALUES OF CIRCUIT 1 OR 2
To swap between the information of the two circuits use the UP and DOWN key to select a label then
push SET, check the led.
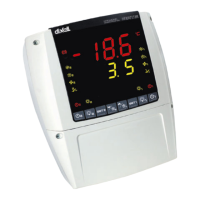
Example in fig.1
Icon Cir1 is on: the top display shows the value of the output evaporator temperature (12.8°C) of the
circuit 1; the bottom display shows Out 1 (outlet temperature evaporator 1). Push SET key to swap to
the circuit 2. Fig2
Icon Cir2 is on: the top display shows the value of the output evaporator temperature (11.7°C) of the
circuit 2, the bottom display shows Out 2.
Fig.1
 Loading...