78
spe.1_72732510
6
5
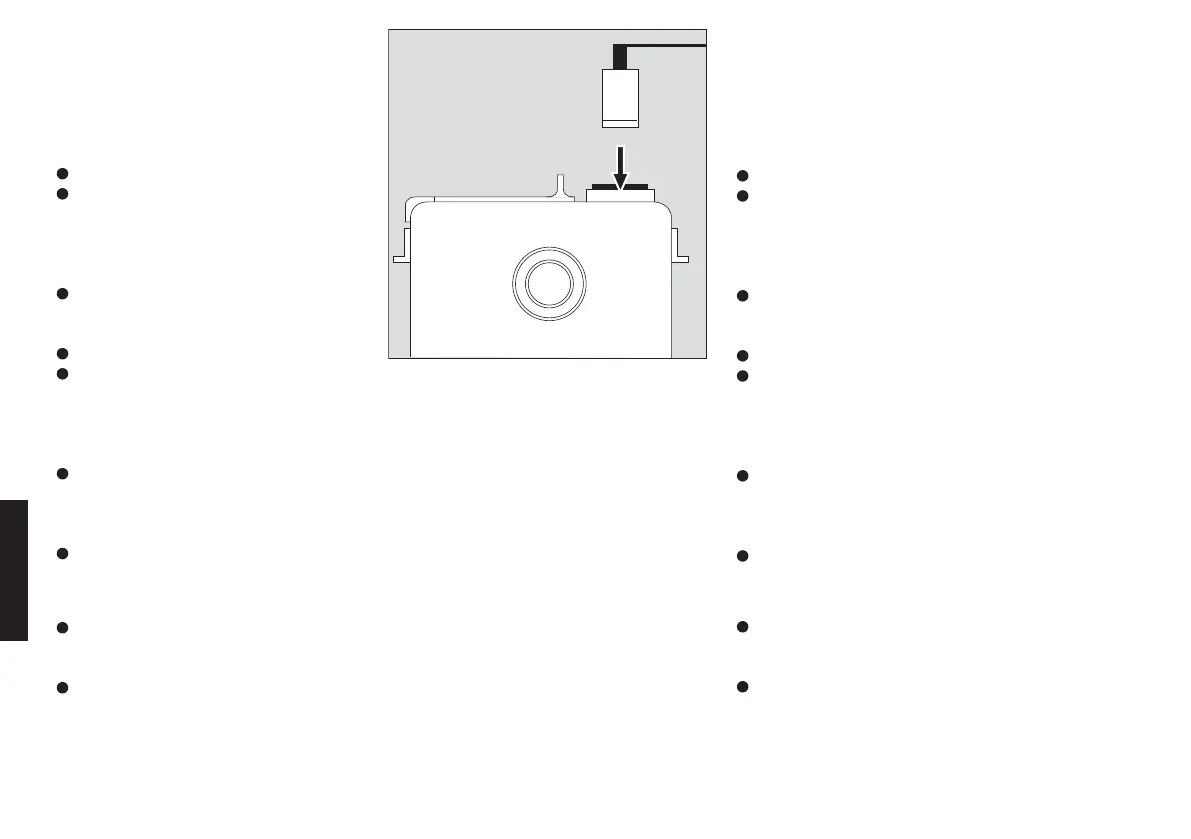
5 Вставьте CAT Ex сенсор в штекерный
соединитель калибровочного адап
тера, следя за правильным положе
нием ключа на штекере сенсора!
6 Вставьте сенсор с соединительной
втулкой в верхний соединитель ка
либровочной камеры.
Включите the X – am 7000.
Следуйте инструкциям по эксплуата
ции калибровочной камеры: помес
тите калибровочную среду в калиб
ровочную камеру и включите калиб
ровочную камеру.
Калибруйте чувствительность сенсо
ра. Время стабилизации показаний
приведено в спецификации сенсора.
Выключите the X – am 7000.
Извлеките CAT Ex сенсор из соедини
теля на калибровочной камеры, из
влеките калибровочный адаптер из
прибора и снова установите сенсор в
X – am 7000.
Установите на место пластину с
мембранным фильтром сенсоров,
следя за правильным положением
прокладки.
Установите и закрепите защитную
крышку блока сенсоров.
Инструмент автоматически учиты
вает возможное изменение чувстви
тельности для некоторых газов.
Для некоторых газов возможно уве
личение чувствительности при изме
рении без мембранного фильтра.
5 Plug the CATEx sensor into the con
nector on the calibration adapter, not
ing the coding of the connector!
6 Insert the sensor with feedthrough into
the upper connector of the calibration
chamber.
Switch on the X – am 7000.
As described in the instructions for use
for the calibration chamber: fill the cali
bration chamber with calibration medi
um and switch on the calibration cham
ber.
Calibrate the sensitivity of the sensor.
See the sensor data sheet for the neces
sary settling time for a steady reading.
Switch off the X – am 7000.
Remove the CATEx sensor from the
connector of the calibration chamber,
remove the calibration adapter from the
instrument and plug the sensor back
into the X – am 7000.
Mount plate with sensor membrane,
taking care that the gasket is correctly
positioned.
Mount and secure the sensor grille.
The instrument automatically includes
the gasspecific sensitivity which may
be changed.
A gasspecific higher sensitivity might
occur in case of measurements without
membrane.
 Loading...