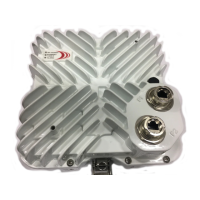
2.0 Aligning the Horizon Compact System
The alignment process is carried out in two stages. The first stage is to visually align the antennas. Once
the antennas have been visually aligned, the second stage is to perform a detailed alignment, which
involves adjusting the fine alignment mechanisms until a maximum received signal is obtained. This
signal should be within ±3 dB of the expected signal level determined during the planning process.
2.1 Visual Alignment of the Horizon Compact Antennas
This section details how to align the Horizon Compact antennas visually.
Procedure 2-1
Align the antennas visually
Before attempting to visually align the Horizon Compact antennas, make sure that the aiming adjustment
mechanisms (pan and tilt) on the mounting system are set to their mid positions. This ensures that there
is adequate to and fro movement available from the adjustment mechanism for fine adjustment later. To
visually align, loosen the clamping nuts and rotate the antenna assembly clamp on the mounting pole,
then, securely tighten the clamp.
There are three methods that are recommended for visually aligning the antennas. In each case the use
of signaling mirrors, on a sunny day, or a powerful flashlight for dull days, may greatly assist in locating
the other end of a link.
1. If the far end antenna site is visible, aim the near end antenna towards the far end site as
accurately as possible. The beamwidth of the signal is approximately 2 degrees (or less), which is
approximately equivalent to a thumb's width when the arm is fully extended. Align as closely to
the centre of the 2-degree beamwidth as possible. Clamp the radio/antenna mounting brackets in
place on the pole/tower torquing the nuts to specification. See
Table 2-1 for torque values.
Repeat this for the far end site. This should provide you with a signal strong enough to perform an
accurate alignment later.
2. If the far end antenna site is NOT visible (due to poor visibility), and the site locations
appear on a map, use a large scale map of the area and mark the positions of each end of the
link. Draw a line on the map between each of the ends of the link. Locate a landmark which falls
on the line that is visible from the near end and point the antenna to the landmark. Clamp the
radio/antenna mounting brackets in place on the pole/tower torquing the nuts to specification. See
Table 2-1 for torque values. At the far end of the link locate a second landmark, visible from the
far end, that falls on the line and align the far end antenna to that landmark. Clamp the mounting
bracket as before. The antennas should be aligned sufficiently to obtain a signal strong enough to
perform an accurate alignment later.
Table 2-1
Torque Specifications for Antennas
Bolt size (in inches) Nut torque
¼ 50 in-lb
5/16 102 in-lb
3/8 15 ft-lb
7/16 24 ft-lb
½ 37 ft-lb
9/16 37 ft-lb