5-31
CH 5/ Start Menu
Monitoring
using start &
end time
(continued)
Action... Result...
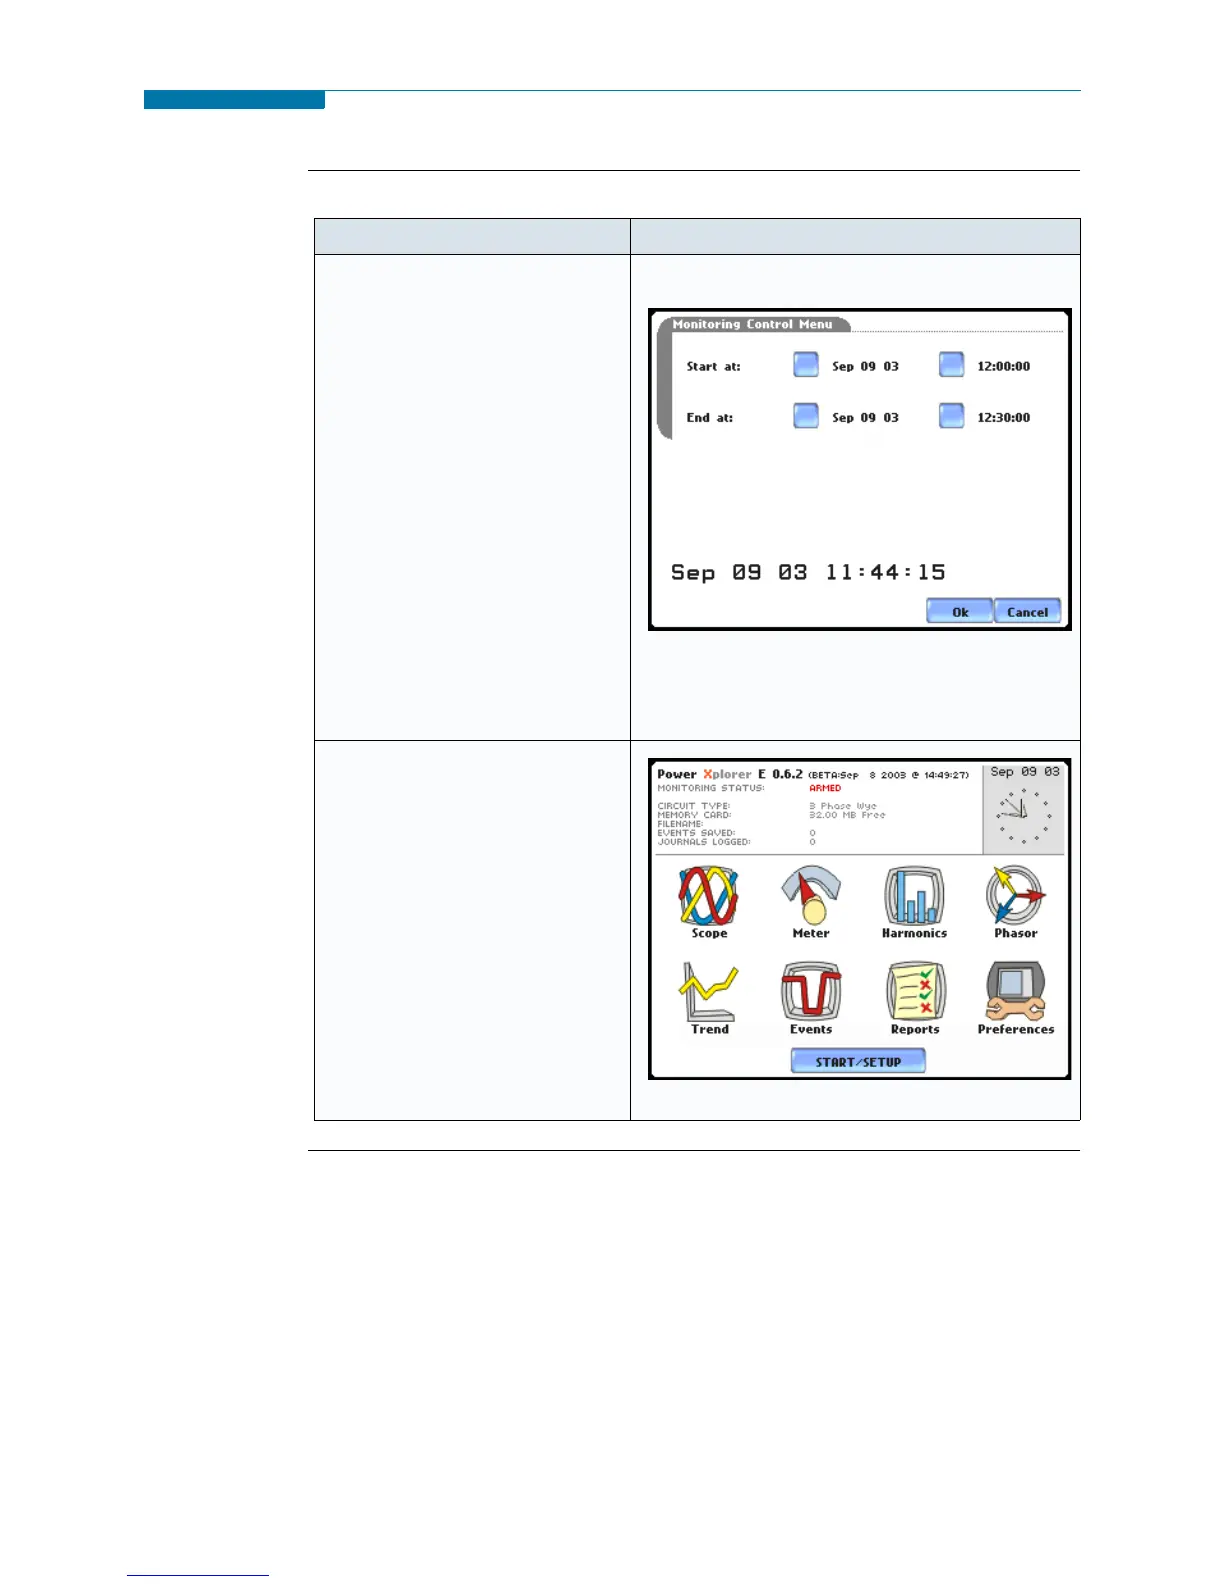
STEP 3: The screen will display
the new settings once the
monitoring Start time/date and
End time/date have been set.
• Press the time and date
function keys when you want to
change time/date monitoring
settings. Refer back to Step 2
on page 5-29.
•Press OK when done setting
the Start and End monitoring
time/date. Proceed to Step 4.
•Press Cancel to discard the
changes in time/date
monitoring settings and return
to Monitoring Menu.
MARK131b
STEP 4: After specifying the Start
and End time/date of monitoring,
the message MONITORING
STATUS: ARMED appears on
screen.
Armed means that the system
will automatically begin
monitoring at the specified Start
time and date.
Once monitoring status is ON,
follow the Start/Stop monitoring
procedure found on page 5-26.
MARK132
www.GlobalTestSupply.com
Find Quality Products Online at: sales@GlobalTestSupply.com
 Loading...