9-5
CH 9/ Downloading Events
Connection
setup via
Ethernet
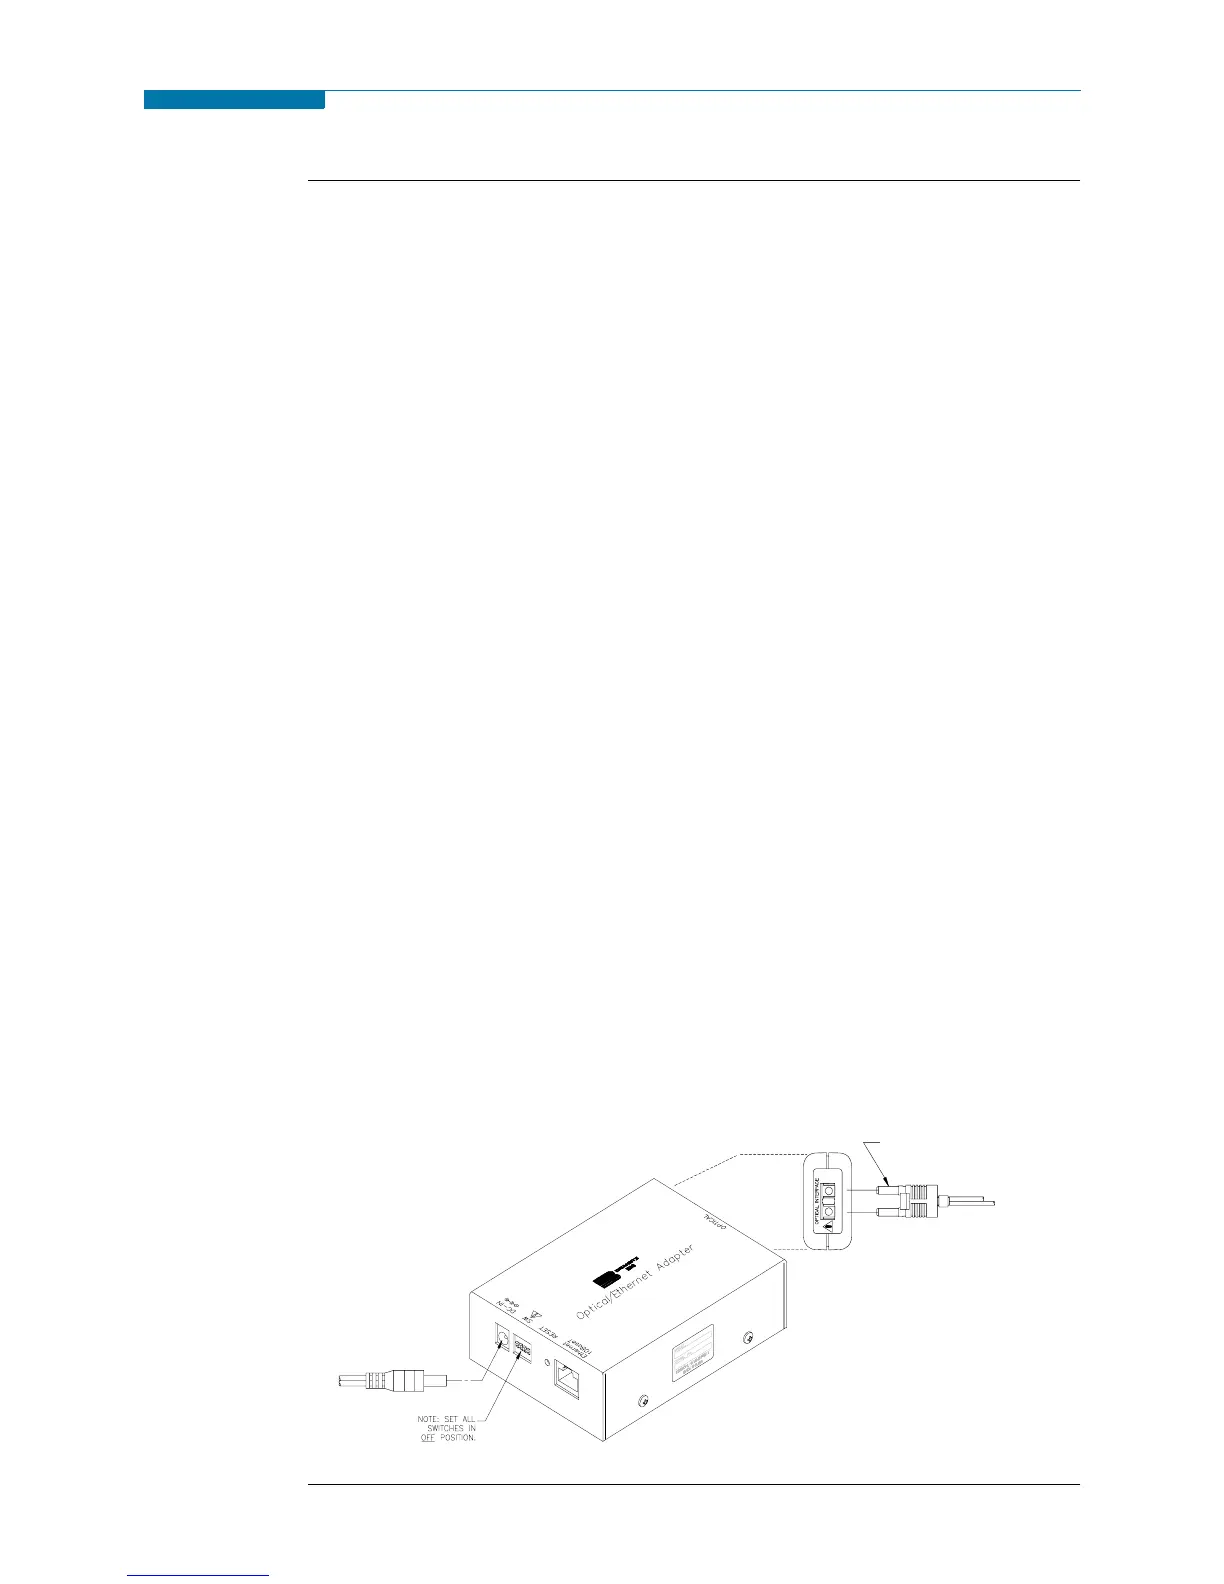
The following procedure and diagram describe how to connect the PX5 to a computer
via Ethernet. Once the physical connection is done, see Chapter 4 Instrument Settings -
Communications on page 4-10 for instructions on how to enable the PX5 settings to
communicate with external devices.
1. Connect one end of the fiber optic cable (P/N 900406) into the Fiber Optic Serial
Data Port located on the left side panel of the PX5.
2. Connect the other end of the fiber optic cable into the Fiber Optic Port on the metal
housing of the Ethernet Communication Module (P/N COMM-OEA).
3. The COMM-OEA requires connection to an external power source. Connect the DC
plug from the AC adapter supplied (P/N 11707-G1) to the 12V, 3W max input jack on
the Ethernet adapter. Configure the AC power plug of the battery charger by sliding the
proper plug supplied (US, EURO, UK or Australia) and locking it into place. Plug the
AC power plug of the battery charger to the proper source 120V AC for US type plug
or 230V AC for Euro, UK or Australia type plug.
NOTE: For battery backup operation, replace the AC adapter with the optional
accessory Battery Charger/UPS (P/N XBC-PX5) available from Dranetz-BMI.
4. Set the IP configuration of the Ethernet Communication Module. Consult your IT
Department for the appropriate setting of your local area network. See Chapter 4
Instrument Settings - Communications on page 4-10 for the procedure on how enter IP
settings in the PX5.
5. Connect the Ethernet port on the Ethernet Communication Module to the local area
network to which your computer is connected to.
6. Install the software contained in the compact disc that came with your Ethernet
Communication Module. This will install the “Real COM Installer Program” plus some
utility programs from MOXA Technology, Inc.
®
for the Ethernet Communication
Module on your computer.
7. Run the Real COM Installer. Map and activate a COM port to the first available
COM port on your computer.
8. Refer to the NodeLink
®
User’s Guide (P/N UG-NODELINK) for instructions on
how to set up a NodeLink site.
DC POWER INPUT
FIBER OPTIC CABLE
TO PX5
OPTICAL
PORT
www.GlobalTestSupply.com
Find Quality Products Online at: sales@GlobalTestSupply.com
 Loading...