Drobo 8D User Guide 94
Note:
For added protection we recommend to enable Dual Disk Redundancy feature. Atleast 3
drives should be inserted to the device before enabling redundancy feature.
The Drobo uses largest drive in the disk pack to maintain data redundancy. Since Drobo
uses largest size drive for redundancy, you will need to add a large drive in order to see more
usable capacity. For more information, see: Capacity Calculator.
4. The drive ejects from the drive bay. Carefully remove it.
Note:
The drive light turns a solid red, indicating that you need to add a drive or replace the
current drive with a larger drive. It may stay red for up to 15 minutes after you replace the
drive.
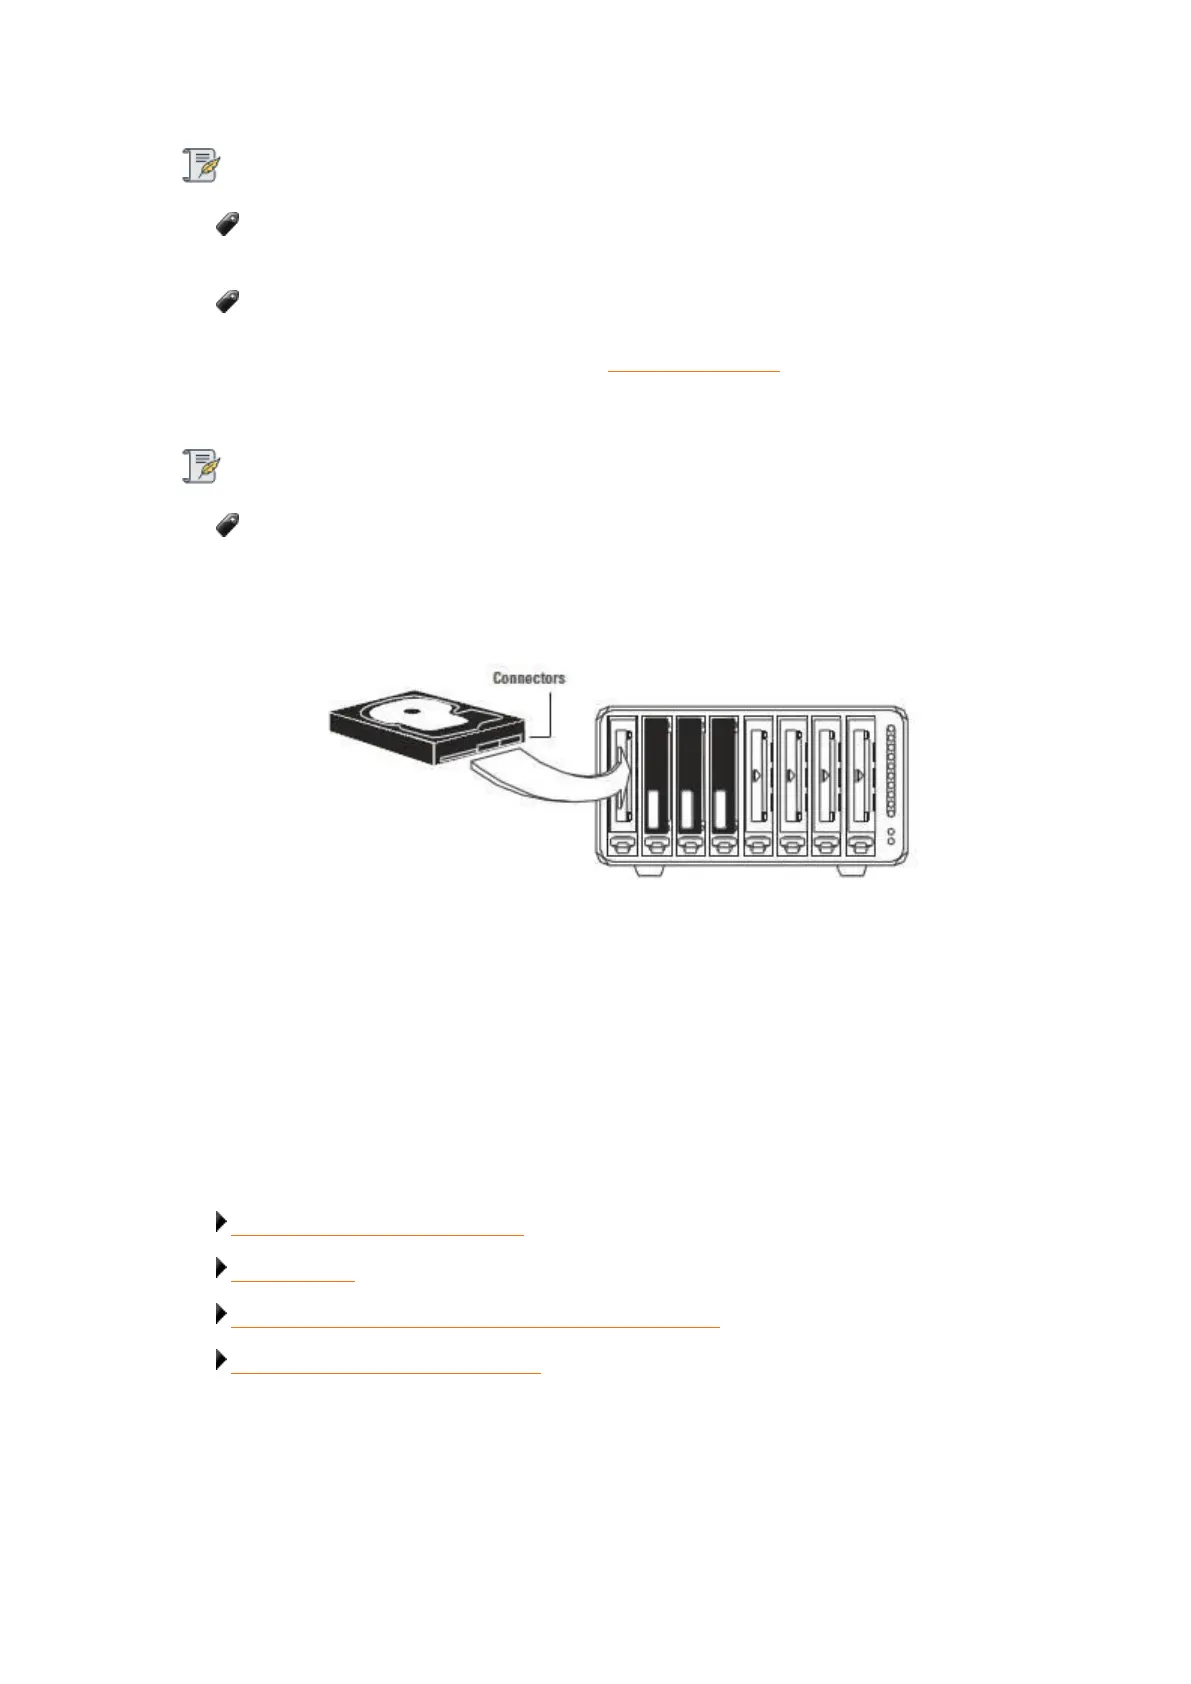
5. Insert drives with the top labels facing the power and capacity lights. Refer to the image below.
6. With your other hand, use your thumb to depress and hold open the drive lock to an empty drive
bay.
7. Slide the drive into the data bay, release the drive lock and push the drive into place until you
feel it connect. The drive lock will snap behind the drive, securing it into place.
8. Add or replace additional drives in the same manner, following steps 3 through 6.
9. When finished, replace the bezel (faceplate) right side up, so that you will be able to see the
indicator lights whenever the Drobo device is turned on.
Related topics:
Managing Capacity (Drive Space)
Adding Drives
Checking Storage Usage and Device Status Information
Understanding the Indicator Lights