2
About the RTM (Rotary Tool Module)
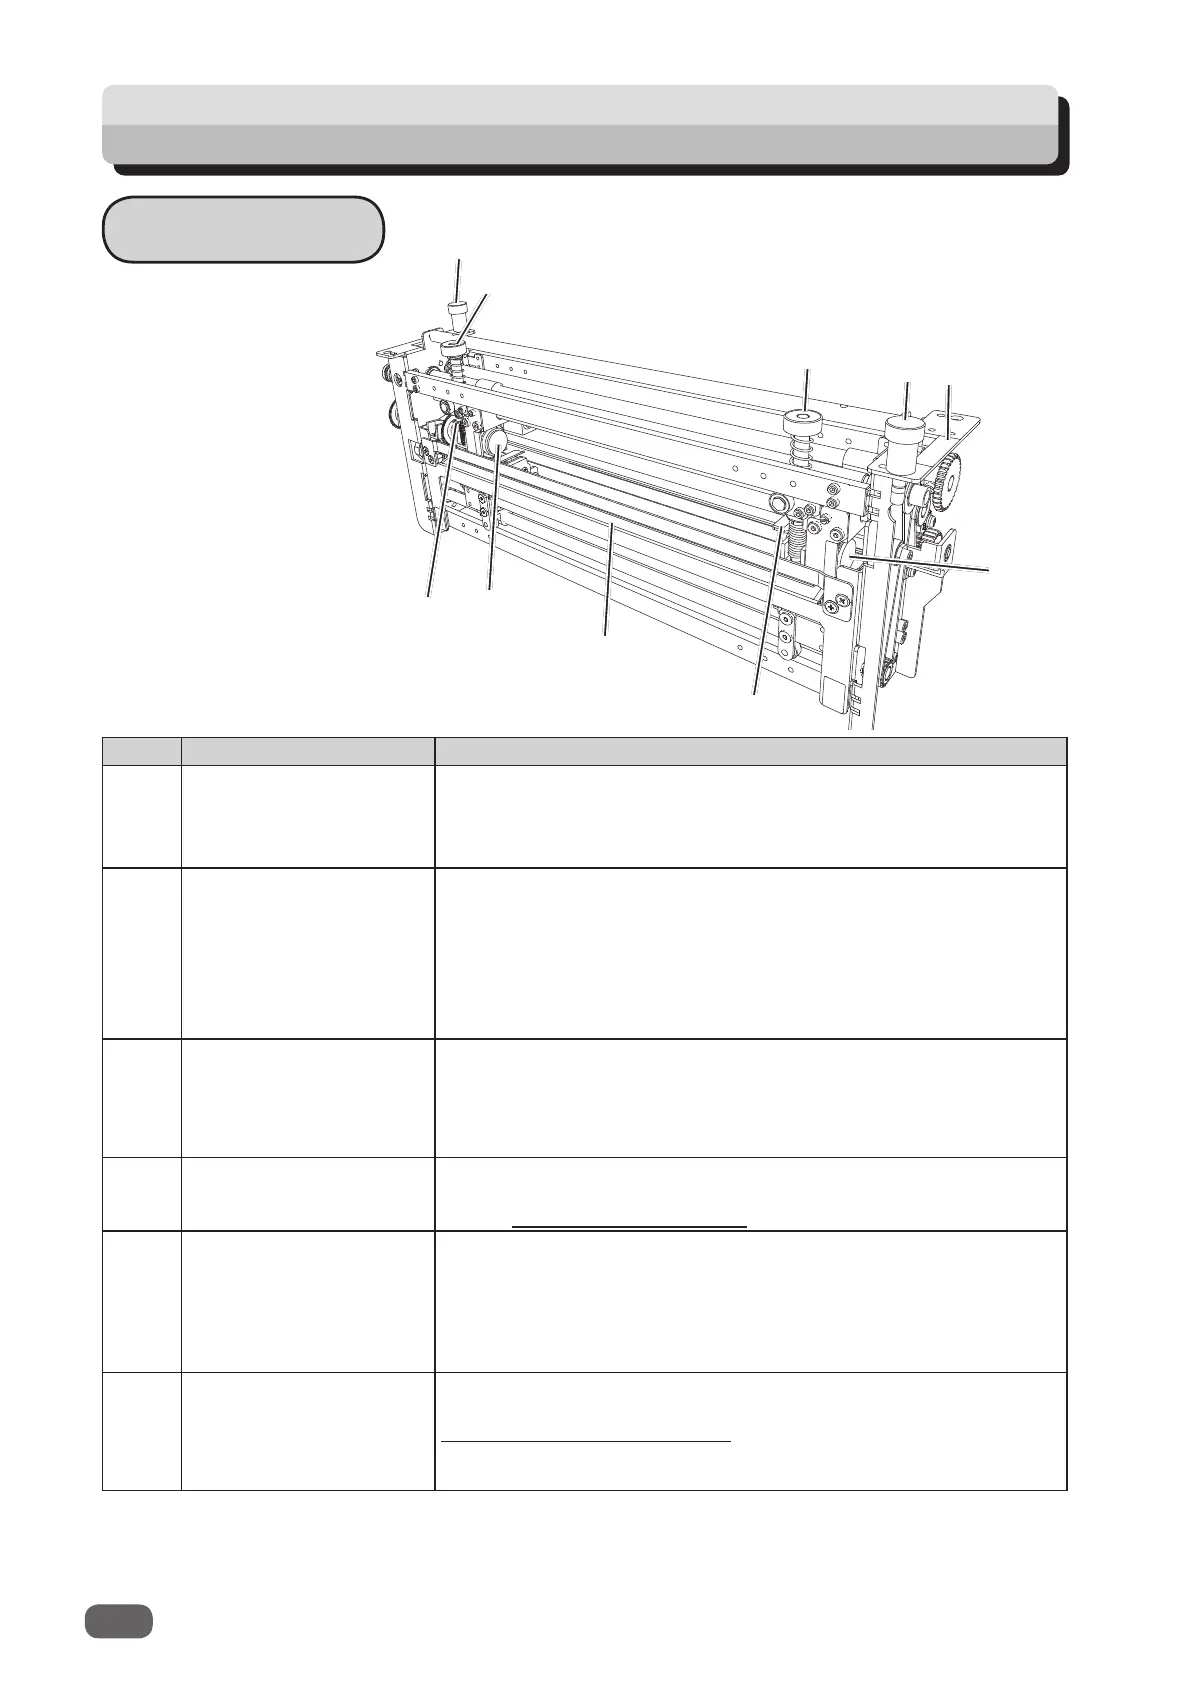
Appearance
No. Name Function
1 Fixing screw Tighten this when installing the
RTM (Rotary Tool Module)
in
the DC-618.
Loosen this when removing the
RTM (Rotary Tool Module)
from the DC-618.
2 Adjustment knob Adjusts the depth of the
rotary tool
.
Turning this clockwise makes the depth
deeper
and turning
this
counterclockwise makes the depth
shallower
.
Turn this to adjust
the depth of the
rotary tool
depending on
the types of it attached to the
rotary too unit
. When replacing
the
rotary tool
, turn this counterclockwise until it stops to raise
the
rotary tool
to the upper limit position. (→P.10)
3 Color label Install the
RTM (Rotary Tool Module)
in a slot of the DC-618,
to which the
color label
affi xed is the same as this on the
RTM
(Rotary Tool Module)
.
Install the
RTM (Rotary Tool Module)
in slot 2 to slot 3 in order
from the document feed side.
4 Guide assy
Supports the conveyance of a document.
When replacing the
tool
, remove the
guide assy
.
(→ P.7 Removing a Rotary Tool)
5 Hand knob When removing the
rotary tool
from the
rotary tool unit
,
remove this. (→P.7) When attaching the
rotary tool
to the
rotary tool unit
, secure it with this. (→P.9)
There are two
rotary tool units
in total attached to the
RTM
(Rotary Tool Module)
: one is on the right and the other one is
on the left.
6 Lever
When removing the
rotary tool
from the
rotary tool unit
or
when attaching it to the
rotary tool unit
, raise this. (→ P.7
How to Replace a Rotary Tool)
There are two
levers
in total attached to the
RTM (Rotary Tool
Module)
: one is on the right and the other one is on the left.
6
1
4
5
5
6
2
1
2
3