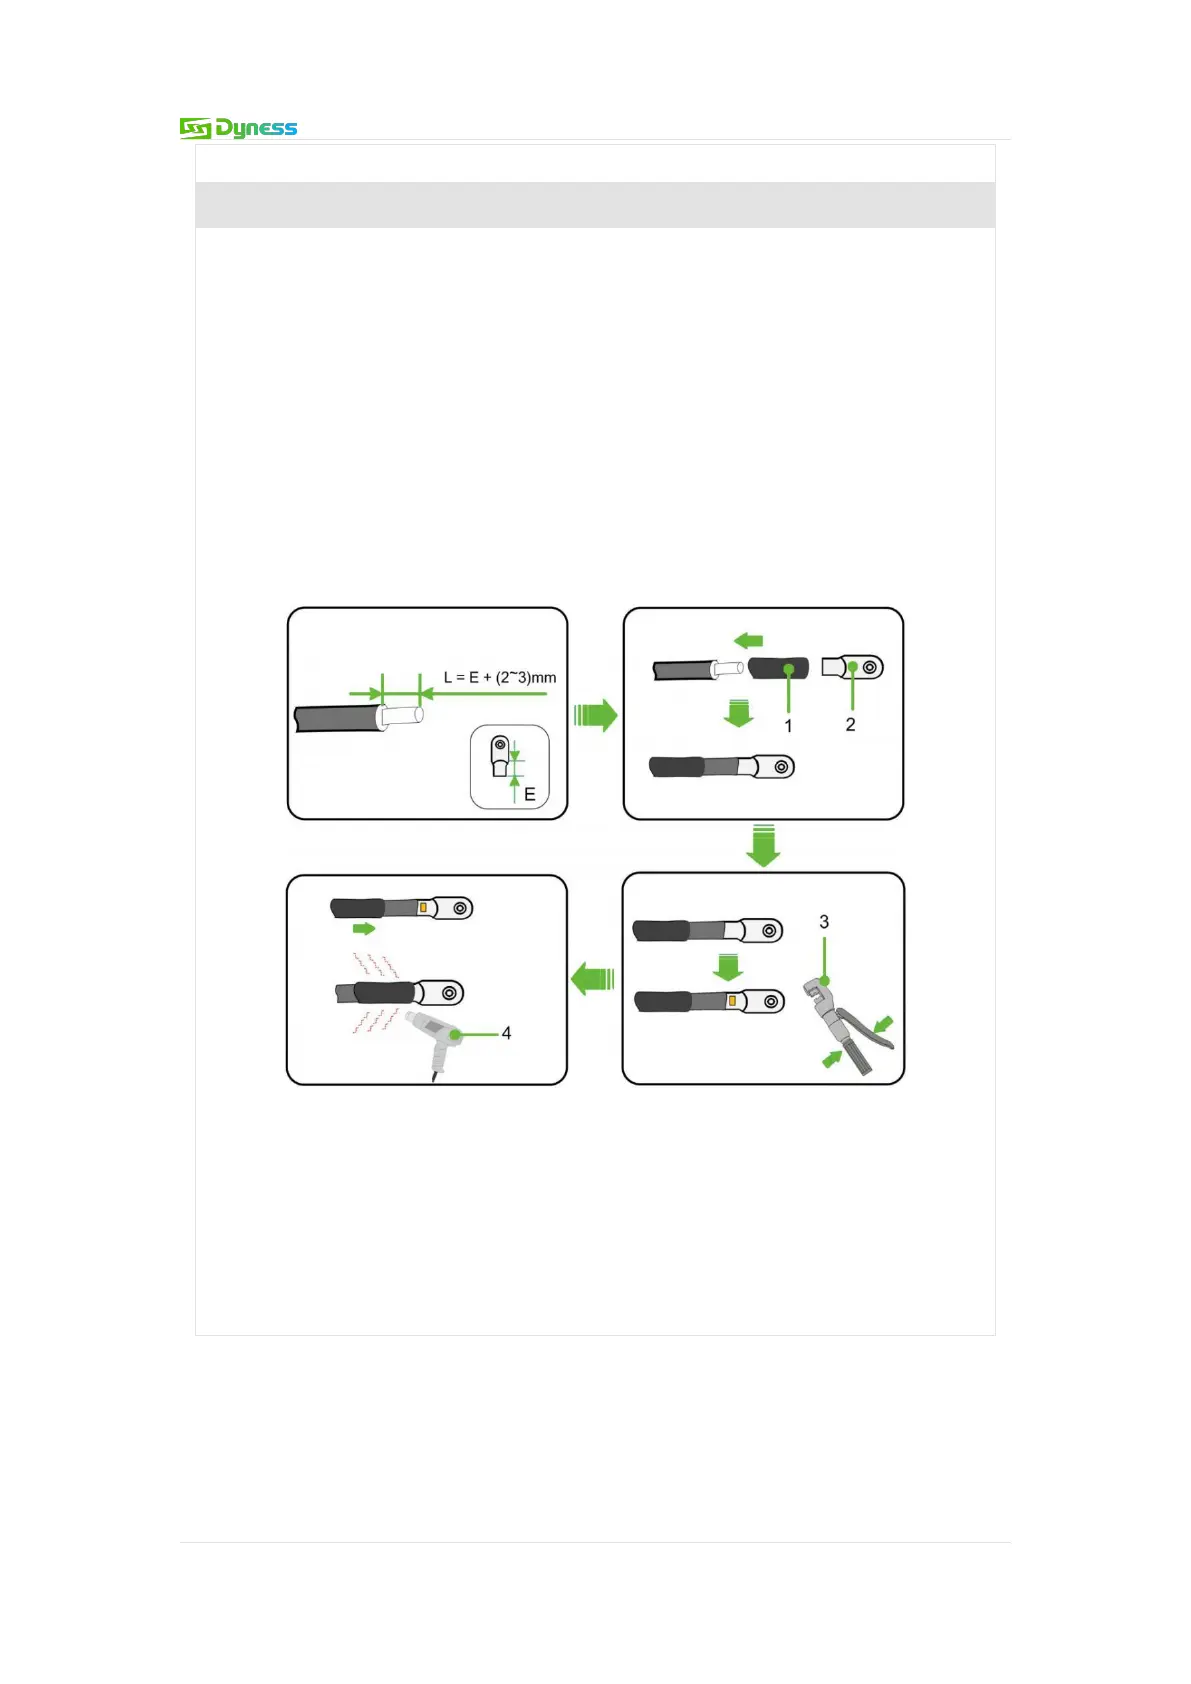
If copper cable is selected, the connection sequence of wiring components is shown
as follows:
Trip off the insulation skin from the cable terminal, and the length of which
should be the depth of the wire hole on the copper terminal, plus an additional
2-3mm.
Install the heat-shrink sleeve at the cable terminal and insert the exposed copper
core part of the stripped wire into the wire hole of the copper terminal (OT/DT
terminal).
Use hydraulic pliers to firmly crimp the copper terminally.
Slide the heat-shrink tube onto the copper terminal (OT/DT terminal) to fully
cover the wire hole. Use a heat gun to tighten the heat-shrink tube.
Figure 5-12 The connection sequence of wiring components
1:Heat-shrink tube
2:OT/DT terminal
3:Crimping Pliers
4:Hot air gun