11
HIGH PRESSURE BLOWER INSTALLATION
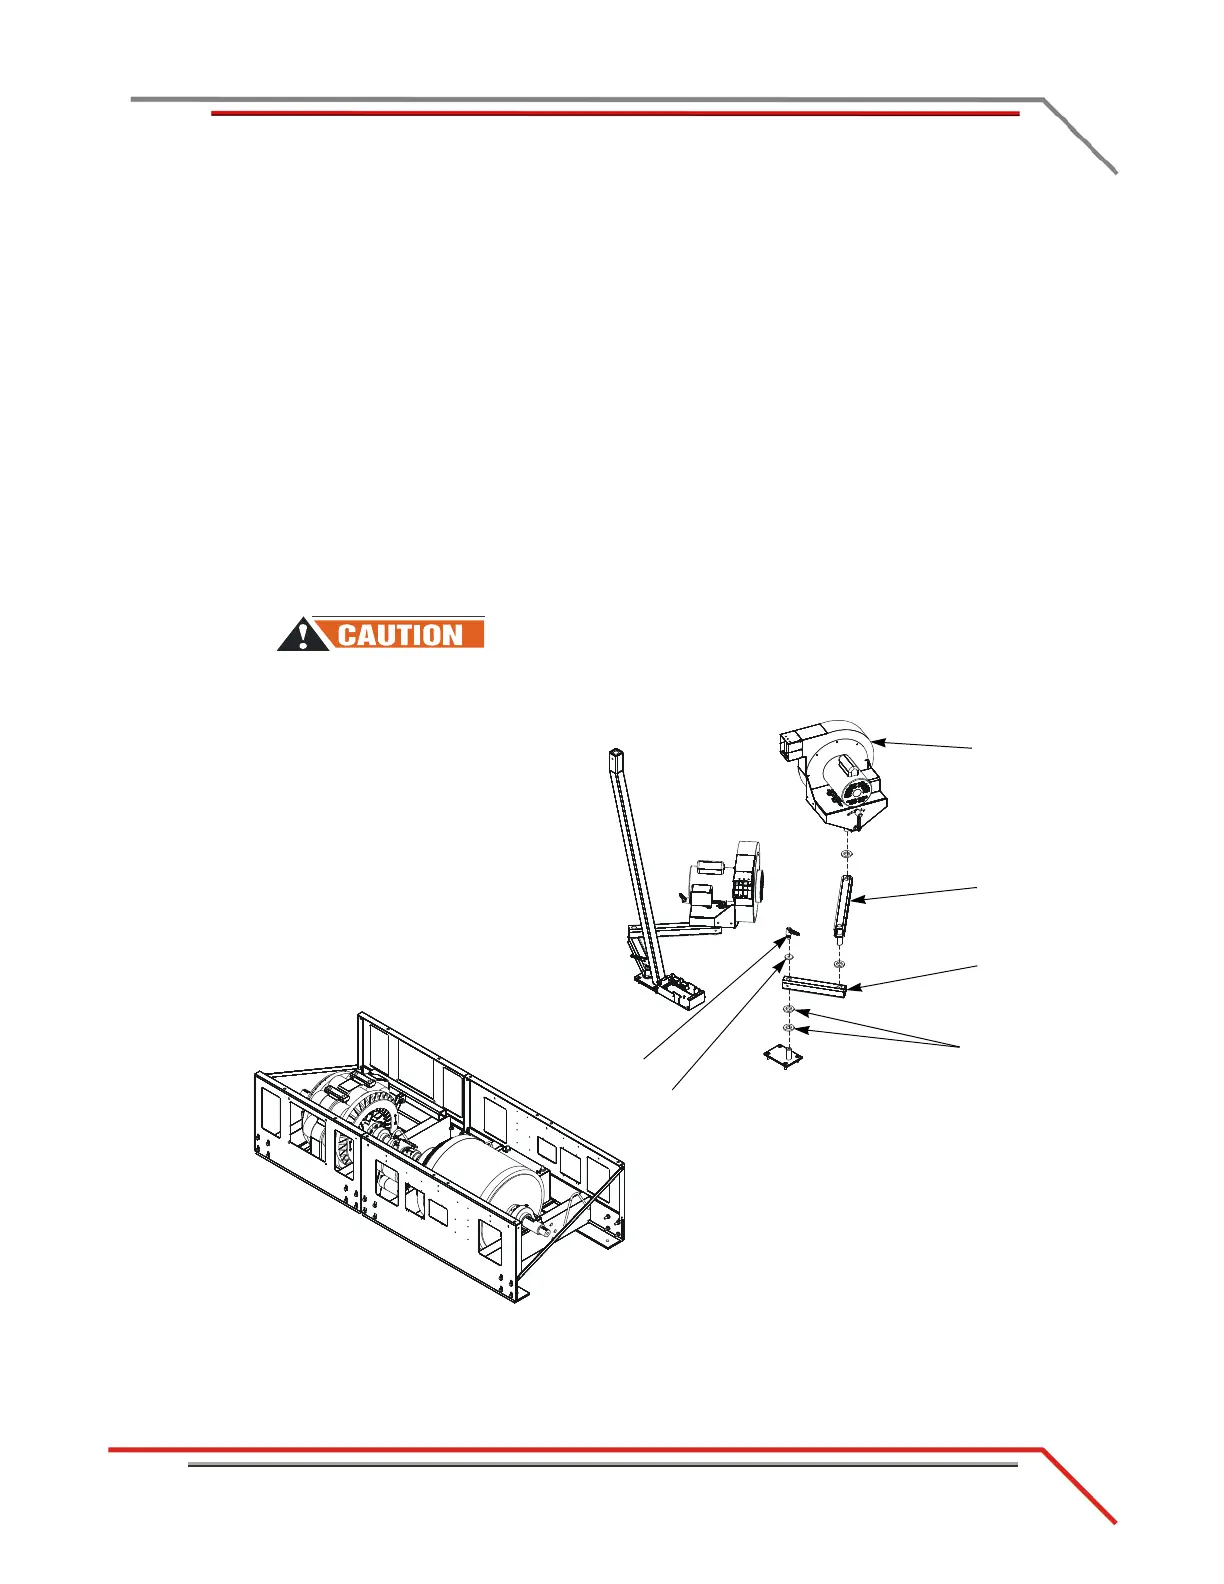
Model 200i/250i In Ground Blower Installation
Version 4 High Pressure Blower Installation Guide
INSTALLING THE BLOWER ASSEMBLIES
Use the following instructions to install both the left and right blower assemblies.
Note: Tire carriage not shown for clarity.
1 Place two 1/4-inch thick poly washers around the pin on the blower mount.
Note: Use only one 1/4-inch thick poly washer around the pin on the left blower
mount.
2 Place the lower blower arm over the blower mount pin.
3 Place a 3/8-inch thick metal washer on top of the lower blower arm.
4 Secure the lower blower arm using the clamp lever.
5 Place a 1/8-inch thick poly washer around the pin on the upper blower arm.
6 Insert the pin on the upper arm into the lower arm.
7 Place a 1/8-inch thick poly washer around the pin on the blower assembly.
8 Insert the pin on the blower assembly into the upper arm.
The blowers can run at any time once the cord is plugged into a power
source.
Figure 6: Install the Blower Assemblies—In Ground
right blower
assembly
aluminum washer
1/4-inch thick
poly washer
lower blower
arm
clamp lever
upper blower
arm