B-5
MODEL 200IX/250IX BLOWER INSTALLATION
Model 200iX/250iX In Ground Blower Installation
Version 4 High Pressure Blower Installation Guide
MODEL 200IX/250IX IN GROUND BLOWER INSTALLATION
The high pressure blower supplies air to cool the bike’s engine. This section will walk
you through the blower installation procedures. For complete dyno installation
instructions, refer to the In Ground Model 200iPX/250iPX Motorcycle Dynamometer
Installation Guide
P/N 98200074.
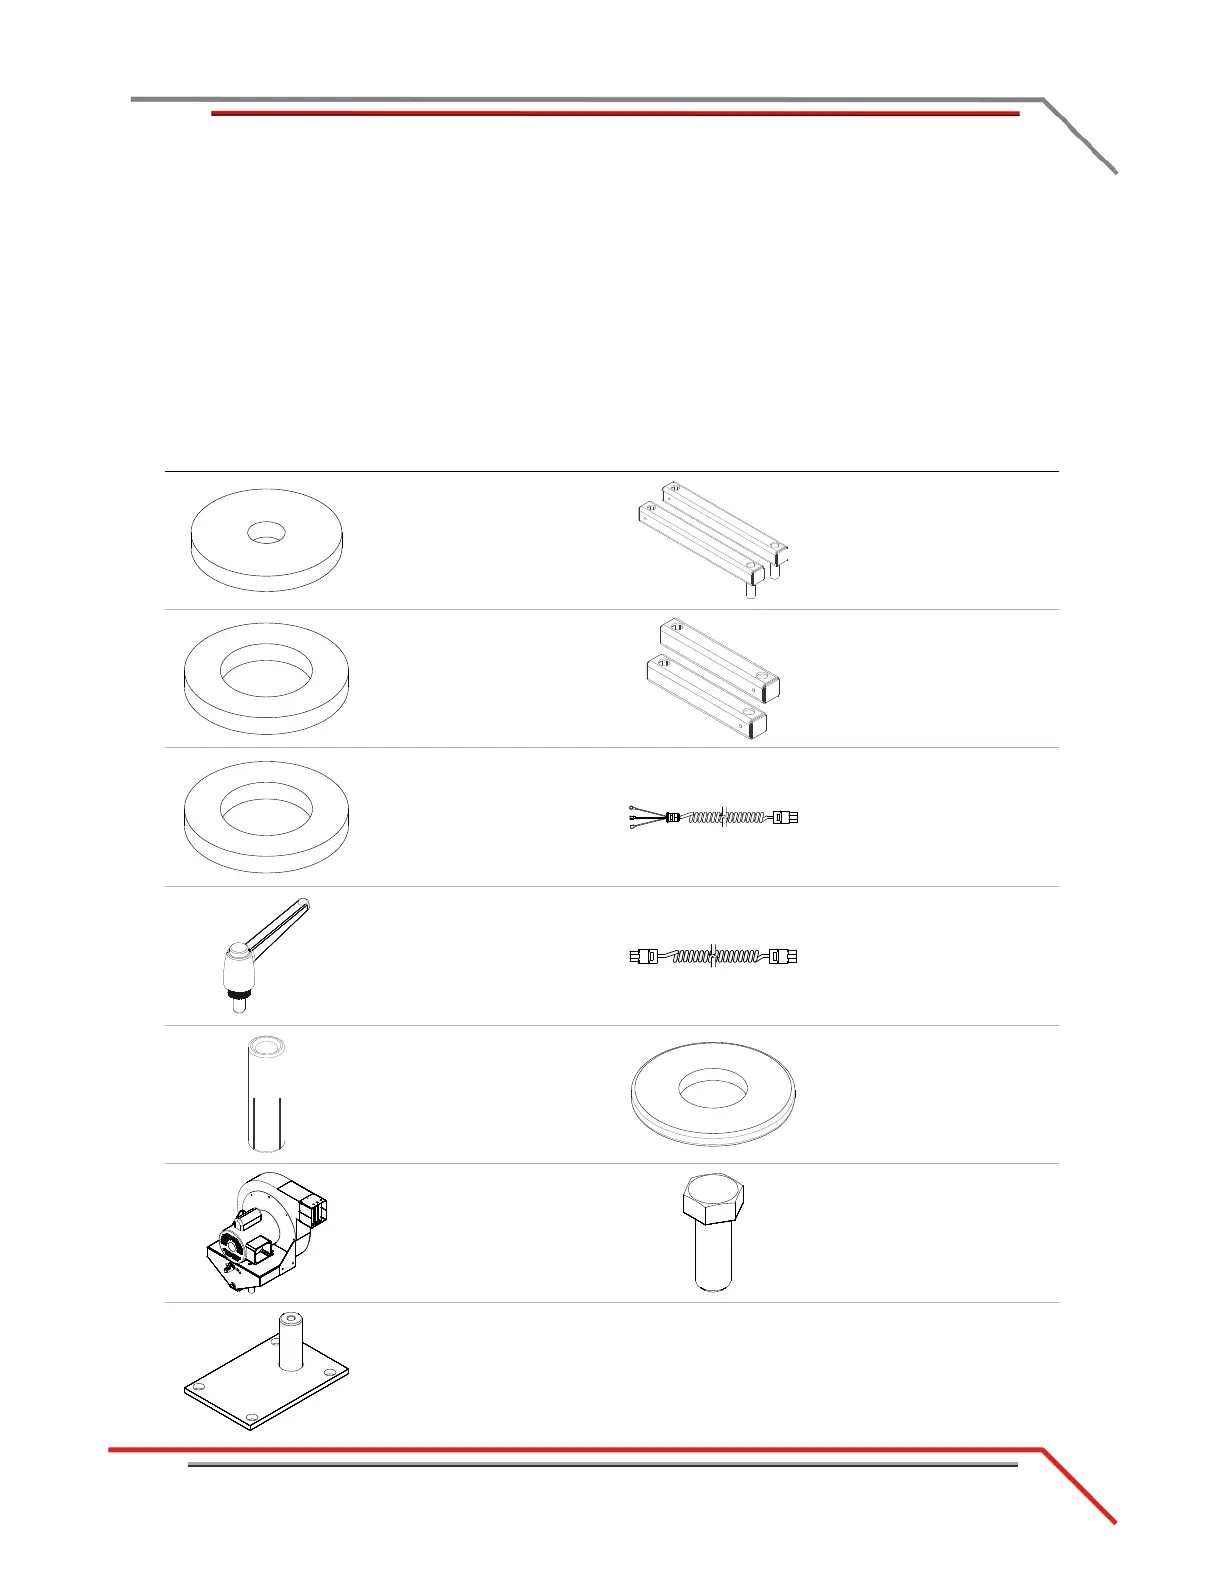
The following table lists all of the parts included in the High Pressure Blower Floor
Mount Installation kit (P/N 76722005). Check your kit against the parts listed to
make sure you have received all of the parts. If any part is missing, contact Dynojet
Technical Support.
part description part description
washer 1.5 x .38 ID x .187
thick (2)
P/N 26215220
upper blower arm assembly
P/N 63400000
washer 1.87 x 1.25 ID x .12
thick. poly (4)
P/N 26215520
lower blower arm assembly
P/N 63400002
washer 1.87 x 1.25 ID x .25
thick, poly (2)
P/N 26215521
cable, blower assembly
power (2)
P/N 76950301
clamp lever, 3/8-16 x 3/4" (8)
P/N 35712991
cable, POD to fan extension
P/N 76950317
anchor, Red Head, 3/8" (8)
P/N 37513200
washer, 5/16
"
, flat (10)
P/N DM150-002-007
blower assembly, right
P/N 61300000
blower assembly, left
P/N 61300003
bolt, 3/8-16 x 1
"
, hex (2)
P/N DM150-019-012
fan arm mount (2)
P/N 61329601P