15
HIGH PRESSURE BLOWER INSTALLATION
Stand Alone Blower Installation
Version 4 High Pressure Blower Installation Guide
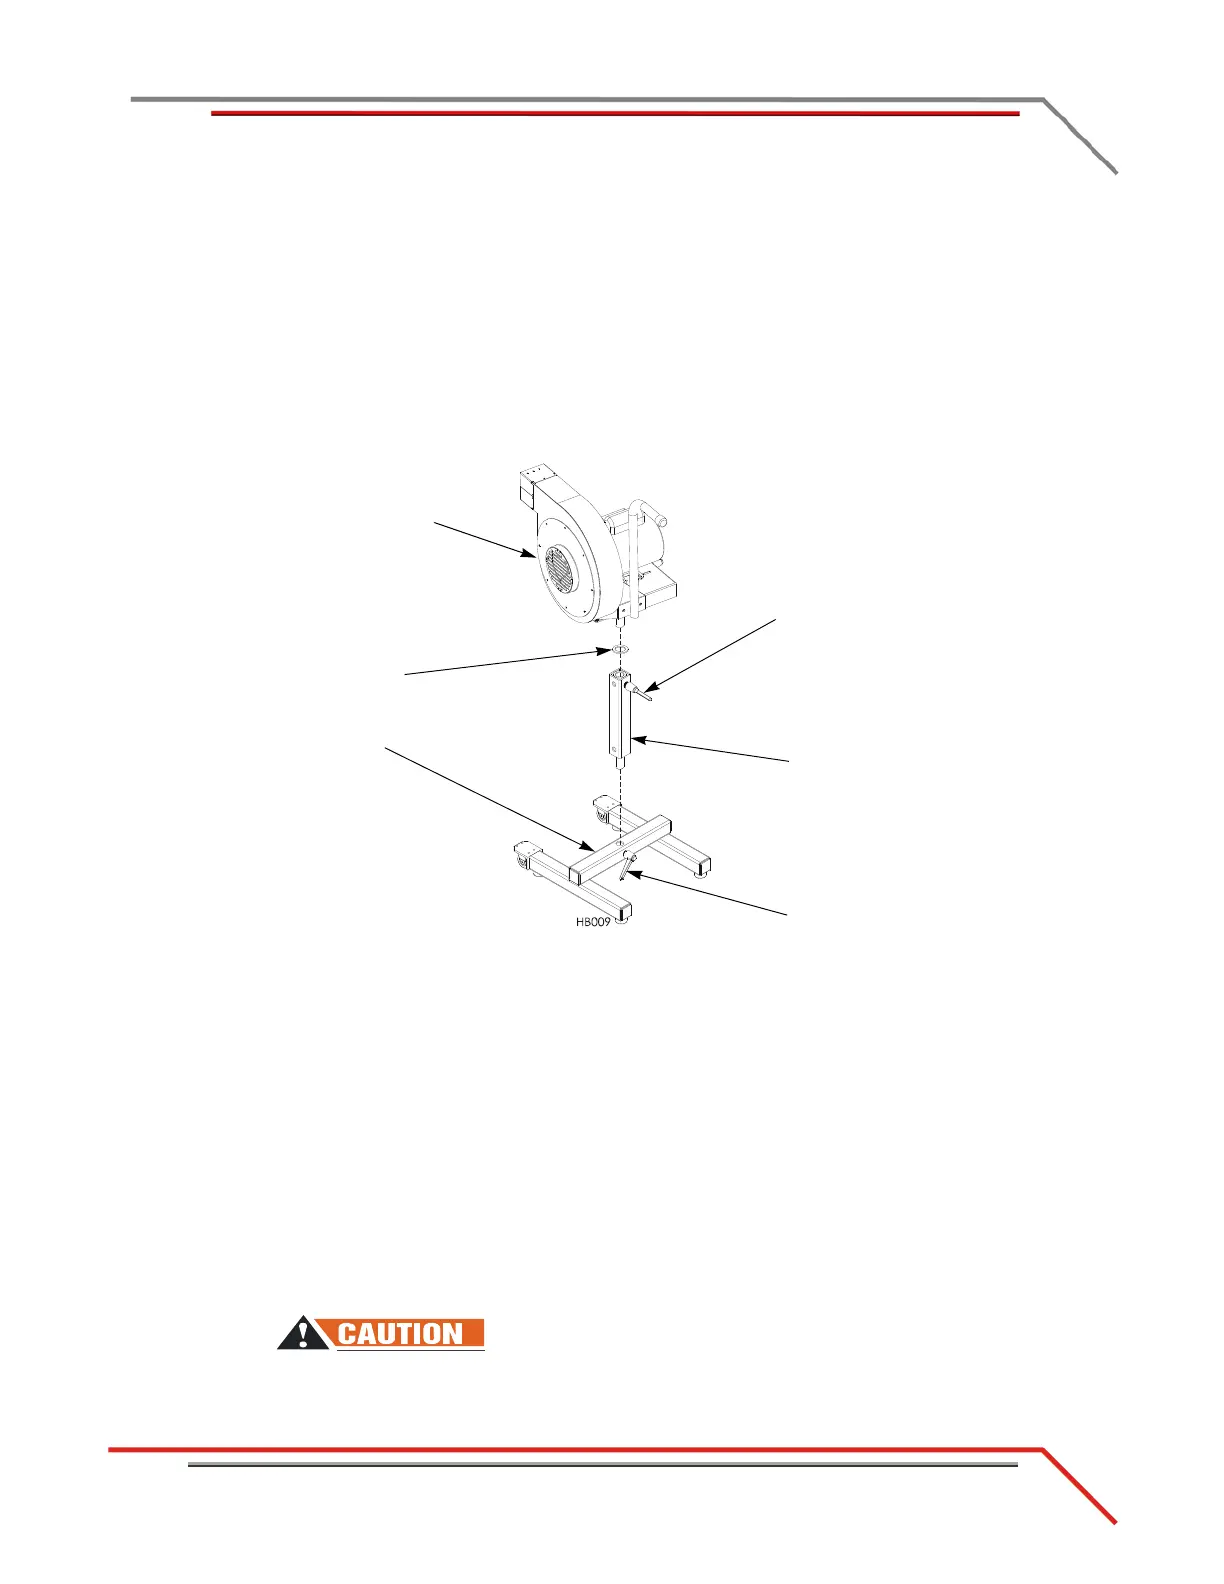
INSTALLING THE EXTENSION
The extension provides an extra twelve inches of height allowing you to precisely
direct air flow where you need it. Repeat the following steps for each blower and base
assembly.
1 Insert the pin on the extension assembly into the stand alone base. Tighten the
clamp lever.
2 Place a poly washer around the pin on the blower assembly.
3 Insert the pin on the blower assembly into the extension. Tighten the clamp lever.
Figure 9: Installing the Extension
POWER HOOKUP
Each blower has its own power cord and will plug directly into a power source located
in your dyno room. Each blower must be plugged into a separate circuit.
• 17A at 120VAC each 50/60Hz
1 Plug the power cord from the blower into a power source located in your dyno
room.
Note: Each blower must be plugged into a separate circuit. When using the
blowers in conjunction with an eddy current brake (retarder), make sure the
retarder is plugged into a separate circuit than either of the blowers.
2 Activate the blower using the switch on the blower motor. The blowers are
independent of one another; each blower can be turned on and off individually.
Risk of injury. Eye protection required. Be aware of debris from blowers.
Be sure the blowers are free and clear of any obstruction. The blowers can
run at any time once the cord is plugged into a power source.
base
blower assembly
clamp lever
extension
clamp lever
washer