B-7
MODEL 200IX/250IX BLOWER INSTALLATION
Model 200iX/250iX In Ground Blower Installation
Version 4 High Pressure Blower Installation Guide
INSTALLING THE LEFT BLOWER ASSEMBLY
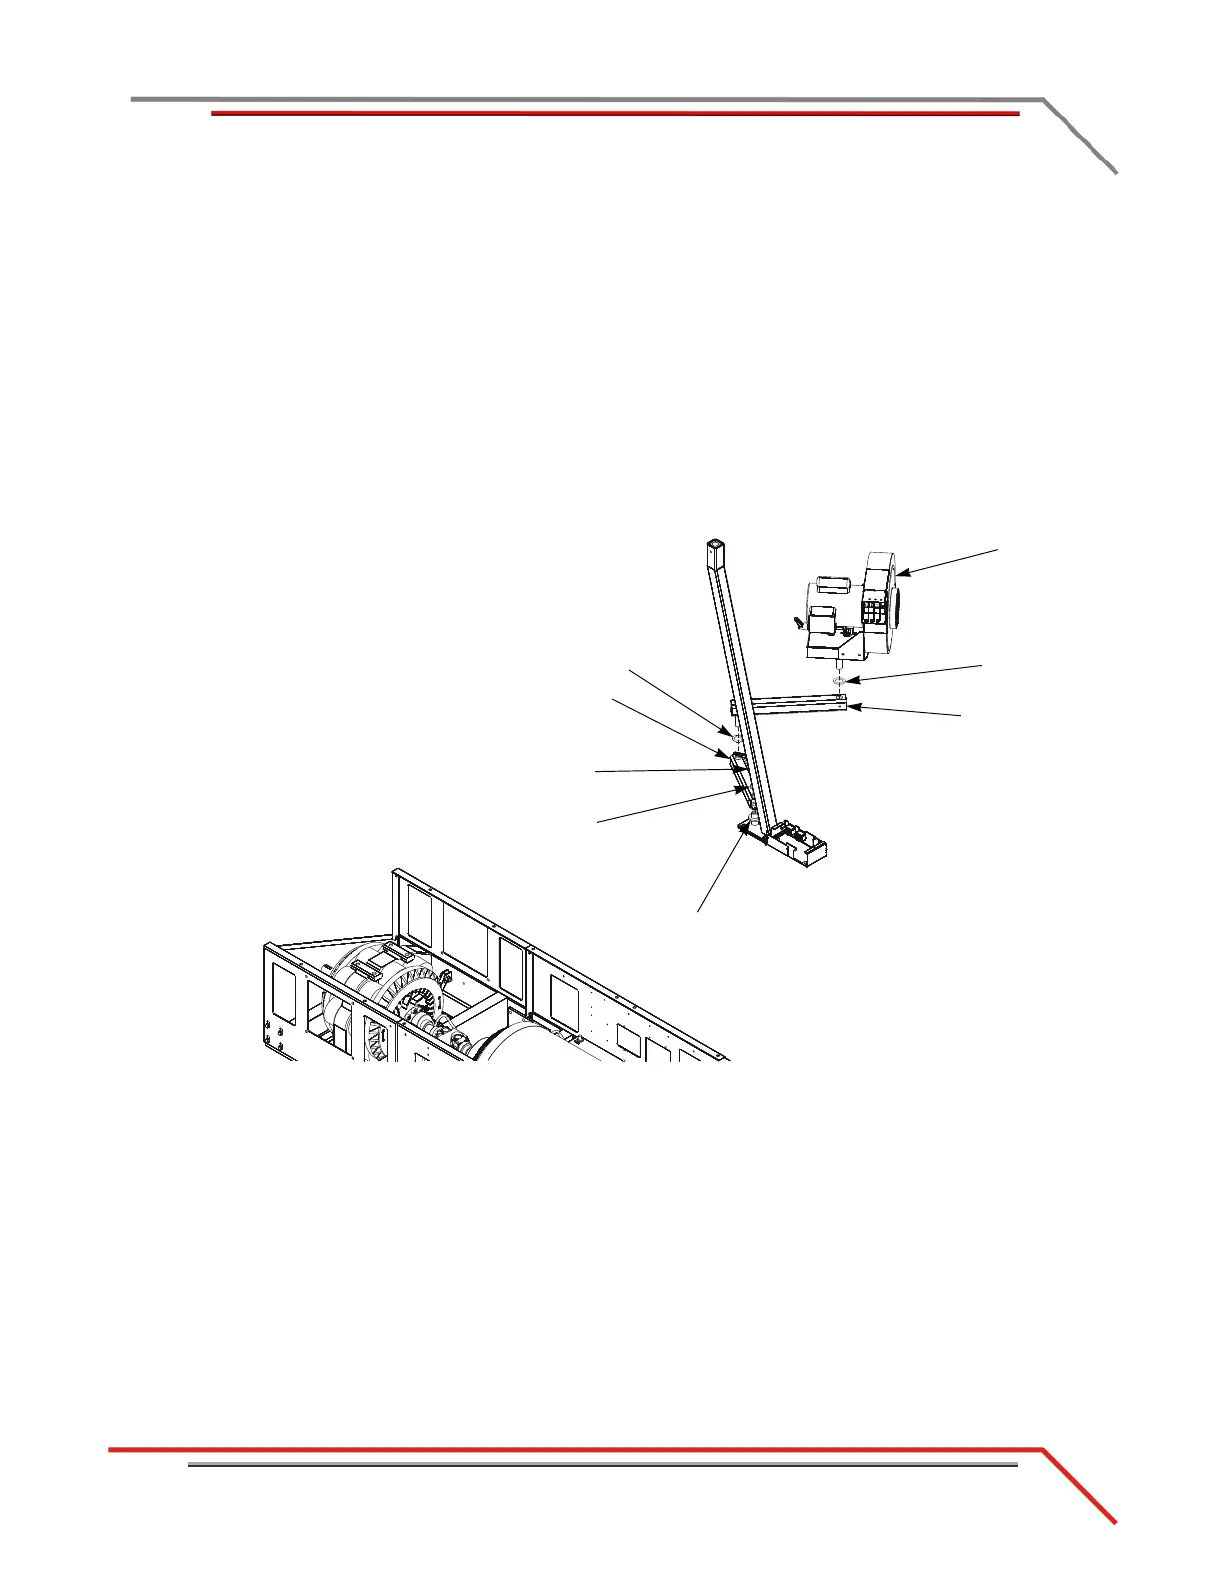
1 Insert a plastic cap in both ends of each arm.
2 Place one 1/4-inch thick poly washer around the pin on the blower mount.
3 Place the lower blower arm over the blower mount pin.
4 Place a 3/8-inch thick metal washer on top of the lower blower arm.
5 Secure the lower blower arm using the clamp lever.
6 Place a 1/8-inch thick poly washer around the pin on the upper blower arm.
7 Insert the pin on the upper arm into the lower arm.
8 Place a 1/8-inch thick poly washer around the pin on the blower assembly.
9 Insert the pin on the blower assembly into the upper arm.
Figure B-4: Install the Left Blower Assembly
poly washer
clamp lever
(not visible)
blower
assembly
metal washer
(not visible)
poly washer
upper blower arm
lower blower arm
poly washer