Do you have a question about the Echo CS-2511TES and is the answer not in the manual?
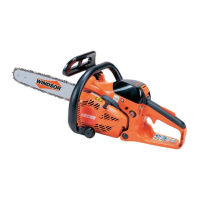
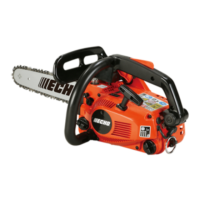
Detailed technical specifications for chainsaw dimensions, engine, fuel, and components.
Specific technical parameters for engine, ignition, and carburetor adjustments.
Specifies precise torque values for various fasteners and components during assembly.
Lists specific lubricants, sealants, and greases required for maintenance tasks.
Defines acceptable wear and measurement limits for critical engine and component parts.
Lists specialized tools required for proper servicing and repair of the equipment.
Step-by-step guide for safely dismantling the starter mechanism.
Instructions for removing and installing a new starter pull rope.
Procedure for correctly reassembling the starter components after service.
Steps for replacing the starter pawl and associated spring.
Diagnostic chart to identify and resolve ignition system issues.
Method for checking spark output using a spark tester.
Procedure for inspecting the spark plug for fouling or damage.
Instructions for replacing the spark plug cap and ignition coil assembly.
Steps to test the ignition switch using a multimeter.
Detailed instructions for removing and installing the ignition switch.
Procedure for replacing the ignition coil unit.
Guide to adjusting the air gap between flywheel and ignition coil.
How to inspect the flywheel, its key, and magnetic force.
Method for inspecting, cleaning, and replacing the air filter element.
Steps for replacing the latch mechanism of the air cleaner cover.
How to inspect the fuel cap and fuel strainer for damage or blockage.
Procedure for inspecting the fuel tank and lines for leaks.
How to inspect and replace the fuel tank vent for proper pressure regulation.
Steps for removing and installing the fuel purge bulb.
Instructions for replacing the fuel and fuel return lines.
Guidelines and initial settings for adjusting the carburetor for optimal engine performance.
Method for testing the carburetor for fuel leaks and proper function.
How to inspect clutch shoes, springs, drum, and hub for wear or damage.
Instructions for replacing individual components of the clutch system.
Procedure for correctly installing the clutch assembly onto the crankshaft.
Steps for replacing the chain brake lever and its torsion spring.
How to inspect all parts of the chain brake system for damage or wear.
Procedure for inspecting the oil cap and strainer for proper function.
How to inspect the oil tank vent for proper airflow.
Instructions for inspecting and replacing the oil delivery line.
How to inspect the worm gear of the auto-oiler assembly.
Steps for cleaning, disassembling, and replacing the auto-oiler assembly.
Method for testing engine cylinder compression to assess its health.
How to clean cooling fins and passages to prevent engine overheating.
Procedure for inspecting and cleaning the engine's muffler and exhaust port.
Method for testing the crankcase and cylinder for air leaks.
Steps for safely removing the main engine block assembly.
How to inspect the cylinder bore and wall for wear or damage.
Procedure for inspecting the piston and its rings for wear or breakage.
Instructions for replacing engine oil seals to prevent oil leaks.
How to inspect the crankcase halves and crankshaft for damage.
Steps for replacing oil seals and ball bearings in the engine.
Instructions for assembling the crankshaft into the crankcase.
Procedure for installing piston rings and the cylinder assembly.
Steps for removing and installing the lifting hook assembly.
Instructions for replacing throttle trigger, rod, and lockout components.
Steps for replacing the front handle and its associated spring.
Instructions for replacing the rear handle and its springs.
Procedure for replacing the nut that secures the guide bar.
Instructions for replacing the chain tensioner mechanism.
Steps for replacing the stud that mounts the guide bar.
A comprehensive guide to diagnosing and solving common operational problems.
A flowchart illustrating the disassembly sequence for major components.
Recommended schedules for routine maintenance tasks based on usage.
| Engine Displacement | 25.0 cc |
|---|---|
| Engine Type | 2-stroke |
| Chain Pitch | 3/8" |
| Weight | 2.3 kg |
| Fuel Capacity | 0.19 L |
| Oil Capacity | 0.14 L |
| Chain Oil | Automatic |
| Chain Brake | Inertia |
| Bar Length | 10 inches |
| Chain Gauge | 0.050 inch |