72
Various Settings
ATTENTION
• Refer to the following for the method of
calculating the delay time.
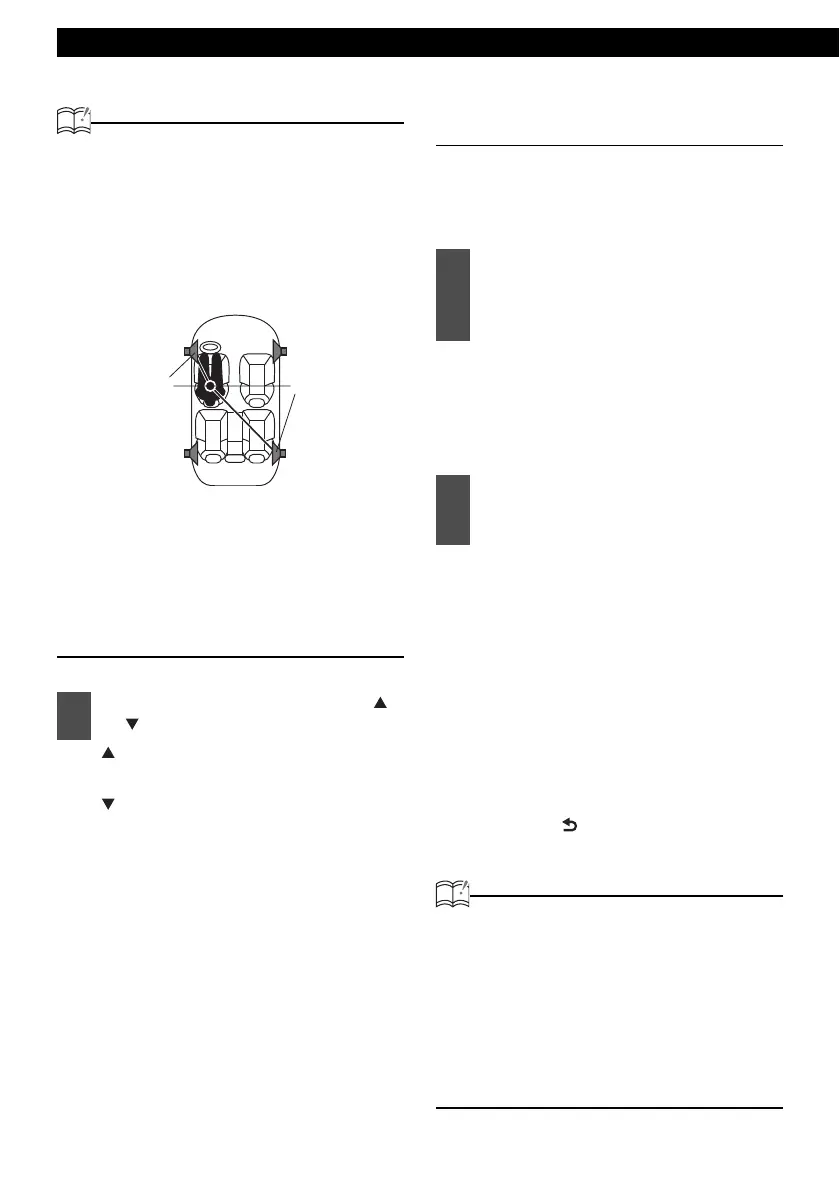
A = (B-C) / 34
A: Delay time (ms)
B: Distance from the listening position to the
furthest speaker (cm)
C: Distance from the listening position to the
speaker to be adjusted (cm)
(Example) Listening position:
Driver's seat (left)
B: 200 (cm)
C: 50 (cm)
Delay time = 200 (cm) - 50 (cm) / 34
= Approx. 4.4 (ms)
• Time Alignment cannot be specified
together with Position selector.
[ ]:
Increases the dB.
[]:
Decreases the dB.
Automatically adjusting Time
Alignment (Auto TA)
You can automatically measure and adjust the
delay time and sound level from each speaker
if the optional measurement microphone
(MEI-100) is connected to this system.
Align the microphone with the actual
ear position and attach it to the
headrest or other appropriate fixture.
(When installing the microphone, fix it
with a tape or string.)
After pressing the button, a 10-second
countdown begins. Leave the vehicle
during that time.
After ten seconds, impulses will be
output from the speakers and the
measurement of the time alignment
will start. "Measuring" is shown during
measurement.
You can adjust the volume (by turning
the [VOL] knob) and restart
measurement while it is in progress.
Press the [ /BAND] button once more
to cancel measurement.
ATTENTION
• When the speaker band is set to Non-Fader
(Sub-woofer), you cannot automatically
adjust the time alignment.
• The loudness and position selector
functions are turned off during automatic
adjustment of the time alignment.
• Bluetooth is temporarily disconnected
during automatic adjustment of the time
alignment.
5
Adjust the level by pressing the [ ]
or [ ] button.
C
B
1
Connect the RCA connector of the
optional microphone (MEI-100) to
the L-ch of the AUX jack of the
main unit.
2
Hold down the [ENTER] button on
the Time Align screen for more
than one second.