Filling and Purging Procedure
• Refer to steps 1 through 5, located on
page 15 of this manual.
DO NOT run the P/A unit until the SeaStar
Steering System has been bled free of air. Failure to do so
may result in non-repairable damage to the P/A unit.
Electrical Installation
• Refer to page 12 of this manual for electrical connection.
Power Assist for SeaStar Systems
5
SYSTEM INSTALLATION
OVERVIEW
System Installation
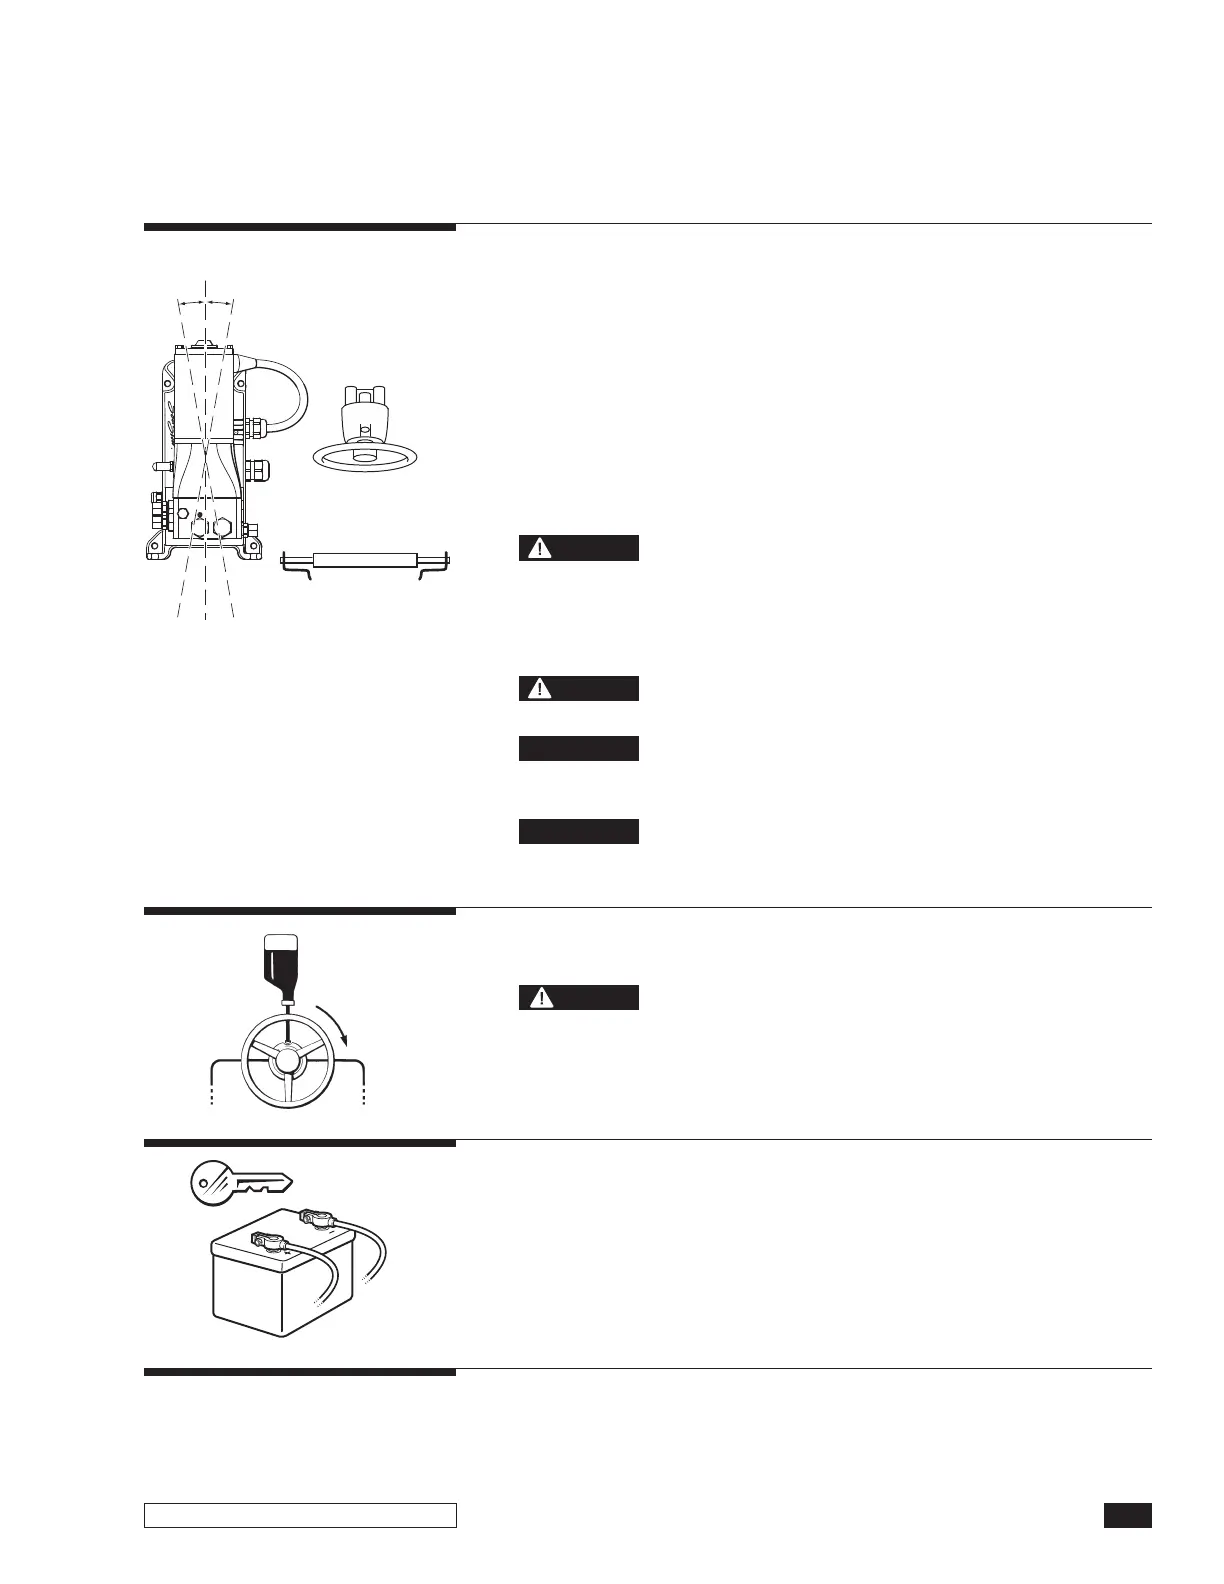
• Install SeaStar Helm pump onto the dash using installation
instructions provided with your helm pump.
• Install Steering Cylinder into boat using the installation
instructions provided with your steering cylinder.
• The P/A unit will make a noise similar to that of an autopilot;
this should be taken into consideration if installing the P/A unit
into a center consul and/or in an area where noise is preferred
to be limited. Install the P/A unit in a vertical position (see
diagram) as close the steering cylinder as possible.
DO NOT mount the P/A unit in a horizontal position.
The P/A motor may be HOT to the touch, DO NOT
mount P/A in an area where fabrics and/or any other flammable
material may come in contact with the P/A motor.
• Install steering hoses using diagrams noted on page 6 through
page 10, using your specific application.
The SeaStar PRO system must use SeaStar PRO
steering hoses.
Due to the different cylinders options available
with SeaStar Steering, be sure that you choose the correct
installation diagram noted in this book.
Hoses MUST be at least 6’ in length from the power
assist to the helm pump, or, from the power assist to the cylinder(s).
NOTICE
NOTICE
CAUTION
WARNING
WARNING
C
YLINDER
P/A UNIT
H
ELM
10° 10°
STEP 1
Final Purge and System Check
• Turn ignition ON and continue with the filling and purging
instructions step 6 on page 18 of this manual
STEP 4
STEP 2
STEP 3



 To Next Page