Component Teardown
4-18
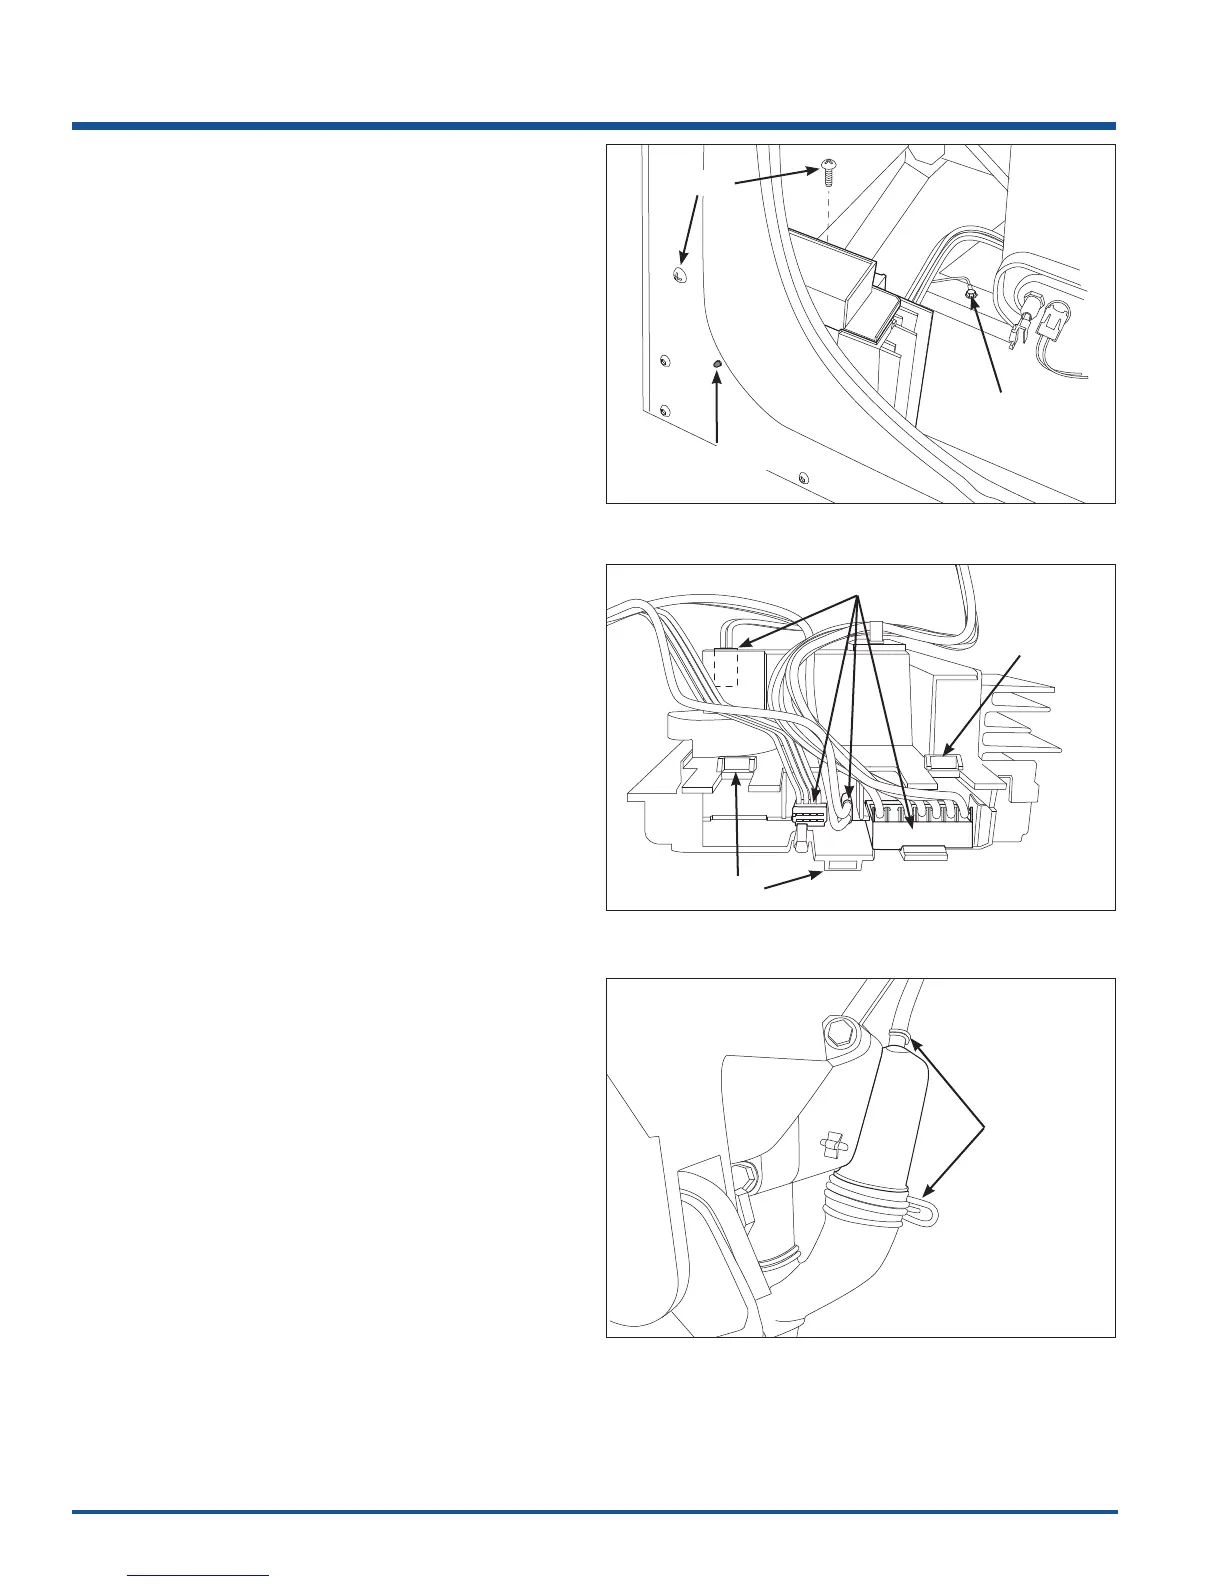
Speed Control Board Assembly Removal
The speed control board assembly is located in the
right rear corner of the unit. Two screws secure the
speed control to the unit frame, one screw fastens to the
unit base the other passes through the rear panel and
fastens into speed control assembly.
To remove the speed control board assembly:
1. Remove rear access panel.
2. Disconnect the terminal plug from the lower front of
speed control assembly.
3. Using a #2 square bit screwdriver, extract the screw
securing the ground wire to the unit base.
(See Figure 4-52)
4. From inside the washer, extract the screw securing
the speed control assembly to the unit base.
(See Figure 4-52)
5. From outside the unit, extract the screw from the
rear panel that secures the speed control assembly
to the rear panel. (See Figure 4-52)
6. Carefully pull drive control assembly towards rear
access panel hole to access the wire harness
connections. Cut wire retainers securing the wire
harness to the drive control assembly.
7. Release the retaining latches securing the cover to
the speed control assembly.
8. Disconnect all wire harness connections from the
speed control assembly. (See Figure 4-53)
Air Bell Removal
The air bell is mounted on the right side of the wash tub
and mounts to a hose connected to the sump. A hose
leads from the air bell and connects to the water level
sensor.
To remove the air bell:
1. Remove the front panel.
2. Using a pliers, compress the hose clamps from
the inlet and outlet hoses and disconnect from
air bell. (See Figure 4-54)
3. Release the rivet holding the air bell to the
outer tub. and remove from unit.
NOTE: When installing an air bell, seal the air connecting
tube to air bell and air bell to sump hose using waterproof
glue. DO NOT plug air connecting tube opening.
Figure 4-53.
Figure 4-52.
Figure 4-54.
Screw
Plastic Locator
Ground Wire
Hose
Clamps
Disconnect
Latch
Latch