19
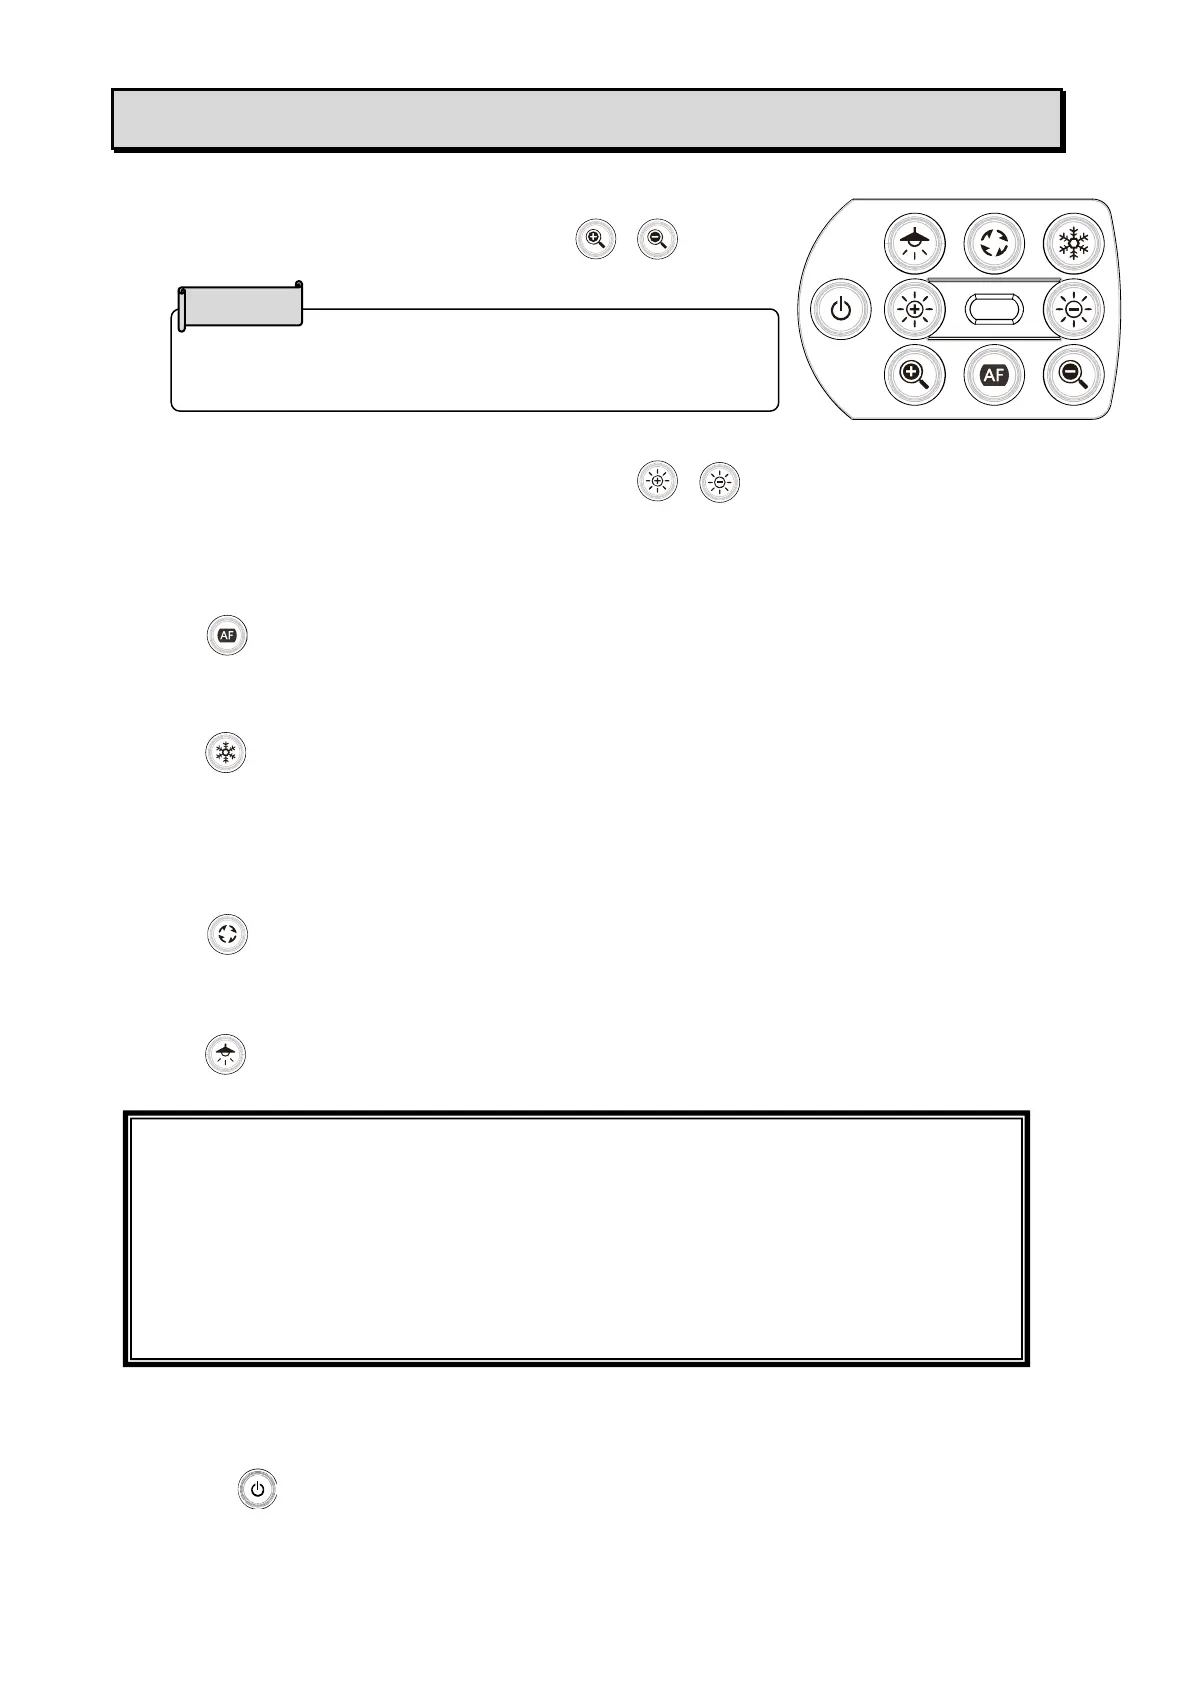
➍ USING THE PRODUCT
◆ADJUSTING THE SIZE
The size of the image can be adjusted using [ / ]
buttons on the operating panel
◆ADJUSTING THE BRIGHTNESS
The brightness of the image can be adjusted using [ / ] buttons on the operating panel.
To initialize the brightness level, press these buttons at the same time.
◆ADJUSTING THE FOCUS
Press [ ] on the operating panel to automatically focus on the subject.
◆PAUSING THE IMAGE
Press [ ] on the operating panel to pause the camera image.
Press the button again to restart.
※The Status LED flashes yellow.
◆ROTATING THE IMAGE
Press [ ] on the operating panel to rotate the image by 180°.
◆TURNING THE LED LIGHTING ON/OFF
Press [ ] on the operating panel to ON/OFF the LED lighting.
◆SETTING THE CAMERA TO STANDBY STATUS(ONLY
AVAILABLE WHEN USING DC POWER CORD)
Press the [ ] button on the operating panel to enter the standby status.
During the standby status, no image will be output from the HDMI OUT or RGB OUT.
※The image will be output regardless of the status (ON/OFF) of the Power button when the
product is connected to a computer via UVC.
The maximum zoom ration is 16x (digital zoom).
The image quality will be degraded when using the digital
zoom.
CAUTION
• To take shots of people, turn the LED lighting OFF.
• Make sure that the light from the LED lighting does not shine directly into your eyes.
• This product is equipped with a high-brightness LED. You can safely use it to light up
the object. The brightness will gradually decrease with long-term use. This is not a
malfunction but a characteristic of the LED.
• Do not touch the LED lighting while it is on as it may become very hot.