CAUTION
Remove the USB cable from the Trex unit before connecting to a device.
CAUTION
Do not add any external power to the device when the Trex unit is powering the device.
This can blow a fuse inside the Trex unit. The repair/replacement will need to be
completed at an authorized service center. Ensure the device is disconnected from the
loop/segment and no other wires are connected to the device before providing power
from the Trex unit.
Procedure
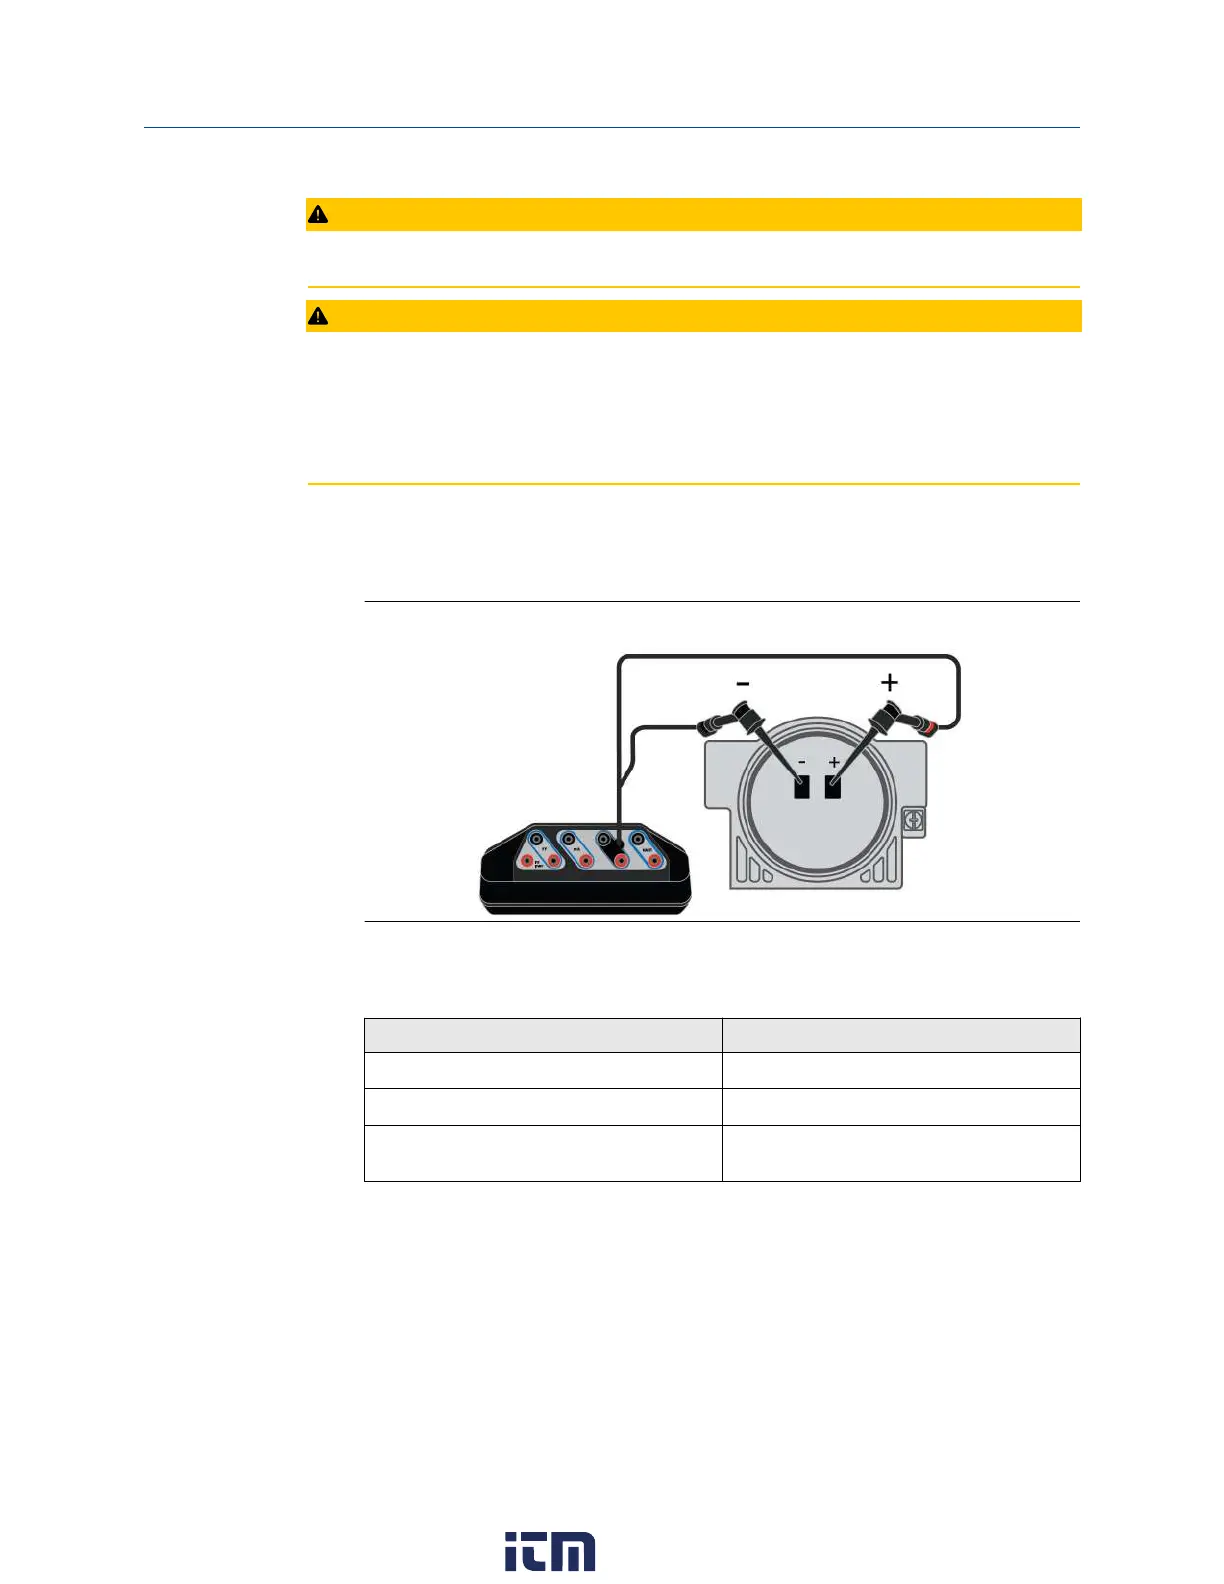
1. Connect the lead set to the HART + pwr terminals on the Trex unit and to the
positioner.
Figure 4-16: Connection for powering a positioner
2. On the Loop Diagnostics screen, tap Trex Unit Power.
3. Select one of the following:
Option Description
Power Positioner with 4 mA (0%)
Power a positioner using 4 mA.
Power Positioner with 20 mA (100%)
Power a positioner using 20 mA.
Power Positioner with other mA value
Power a positioner using a specified mA
value.
4. Tap OK.
Loop Diagnostics is now powering the positioner and measuring voltage and
current. The Trex Unit Current option is also enabled.
5. To change the current value, tap one of the quick current buttons (4 mA, 8 mA, 12
mA, 16 mA, 20 mA), or use the up and down arrow keys to manually increase the
current value. The default increment is 0.1 mA.
6. To stop powering the device, do one of the following:
Loop Diagnostics application User Guide
September 2021
142 User Guide
w ww . . co m
information@itm.com1.800.561.8187
 Loading...