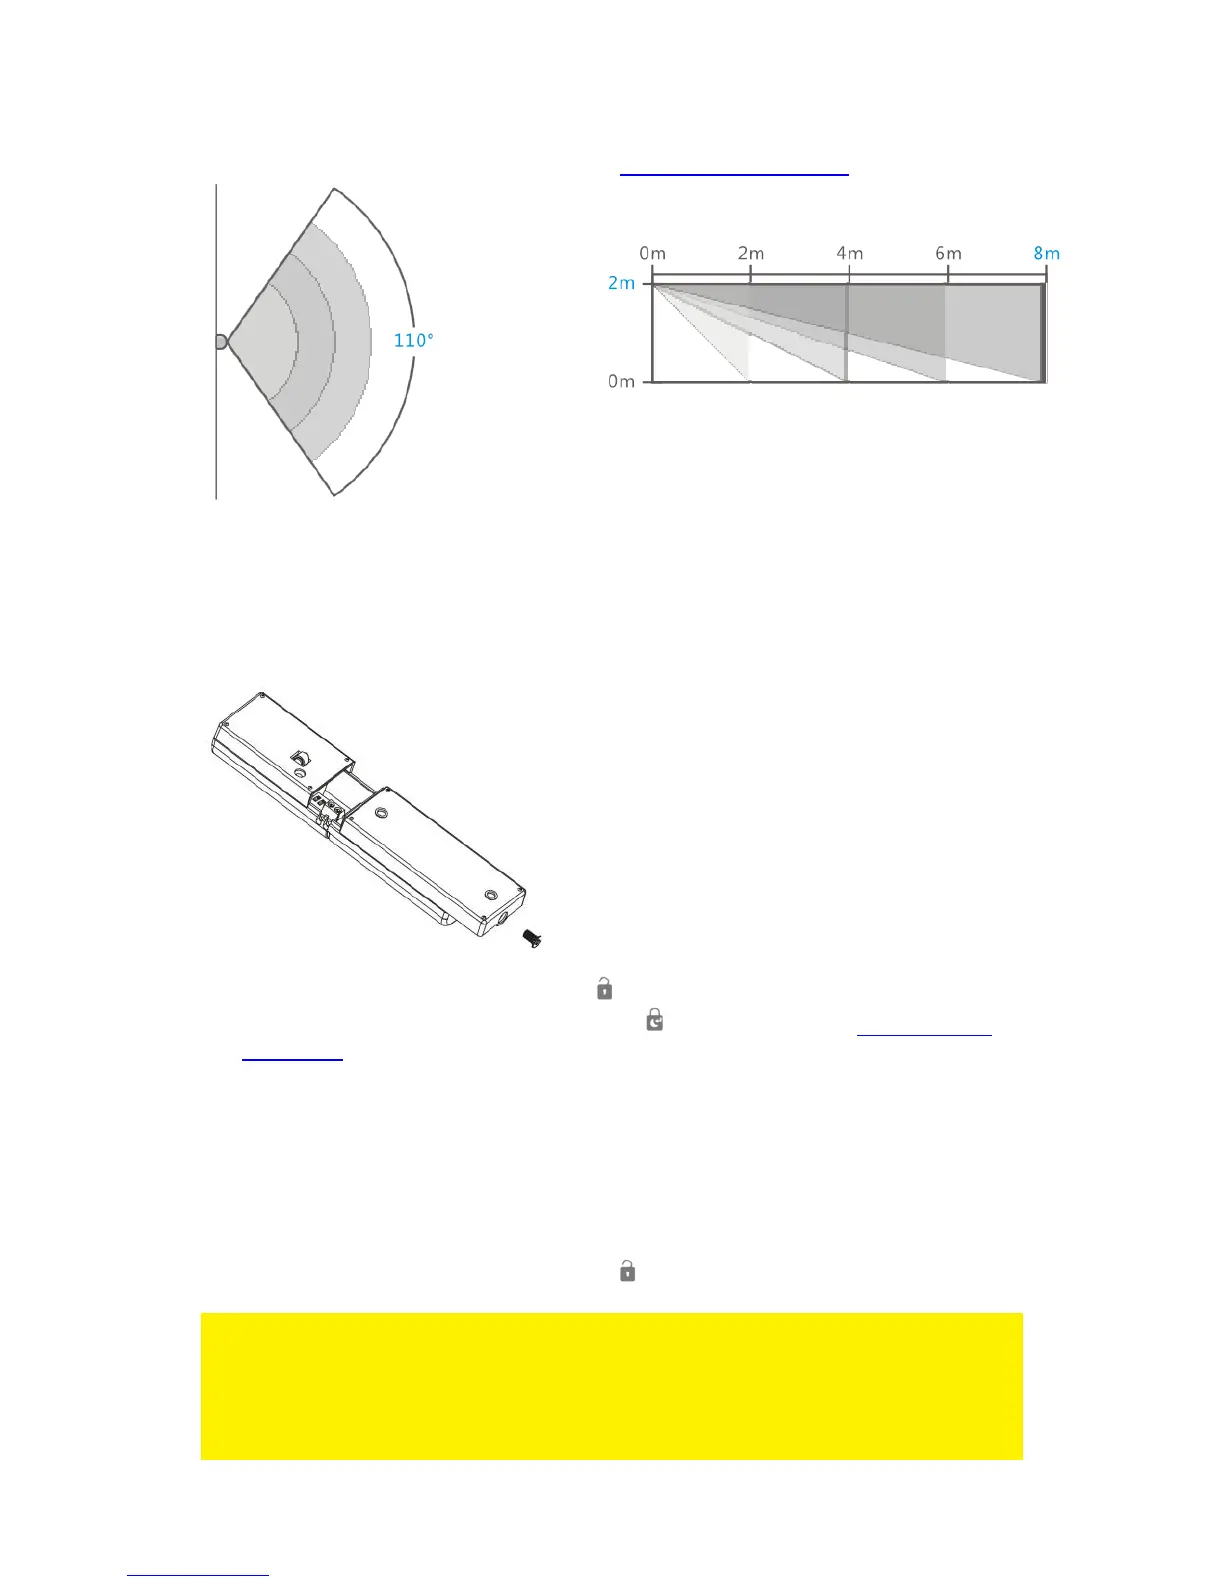
Point the detector in the direction you wish to secure. Test if the motion detector is
working properly in test mode (see chapter “Test the motion detector”).
11.0 Install the Window/Door sensor
11.1 Pair the Window/Door sensor
1. Power on the sensor by inserting its batteries.
2. On the alarm panel, enter the PIN + “ ” key to disarm the system.
3. Enter PIN code + 15 + (Security type) + " " to start login (see "Explanation of
the groups" for an overview of the security types). The alarm system emits a beep
and the "Disarm" - LED will flash for 30 seconds.
4. Within 30 seconds, trigger the sensor.
5. If a sensor is successfully added, the DISARM LED will turn on for 1 second along
with a long beep. The Keypad LED will turn on to indicate the allocated zone
number. (Numbers 1 – 9 for zones 1 – 9, Number 0 for Sensor Zones 10 or
higher).
6. If the binding process fails, it will timeout after 30 seconds and 3 short beeps will
be heard.
7. To exit the binding process, press the “ ” key.
Note: The first accessory registered is assigned to zone 1, the second accessory
registered is assigned to zone 2, etc. Zones 1 to 9 can be renamed. Zones 10 to 100
cannot be renamed. It
is advised to label a sensor with its zone number immediately after successfully
binding it.