Installation Cerabar M, Deltabar M, Deltapilot M
14 Endress+Hauser
4.5 Installing Cerabar M
• Due to the orientation of the Cerabar M, there may be a shift in the zero point, i.e. when
the container is empty or partially full, the measured value does not display zero. You can
correct this zero point shift ä 47, Section "Function of the operating elements" or
ä 73, Section 8.3 "Pos. zero adjust".
• For PMP55, please refer to Section 4.5.2 "Installation instructions for devices with
diaphragm seals – PMP55", ä 17.
• Endress+Hauser offers a mounting bracket for installing on pipes or walls.
ä 21, Section 4.5.5 "Wall and pipe mounting (optional)".
4.5.1 Installation instructions for devices without diaphragm seals –
PMP51, PMC51
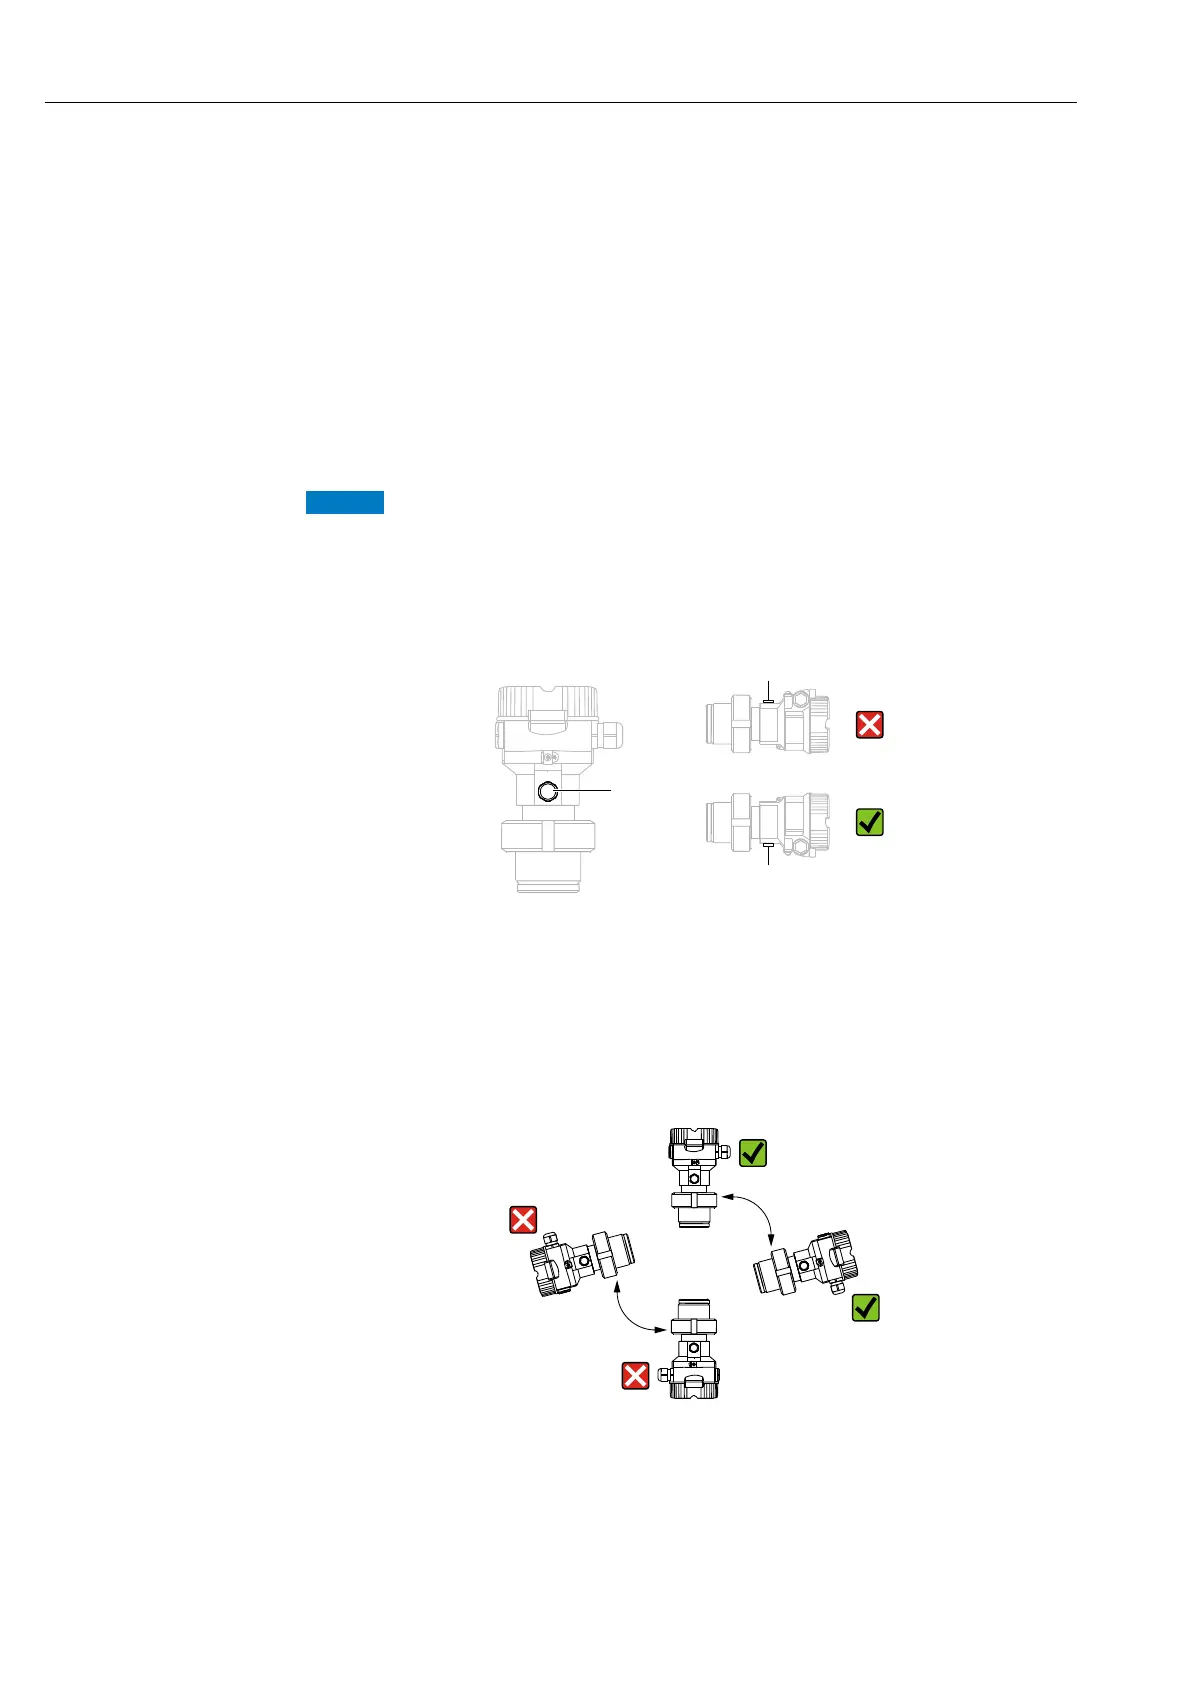
Damage to the device!
If a heated Cerabar M is cooled during the cleaning process (e.g. by cold water), a vacuum
develops for a short time, whereby moisture can penetrate the sensor through the pressure
compensation (1).
‣ If this is the case, mount the Cerabar M with the pressure compensation (1) pointing
downwards.
• Keep the pressure compensation and GORE-TEX
®
filter (1) free from contamination.
• Cerabar M transmitters without diaphragm seals are mounted as per the norms for a
manometer (DIN EN 837-2). We recommend the use of shutoff devices and siphons. The
orientation depends on the measuring application.
• Do not clean or touch process isolating diaphragms with hard or pointed objects.
• The device must be installed as follows in order to comply with the cleanability
requirements of the ASME-BPE (Part SD Cleanability):