Section 9: Standard & Optional Machine
Features
142
The edge of the black bumper on your rotary attachment corresponds to the left edge
of your page in CorelDraw.
The “top” of a cylinder can be at either end of the rotary attachment. It is useful to
visualize the orientation of the cylinder when it’s being engraved.
Place your artwork near the top of the page. Keeping
the white space to a minimum will reduce the distance
the glass will rotate before it starts engraving.
Eliminating the white space at the top of the page
provides the most predictable method of determining
where the laser will start engraving on the glass.
The laser starts engraving at the top of the image and
works its way down.
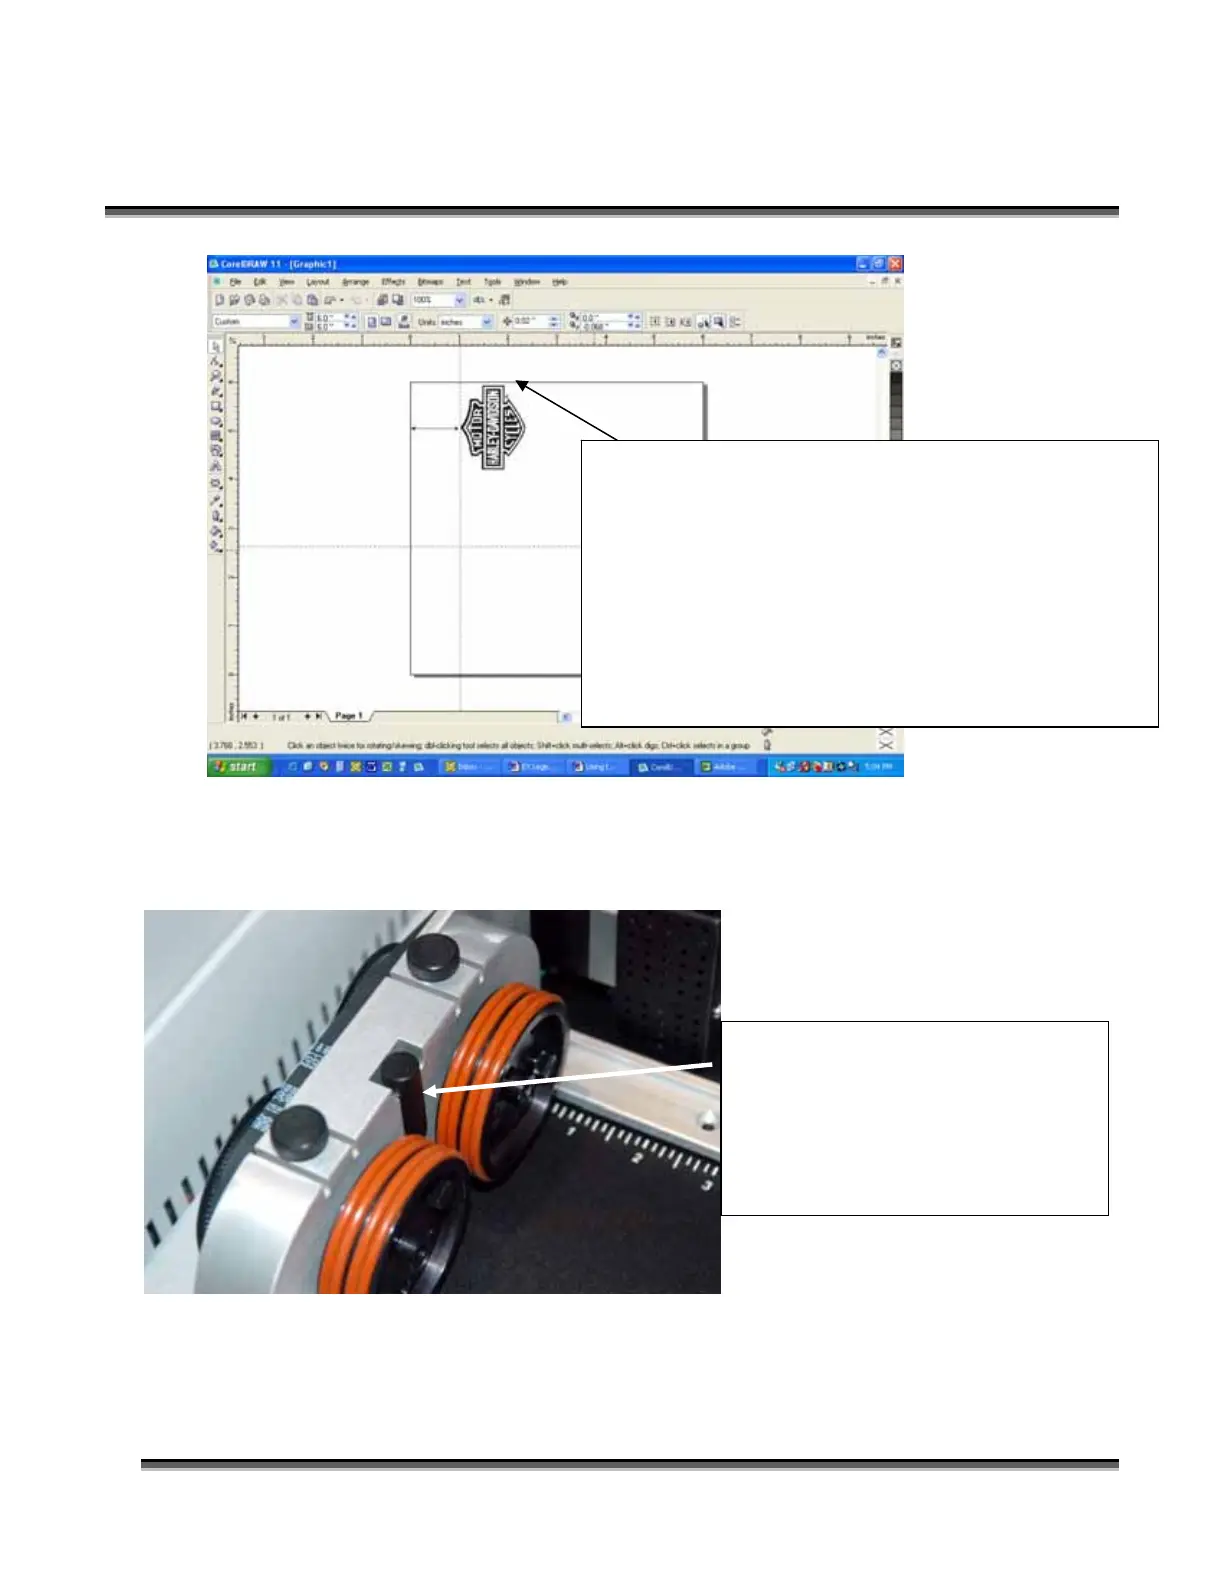
Set your cylinder on the rotary
attachment so that it is close to the
black bumper, but not touching it.
The cylinder may not be able to
rotate freely if it is rubbing against
the bumper.
 Loading...