2
Printing on Continuous Paper
2-9
R4C4620
Rev. C
A5 size CONT.FM
6/14/00 Pass 3
R
Proof Sign-off:
SEI Y.Ohkawara T.Takahashi
T.Takahashi
SEI M.Kauppi K.Blair
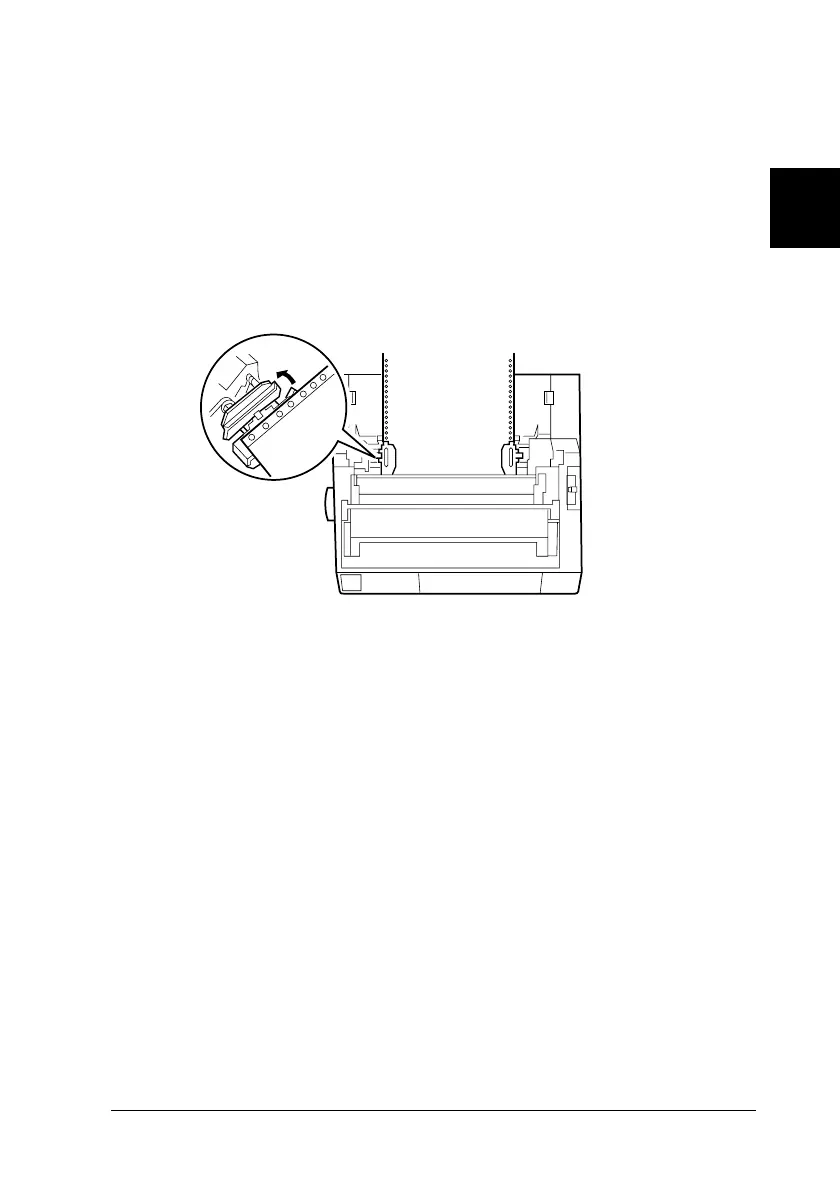
6. Slide the right sprocket to match the width of your paper, but
do not lock it. Move the paper support midway between the
two sprockets as shown in step 5.
7. Make sure your paper has a clean, straight edge. Then open
both sprocket covers and fit the first three holes of the paper,
printable side down, over the tractor pins. Then close the
sprocket covers.
8. Slide the right sprocket to remove any slack in the paper; then
lock it in place by pushing the sprocket lock down.
9. Attach the paper guide as described on “Attaching the Paper
Guide” on page 1-11. After installing the paper guide, grab
the center section of the paper guide, lift it up and lay it flat.
front of the printer
 Loading...