REV.-A
4.2.4.2 Removal of Printer Mechanism
1. Remove the platen unit and paper guide (refer to Section 4.2.4.1, immediately above).
2. Disconnect the cables from the following connectors on the TAMA board:
CN4 (red), CN5 (white),
CN7 (white), and CN8 (flexible flat cable, or “FFC). Refer to Figure 4-9.
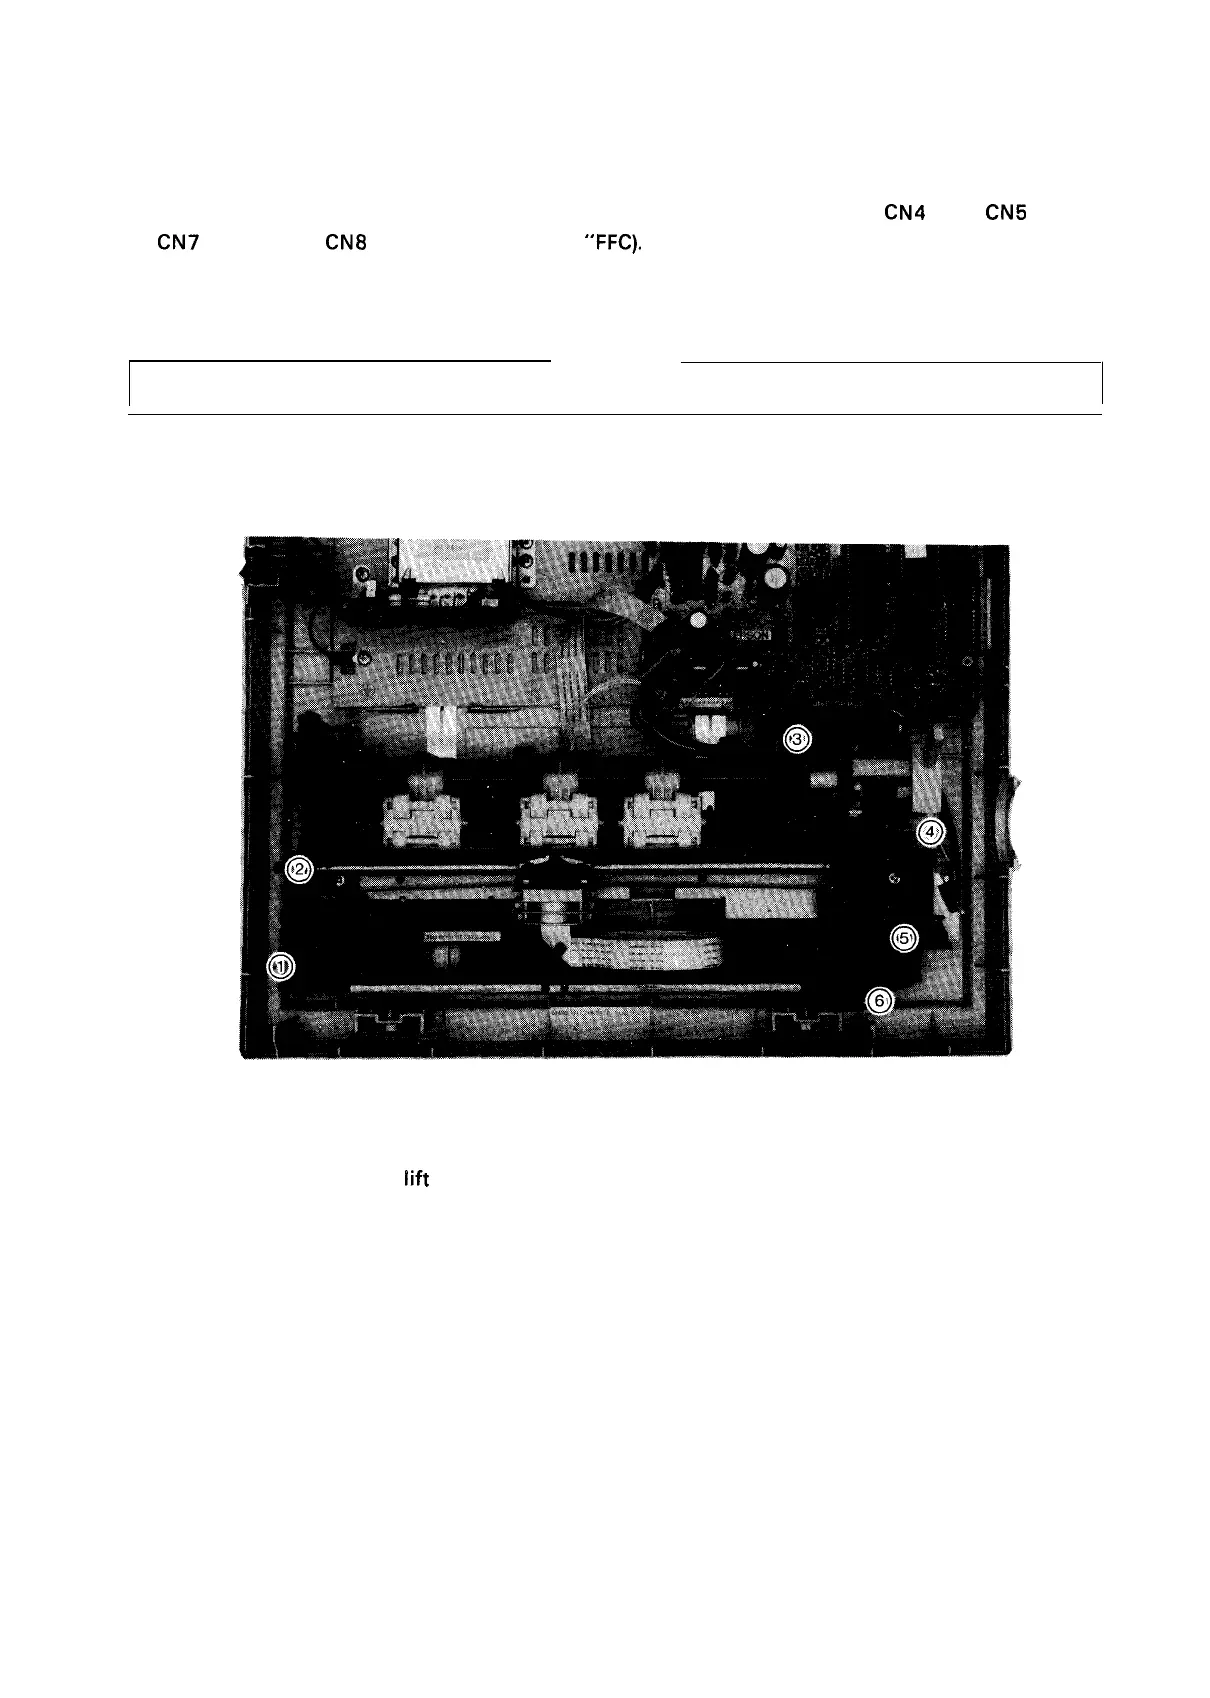
3. With a screwdriver, push and loosen the six tabs securing the printer mechanism to the lower casing.
For easiest removal, follow the procedure below.
WARNING
Be sure to push the tabs GENTLY, so as not to damage the lower casing or printer mechanism.
Figure 4-17. Printer Mechanism Removal
a.
Loosen tabs 1 and 2, and
lift
the left side of the frame about 1 cm above the lower casing.
b. Loosen tab 3, and raise the left side further, so that it is about 3 cm above the lower casing.
c. Loosen tab 4,5, and 6 and remove the printer mechanism.
4-13

 Loading...


