C
Disconnect the power cable and all other cables
from the printer.
Also, remove the following from the ink unit.
❏ Power cable and connection cable
❏ Overturn-prevention plate (for both sides)
D
Remove media from the Media Feeding Unit
and the Auto Take-up Reel Unit.
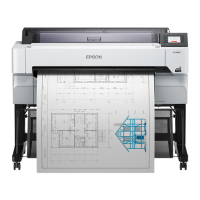
E
Unlock the two casters on the front of the
printer's legs.
Unlock all four casters on the ink unit.
c
Important:
When performing level adjustment using the
levelers, make sure you raise the levelers
above the casters before trying to move the
printer. Moving the printer without raising
the levelers could cause a malfunction. You
need the spanner supplied to adjust the
levelers.
(1)Loosen the nut on the top of the levelers.
(2). Turn the nut on the bottom
counter-clockwise.
(3)Check that it is above the casters.
F
Move the printer.
Use three people to move the printer; one on
each side of the printer and one for the ink
unit. Also, move so that the printer goes first in
the direction you are going.
c
Important:
Use the casters on the dedicated printer
stand to move the printer indoors a short
distance over a level floor. They can not be
used for transport.
When moving through a narrow
space
You can move through doors and so on that are at
least 1050 mm (41.3 in.) wide. If you remove the
curing heater, you can pass through gaps that are at
least 900 mm (35.4 in.) wide.
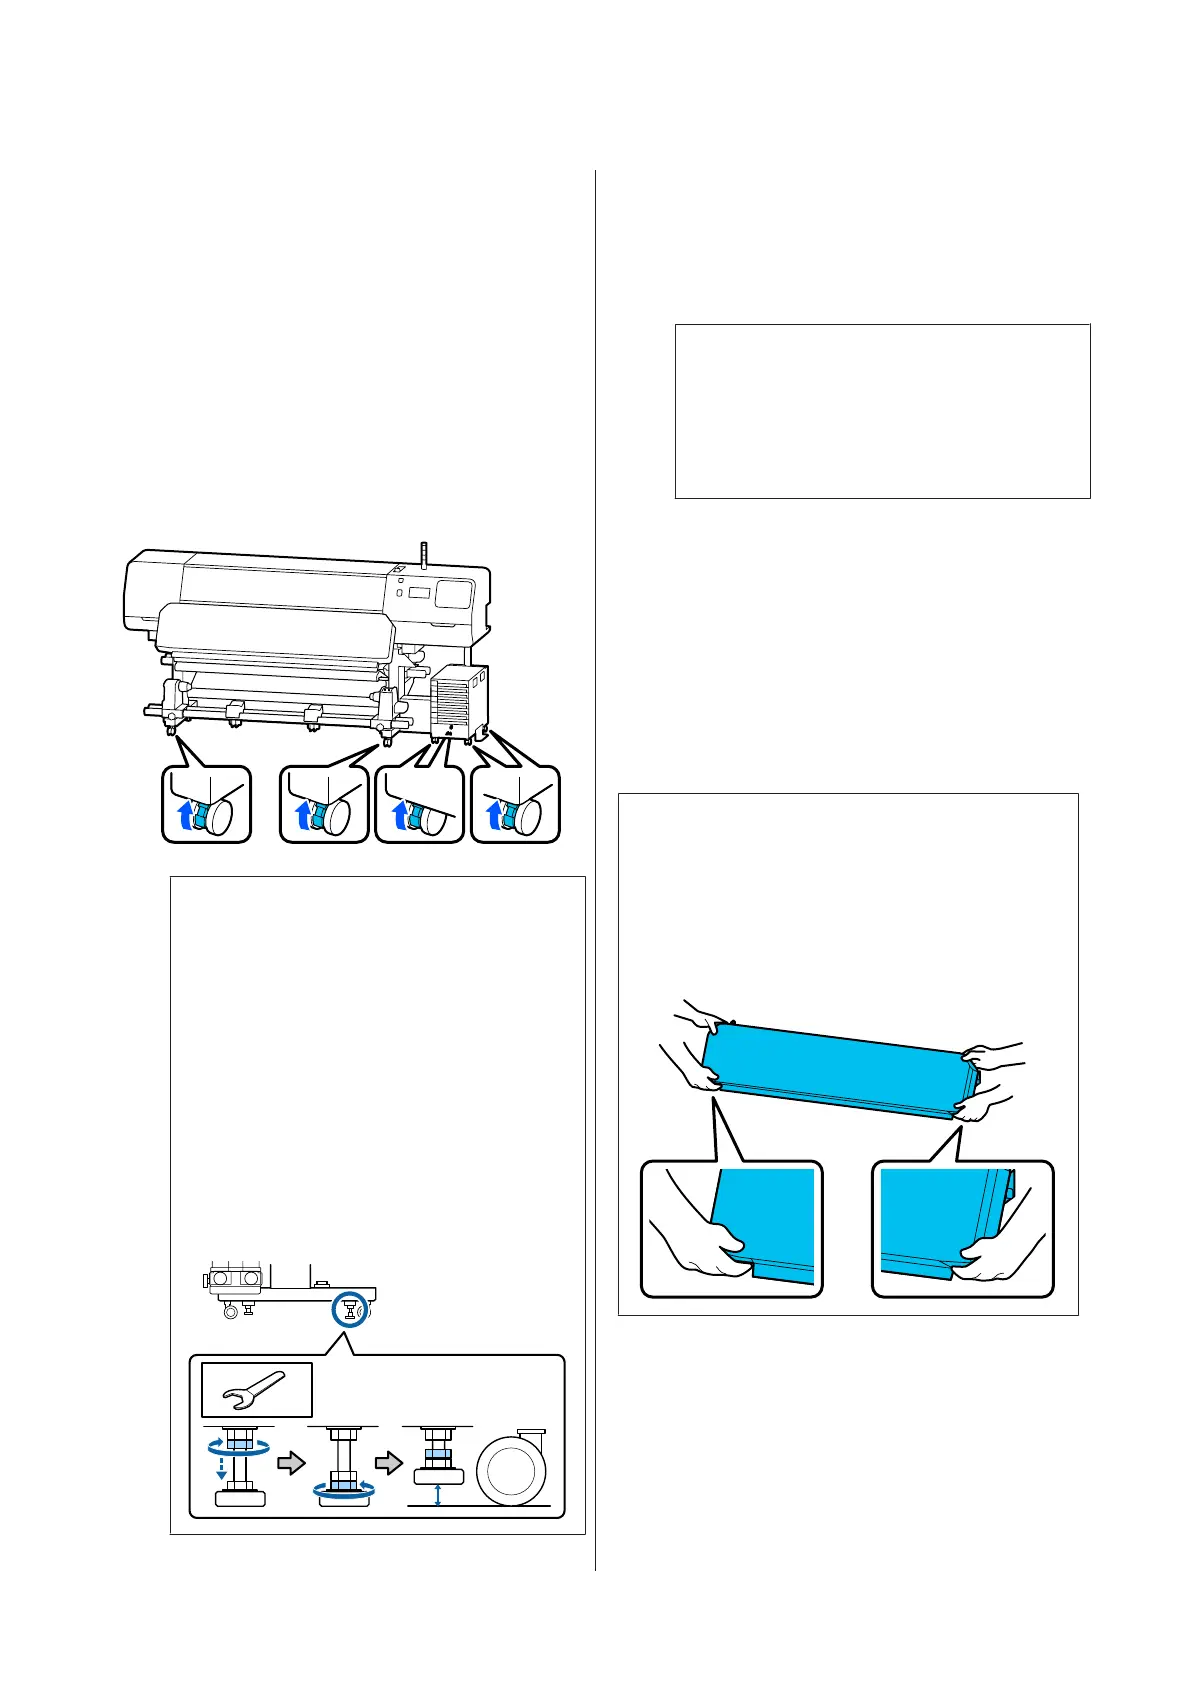
Follow the steps below to remove the curing heater.
c
Important:
❏ Make sure you use two people when removing
and carrying the curing heater.
❏ When carrying the curing heater, make sure
your hands are positioned as shown in the
figure.
A
Turn off the printer and unplug both of the
power cables.
SC-R5000 Series/SC-R5000L Series User's Guide
Appendix
134

 Loading...