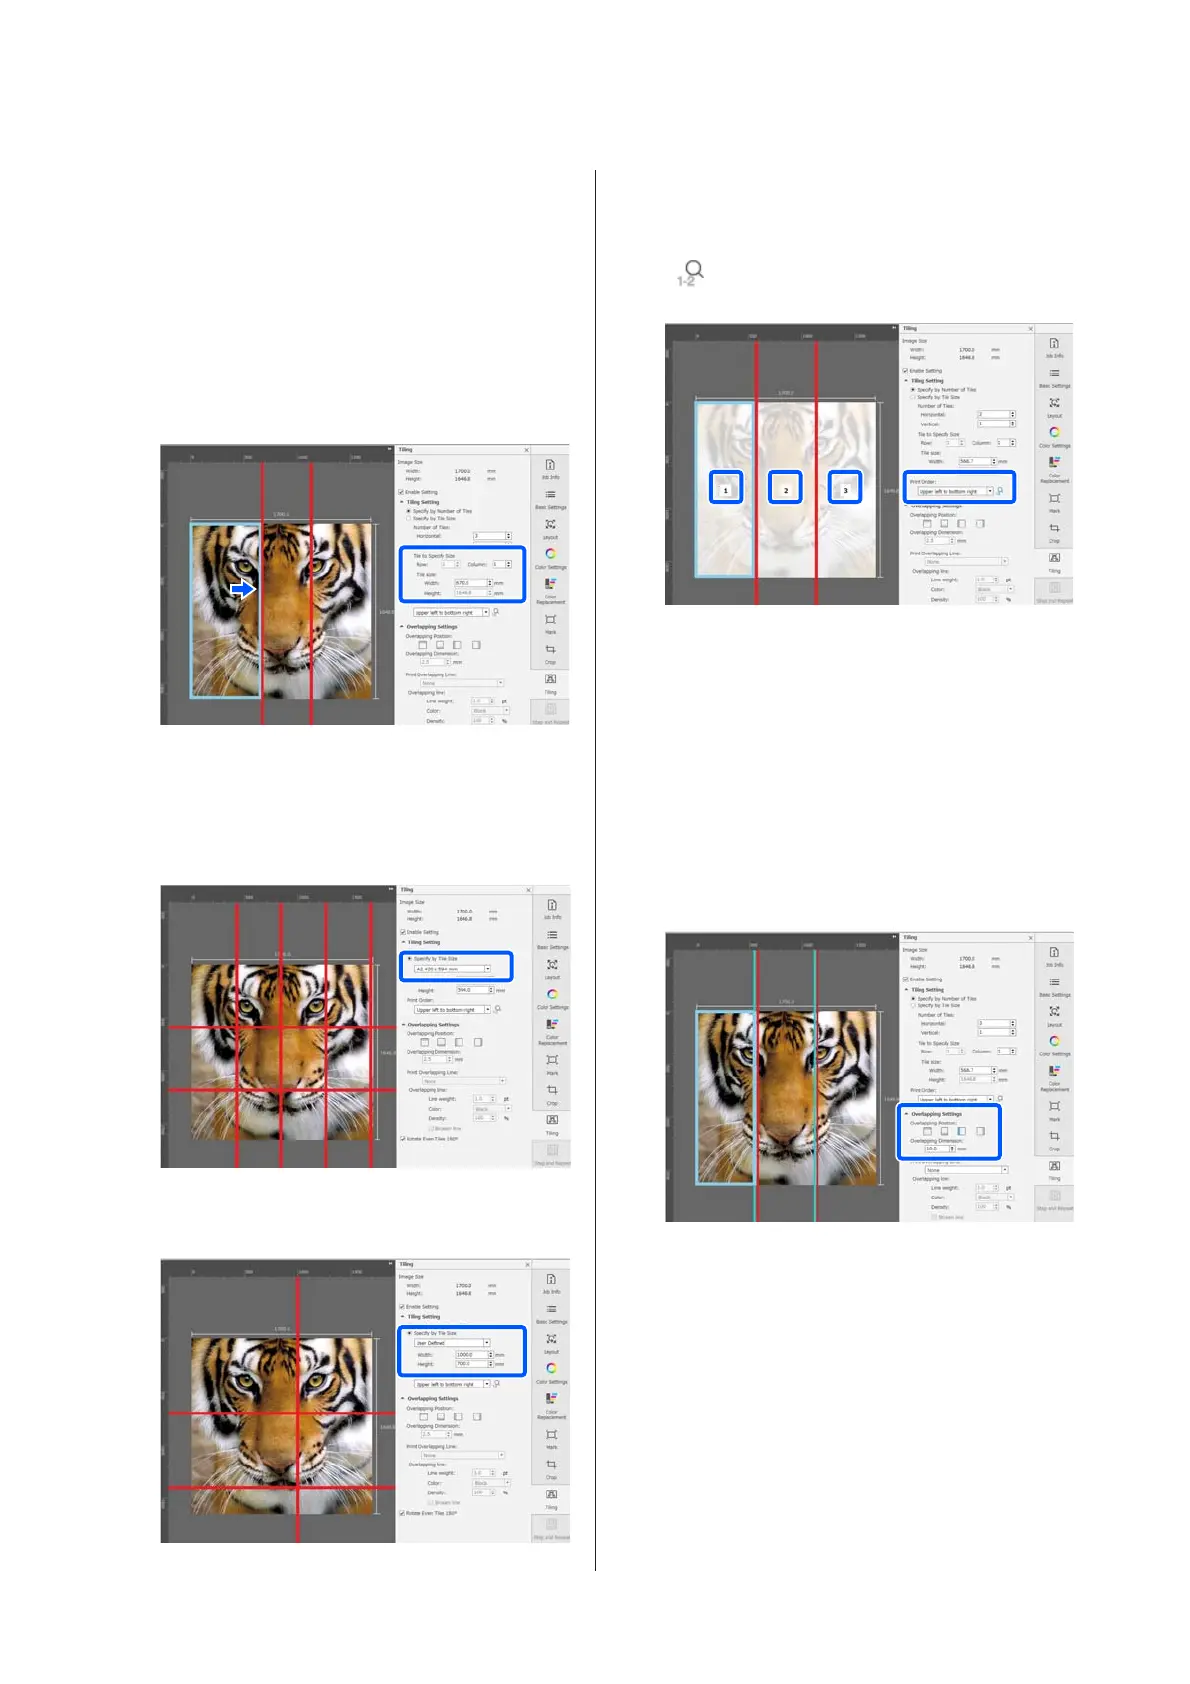
(1) Use the mouse cursor to click the tile you
want or specify the position of the tile you
want in Tile to Specify Size.
The tile targeted to be adjusted is indicated by
a light blue frame.
(2) To adjust the size, drag the light blue frame or
enter a value in Tile size.
Advance to step 8, and set the overlap.
G
Set the size of divisions in Specify by Tile Size.
Example: Set to A2 size
Example: Set to Width 1000 mm and Height
700 mm in User Defined
H
Set the order in which tiles are printed in Print
Order.
When you select Print Order and then click
, a number indicating the print order is
displayed on each tile in the preview area.
I
Set the overlap for pasting the images together
in Overlapping Settings.
(1) Set where to set the overlap in Overlapping
Position.
(2) Set the width of the overlap in Overlapping
Dimension.
Example: Overlapping Dimension is 10 mm
and the Overlapping Position is on the left side
If you want to print boundary lines between the
image and the overlap, go to step 10.
If you do not want to print boundary lines
between the image and the overlap, go to step 11.
J
In Print Overlapping Line, select Print on
Image and Margins or Print only on Margins.
Boundary lines are printed between the image
and the overlap and can be used as guides to
paste the image together.
SC-R5000 Series/SC-R5000L Series User's Guide
Introduction
41

 Loading...