101
When Problems Occur
3
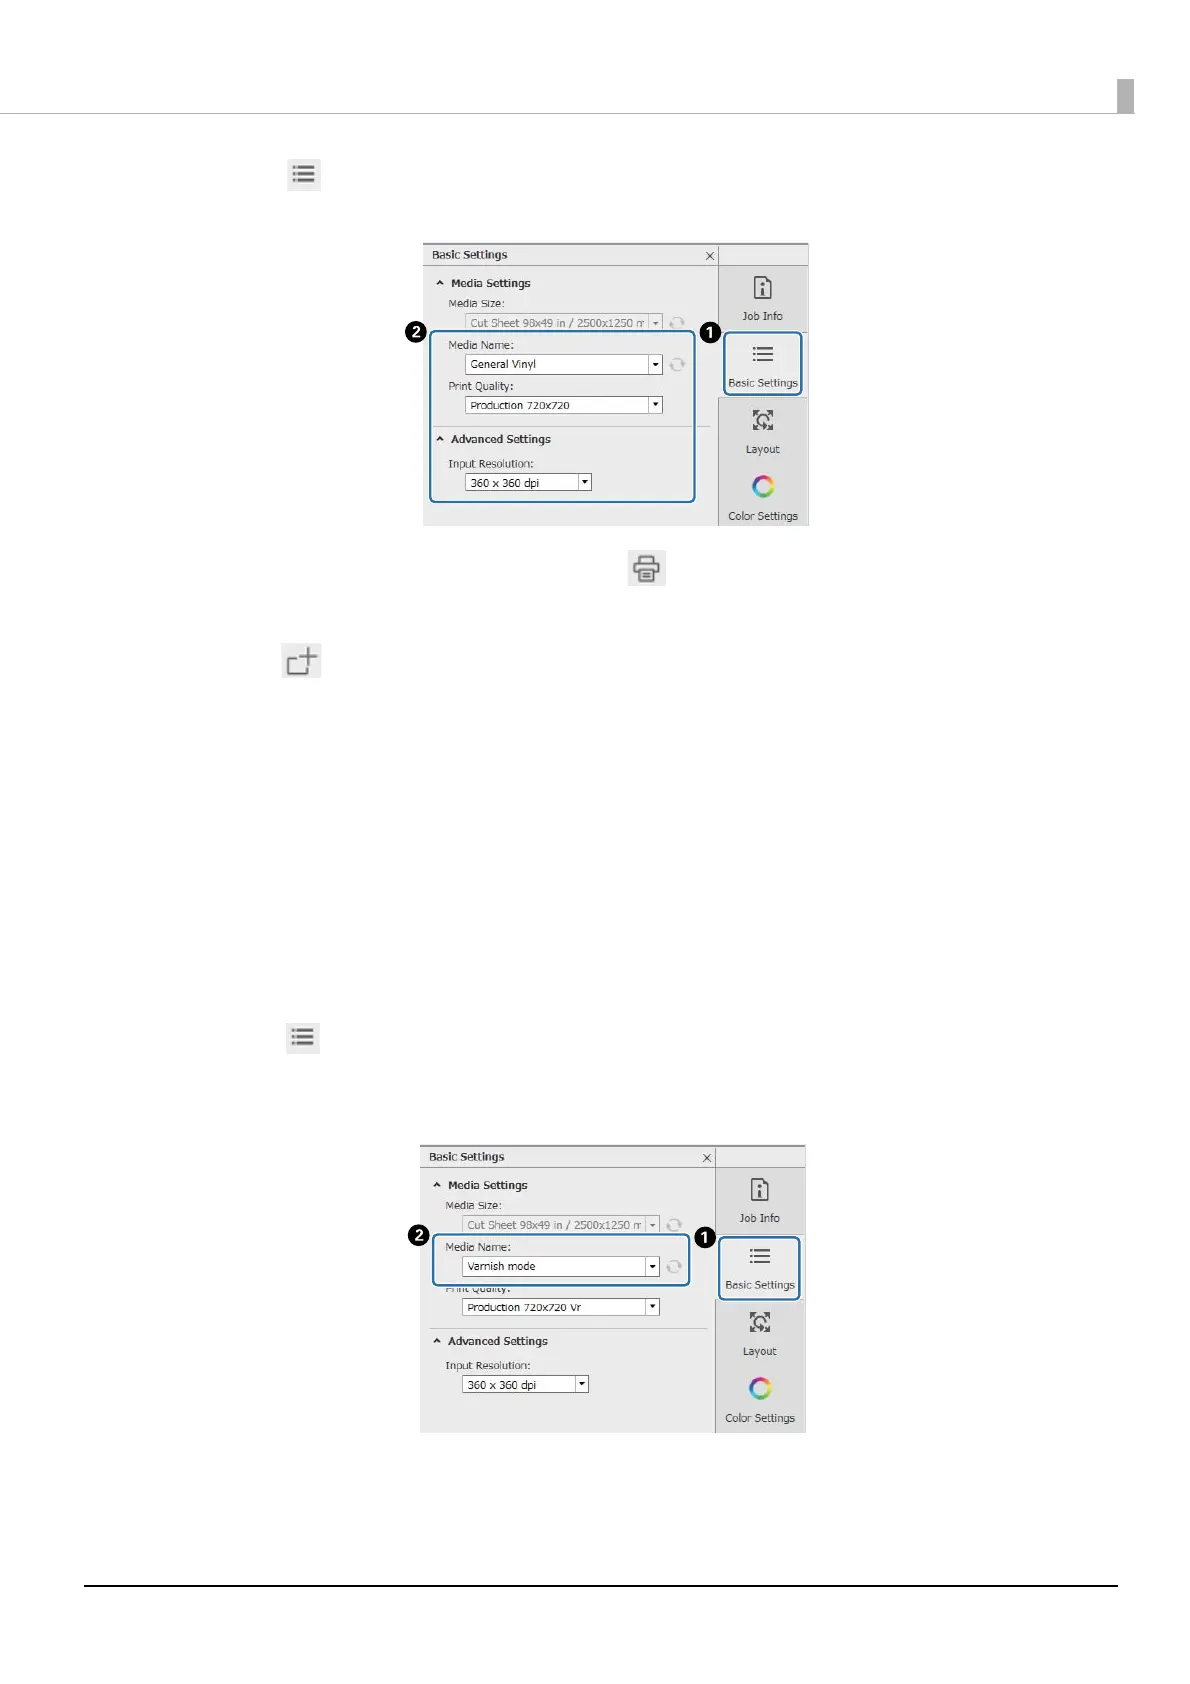
Click (Basic Setting) in the Job Settings menu to set the media name and print
quality.
4
Check the other settings, and then click (Print) on the job toolbar to start printing.
A color layer of the PRN file is output.
5
Click (Add) on the job toolbar to add the same print data as you added in step 1 to
the job list. You can also drag and drop the same print data file as you added in step 1
onto the job list.
A thumbnail and data name of the added print data is displayed in the job list, and the following three lay-
ers are displayed below the data name.
• [First Layer [White] (No Data)]
• [Second Layer [Color]]
• [Third Layer [Varnish] (No Data)]
6
Select the job you added in the job list.
The print image is displayed in the preview area.
7
Click (Basic Setting) in the Job Settings menu, and then select [Varnish mode] as
the [Media Name].
When you select [Varnish mode], the three layers in the job list are hidden.
 Loading...