3938
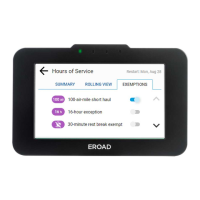
4.4 Emailing logs to yourself
Note: It is good practice to keep a back-up copy of your logs.
1 Tap the Logs icon on the Home screen. The Logs screen
appears.
2 Tap the More icon on the Logs screen. The Logs menu
expands to reveal additional menu options.
3 Tap the Email Logs icon. The Email Logs screen
appears.
4 Enter your email address in the Email Logs field.
Note: This field is pre-populated if your supervisor added an
email address to your Driver Profile in Depot. You can press and
hold the Backspace key to erase the entire field if you want
to enter a dierent email address.
5 Tap the Send button to complete this action. A
confirmation message displays the email address where the
logs were sent.
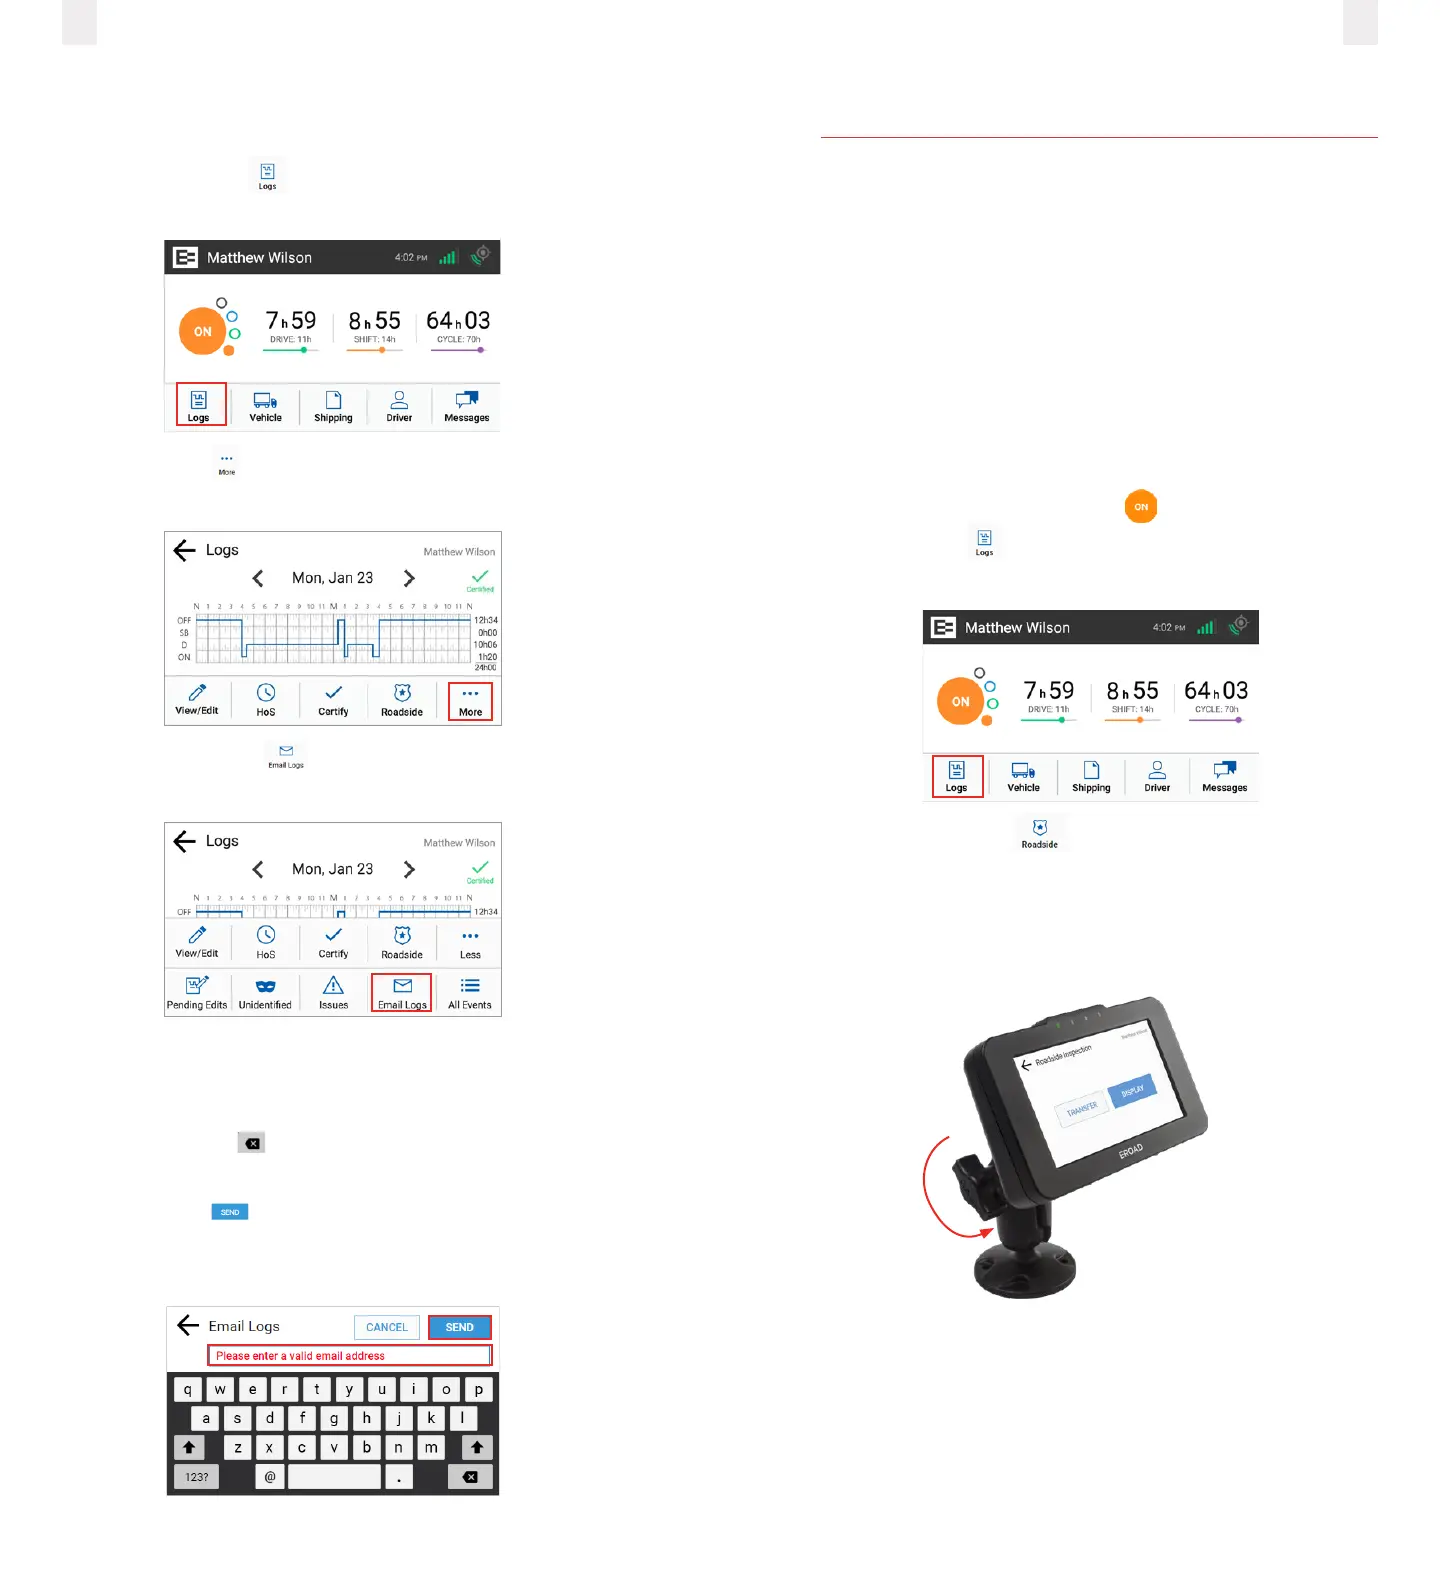
5 Roadside inspection
This chapter describes the functions that you perform during a
roadside inspection. Change the EROAD ELD to the Inspection
mode when a roadside inspection occurs. This must be done
before handing the device to the inspector. The inspector
can see only the required information when the device is in
Inspection mode. The EROAD ELD does not allow the inspector
to change your logs. It allows the inspector to either transfer or
display your records.
Note: The inspector might ask you to power o the ignition, but
power is still supplied to the EROAD ELD.
1 Change your duty status to ON duty.
2 Tap the Logs icon on the Home menu. The Logs screen
appears.
3 Tap the Roadside icon on the Logs menu. The
Roadside Inspection screen appears (See 5.1Transferring
your records.)
4 Remove the EROAD ELD by loosening the fastener on the
mounting arm.