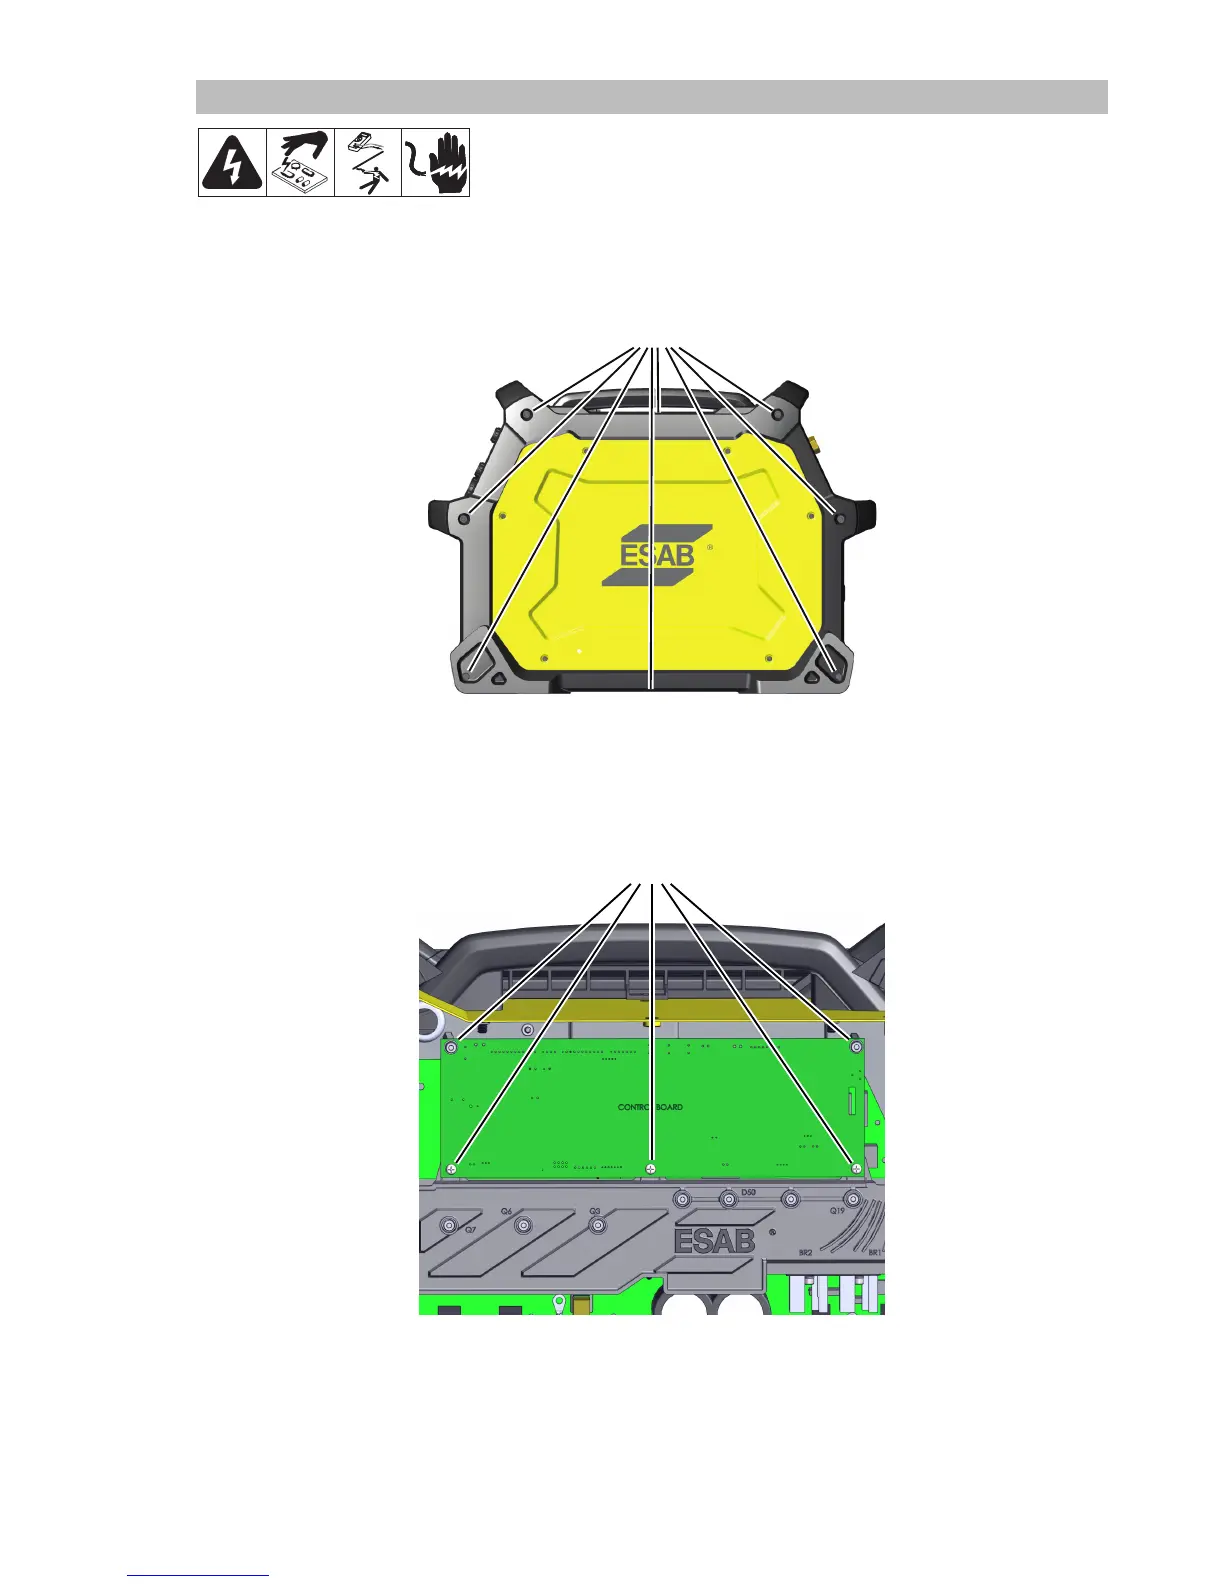
Manual 0463 413 001 DISASSEMBLY 9-3
9.03 Control PCB Removal
Read and follow safety information in Section 1 before proceeding with
disassembly. Follow anti static precautions when handling any PCB (Printed Circuit Board).
Unplug the unit before beginning disassembly procedure.
1. Remove eight (8) screws securing the power-side cover and frame to the power supply.
8
2. Take photos or notes on all the harness connections to the Control PCB which is the upper most board.
3. Disconnect all harnesses from the Control PCB. (Not shown)
4. Remove the five (5) screws securing the board in place and remove the board.
5
Reverse this process for installation.
 Loading...