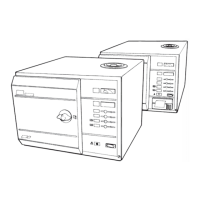
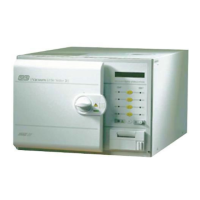
Part 3 SES 2000 AUTOCLAVE
Page 22 of 43 ST-SM8l
PART 3 MAINTENANCE
Solenoid Door Lock (Fig. 4, item 22)
CE ONLY see note page 38.
3.11 Maintenance procedures will depend upon
whether the malfunction is mechanical (e.g. bolt or
return spring sticking) or due to solenoid unit failure.
Proceed as follows:
a Switch-off and disconnect mains power.
b To remove locking bolt, compress the spring with
a suitable tool and open the autoclave door to
provide access to the slotted bolt head screw.
c Grip the solenoid plunger, forward of the E-clip,
and insert a screwdriver in the slot of the locking
bolt head to remove the locking bolt.
d Before refitting or replacing the locking bolt apply
a little ‘Loctite 542’ threadlock to the thread of the
solenoid plunger.
e Refit the nylon washer in the correct position.
f To remove the solenoid unit, proceed as in (b) and
(c) and detach the electrical connector from the
solenoid coil, then remove the solenoid bracket
fixing screws from the chamber head ring. Fit
replacement solenoid unit by reversing the removal
procedure.
Heater Cycling Thermostat (Fig. 4, items 2 and 3)
3.12 To remove and replace thermostat, proceed as
follows:
a Switch-off and disconnect mains power. Then
detach electrical connections from thermostat
noting terminals for re-connection.
b Situated inside the chamber beneath the tray
carrier is the clamp which secures thermostat
sensor to the heater; carefully remove the clamp.
CAUTION
Do not kink capillary tube.
c Disconnect thermostat body from dividing panel
(2 screws), then carefully unscrew gland from rear
of chamber manifold through which the capillary
tube, connecting thermostat sensor to thermostat
unit, passes.
d To fit replacement thermostat, reverse the
procedure described for removal. Note that it is
necessary to use PTFE tape or a suitable sealing
compound to make the joint between the gland
and the chamber fitting.
Temperature Sensor (Fig. 4, item 4)
Note: Autoclaves which incorporate a printer are fitted
with two sensors
3.13 The sensor is mounted on the manifold and
retained by a fibre plate. To remove the sensor, slide
the plate out from the manifold and slide the sensors out
of the plate. When removing the sensor carefully note
the wire colour positions at the plug (i.e. red wire
towards edge of controller board). Remove the plug
from the controller board. When fitting replacement
unit, coat the end of the sensor with a thin layer of zinc
oxide-based heat transfer compound and ensure that
no dirt or grit enters the mounting hole.
Note: When a new temperature sensor is fitted it will
usually be necessary to make some small adjustments
to R17, and R14 on the controller board. In addition the
autoclave must be re-calibrated (see Routine Calibration
Procedure).
Fill and Discharge Valves (Fig. 3, items 1 and 2)
3.14 To remove and replace the fill and discharge
valves proceed as follows:
Note: When removing a fill valve, ensure that the
reservoir has been drained.
a Disconnect electrical connections from valve and
release plumbing connections at each side.
b Note carefully the orientation of the valves 'fill' and
'discharge' ports to ensure correct re-connection.
c Remove pipework from valve, then remove
securing screws.
d Examine the unit. If only the valve coil has failed
(e.g. short-circuiting) it can be renewed. The
valve can also be stripped and cleaned, although
care must be taken to ensure no damage is
caused to valve seat or rubber sealing plunger.
CAUTION
Do not lose the small internal springs in plunger.
e Fit new or refurbished valve in exactly the same
way as the original one, making connections as
noted in (b).
Solid State Relay (Fig. 4 item 8)
Non CE units, see note page 38.
3.15 Remove electrical connections from relay, noting
their relative positions, and remove the two securing
screws. When fitting a replacement relay unit, ensure
that its mating face is coated with a thin layer of zinc
oxide based heat transfer compound, also avoid
overtightening the connector screws when reconnecting
the wiring. (For CE units see 3.16)
Note
Replacement unit should be rated at 25A, 400V
(repetitive reverse blocking voltage) or greater
(i.e. it must be suitable for use on 240V rms a.c.
supply).