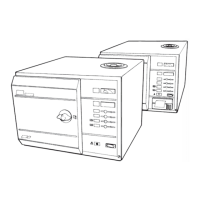
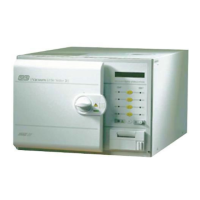
SES 2000 AUTOCLAVE Part 3
ST-SM8l Page 27 of 43
PART 3 MAINTENANCE
= January, to 12 = December). Note that on the
printout, the month will be shown as a letter (A =
January, to L = December).
The serial number (‘hi00’ and ‘lo00’) which is
represented by four digits, is entered into the
autoclave as two, two-digit groups, ‘hi’ and ‘lo’ (‘hi’
= the thousands and the hundreds) and (‘lo’ = the
tens and the units). Thus, for serial number 1127,
'hi' = 11 and 'lo' = 27.
Entering the Autoclave Serial Number (Fig. 7)
3.37 Enter the autoclave serial number as follows.
a Check that the display shows ‘od01’ and:
Enter the modification state (01 = A, to 26 =
Z) by pressing switch 1 to increase the
number, or switch 2 to decrease the number.
When the number is correct, press switch 3
to accept the entry.
b Check that the display has changed to ‘yr00’ and:
Enter the year (00 = 1990, to 09 = 1999) by
pressing switch 1 to increase the number, or
switch 2 to decrease the number.
When the number is correct, press switch 3
to accept the entry.
c Check that the display has changed to ‘on01’ and:
Enter the month (01 = January, to 12 =
December) by pressing switch 1 to increase
the number, or switch 2 to decrease the
number.
When the number is correct, press switch 3
to accept the entry.
d Check that the display has changed to ‘hi00’ and:
Enter the first two digits of the serial number
by pressing switch 1 to increase the number,
or switch 2 to decrease the number.
When the number is correct, press switch 3
to accept the entry.
e Check that the display has changed to ‘Lo00’ and:
Enter the last two digits of the serial number
by pressing switch 1 to increase the number,
or switch 2 to decrease the number.
When the number is correct, press switch 3
to accept the entry.
The autoclave serial number is now set. Note that the
display has changed to ‘on01’ indicating that the time
and the date must be entered as described in section
3.38 and 3.39.
Entering the Time and Date (Fig. 7)
3.38 The date and time comprises five elements:
The month ‘on01’.
The year ‘yr00’.
The day ‘dy01’.
The hour ‘hr00’ ( based on the 24-hour clock).
The minutes ‘in00’.
3.39 Enter the time and date as follows.
a Check that the display shows ‘on01’ and:
Enter the month (01 = January, to 12 =
December) by pressing switch 1 to increase
the number, or switch 2 to decrease the
number.
When the number is correct, press switch 3
to accept the entry.
b Check that the display shows ‘dy01’ and:
Enter the day (01 = the first, to 31 = thirty-first)
by pressing switch 1 to increase the number,
or switch 2 to decrease the number.
When the number is correct, press switch 3
to accept the entry.
c Check that the display shows ‘yr00’ and:
Enter the year (00 = 1990, to 99 = 1999) by
pressing switch 1 to increase the number, or
switch 2 (to decrease the number).
When the number is correct, press switch 3
to accept the entry.
d Check that the display shows ‘hr00’ and:
Enter the hour (00 = 00.00hr, to 24 = 24.00hr)
by pressing switch 1 to increase the number,
or switch 2 to decrease the number.
When the number is correct, press switch 3
to accept the entry.
e Check that the display shows ‘in00’ and:
Enter the minute (01 = the first minute, to 59
= the fifty-ninth minute) by pressing switch 1
to increase the number, or switch 2 to
decrease the number.
When the number is correct, press switch 3
to accept the entry.
The time and date are now set, and several bleeps will
sound indicating that the set-up procedure is complete.
If a printer is fitted, it will produce a printout for checking.