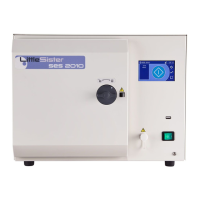
SES 2000 AUTOCLAVE Part 2
ST-SM8l Page 9 of 43
PART 2 DESCRIPTION
Integral Printer (Fig. 2 item 22). If the autoclave
has a printer, it will start automatically when the
programme button is pressed and will print out a
hard copy of the sterilization cycle. Details of the
printer are given in Appendix A to this Manual.
OPERATION CYCLE
2.6 A detailed knowledge of the operation of the
autoclave is not necessary to be able to repair it
effectively; however, a basic understanding of the
various processes of the unit operation which occur
during a cycle is given in the following paragraphs.
Operation
CAUTION
Ensure that the reservoir is filled with water before
switching-on.
Note: When filling the reservoir, water treated by
reverse osmosis can be used as an alternative to
distilled, or deionized water.
2.7 Power to the unit is switched on by selecting the
power switch (0-I) to I. If the chamber door is open there
now follows a single high-pitched audible signal
accompanied by the display ‘SES’, followed by the
number of cycles, and finally ‘ready’ (or time of day if
printer fitted) in the display window.
2.8 If the door is closed, when power is switched on,
the display will alternate between ‘test’ and ‘door’. In
order to continue with the cycle the door must be opened,
at which point the display will change to ‘ready’ (or time)
and the four green indicators will come on.
2.9 After the work trays have been put in the chamber
and the door closed, a programme can be selected and
initiated by pressing one of the programme selector
buttons. If the autoclave has a printer it will automatically
start when the programme selector button is pressed.
2.10 When the door is closed, with power switched
on, this is sensed by the controller via the door interlock
switch. If any attempt is made to open the door once the
cycle has begun, the display ERR2 will appear, and an
audible signal will sound. Under these circumstances
it is necessary to switch the autoclave off and clear the
error as detailed in section 3.41.
2.11 On selecting the programme, ‘FiLL’ will be
displayed, indicating that the cycle has begun. Once
the chamber has filled with water from the reservoir, the
display will change to ‘HEAt’.
2.12 If all conditions are satisfactory, the controller will
set-up the operating parameters for the cycle selected,
and will switch on the heater.
2.13 The heater is controlled by a system which
ensures that the operating temperature is reached with
minimal overshoot. Initially the heater will be ‘on’
continuously and the measured temperature will be
displayed. Note, however, that the system does not
register temperatures below 92°C; hence the symbol
‘HEAt’ will appear and remain on display until a
temperature of 92°C is reached.
2.14 Temperatures are displayed and measured to
0.1°C. In addition, the controller uses signal averaging
to ensure a stable, accurate display.
2.15 Control of the cycle is now fully automatic with
temperature information being collected via the
temperature sensor. Timing is controlled by the controller
and cycle times cannot be adjusted. By comparing
measured values with known time/temperature
relationships, the controller is able to detect faults and
display them as error codes, this is accompanied by an
audible warning signal.
Note: Pressing the bottom 121°C button will display
the cycle counter.
2.16 To ensure efficient sterilization, the autoclave
operates at temperatures slightly above the minimum
recommended. Hence, the operating temperature for
the 121°C cycle is set to 122.5°C, and the 134°C cycle
is set to 135.5°C.
2.17 As the cycle enters the sterilizing phase the
display shows an ‘S’ (flashing) as a prefix to the
displayed temperature. At the end of the sterilizing
phase the heater is turned off and the discharge valve
is opened. At this point, a certain amount of noise from
the reservoir is quite normal.
2.18 Once the controller detects that chamber
temperature has fallen to a safe level, the flashing
display ‘End’ appears and an audible signal sounds to
indicate that the cycle is complete. When the chamber
door is opened the display will show ‘ready’.
Note: If the autoclave has a printer, the printout will
include the following details:
Manufacturer’s name
Autoclave type and serial number
Sterilization cycle type e.g.. 134°C without drying
Date and time for the start of sterilization cycle
Counter indication (five digits with leading zeros)
Sterilization cycle time and temperature
information
Sterilization cycle ended message
Time and date for the end of the sterilization cycle
Operating information relating to the printer is given in
Appendix A to this Manual.