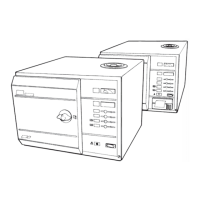
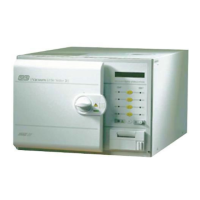
Part 3 SES 2000 AUTOCLAVE
Page 26 of 43 ST-SM8l
PART 3 MAINTENANCE
Set-Up Procedure
3.33 After changing the printer interface board, the
autoclave must be set-up as follows.
WARNING
During the following procedure, the autoclave
cover is removed, and mains voltages are
exposed
Autoclave Without Printer (Fig. 4 and 7 )
3.34 To set-up an autoclave without a printer, proceed
as follows:
a Switch mains power on/off switch to ‘off’ (O).
b Press and hold switch 5 and switch mains on/off
switch to ‘on’ (I). Continue holding switch 5 until
‘Set-Up’ is displayed, and then release it.
c After a short time ‘LS3’ will be displayed.
d Press switch 2 to reject ‘LS3’, and check that the
display changes to ‘SES’.
e Press switch 1 and check that the display changes
to ‘Print’.
f Press switch 1 and check that the display changes
to ‘CyC-0’ (cycle counter).
g Press switch 2 and check that the display changes
to ‘Eng’ (English).
h If English is the required language press switch 1
to accept the ‘Eng’ code. If English is not the
required language, press switch 2 until the required
language code is displayed as follows:
‘Fre’ French.
‘Ger’ German
‘Ita’ Italian.
‘Spa’ Spanish.
‘Por’ Portuguese.
i Press switch 1 to accept the required language
code. Display changes to 'CE', press switch 1 for
CE units press switch 2 for non-CE units (see
Note page 38).
j Several bleeps will now sound indicating that the
set-up procedure is complete.
Autoclave with Printer (Fig. 2 and 7)
3.35 To set-up an autoclave with a printer, proceed as
follows:
a Switch mains power on/off switch to ‘off’ (O).
b Press and hold switch 5 and switch mains on/off
switch to ‘on’ (I). Continue holding switch 5 until
‘Set-Up’ is displayed, and then release it.
c After a short time ‘LS3’ will be displayed.
d Press switch 2 to reject ‘LS3’, and check that the
display changes to ‘SES’.
e Press switch 1 and check that the display changes
to ‘Print’.
f Press switch 1 and check that the display changes
to ‘CyC-0’ (cycle counter).
g Press switch 2 and check that the display changes
to ‘Eng’ (English).
h If English is the required language press switch 1
to accept the ‘Eng’ code. If English is not the
required language, press switch 2 until the required
language code is displayed as follows:
‘Fre’ French.
‘Ger’ German
‘Ita’ Italian.
‘Spa’ Spanish.
‘Por’ Portuguese.
i Press switch 1 to accept the required language
code. Display changes to 'CE', press switch 1 for
CE units press switch 2 for non-CE units.
j The display will have changed to ‘od01’, indicating
that the autoclave serial number must be set as
described in section 3.36 and 3.37.
k After setting the serial number note that the display
has changed to ‘Set’, and then to ‘d-t’, and then to
‘on01’ indicating that the time and date must be set
as described in sections 3.38 and 3.39.
Setting the Autoclave Serial Number
3.36 The autoclave serial number (which is on the
dataplate on the inside of the autoclave door, and on the
back of the autoclave cover) comprises four parts:
SED 4 H 1127
D indicates the modification state
4 indicates the year of manufacture
H indicates the month of manufacture
1127 is the serial number comprising two groups:
11 is the Hi group (thousands and hundreds)
27 is the Lo group (tens and units)
The modification state (‘od01’) which is represented
by a letter from A to Z, is entered into the autoclave
as a two-digit code (01 = A, to 26 = Z). Note that
on the printout, the letter will be shown, not the
number.
The year of manufacture (‘yr00’), which is
represented by the last digit of the year, is entered
into the autoclave as a two-digit code (00 = 1990,
to 09 = 1999).
The month of manufacture (‘on00’) which is
represented by the last two digits of the month, is
entered into the autoclave as a two-digit code (01