Appendix A SES 2000 AUTOCLAVE
Page 40 of 43 ST-SM8l
1
2
3
4
5
6
7
8
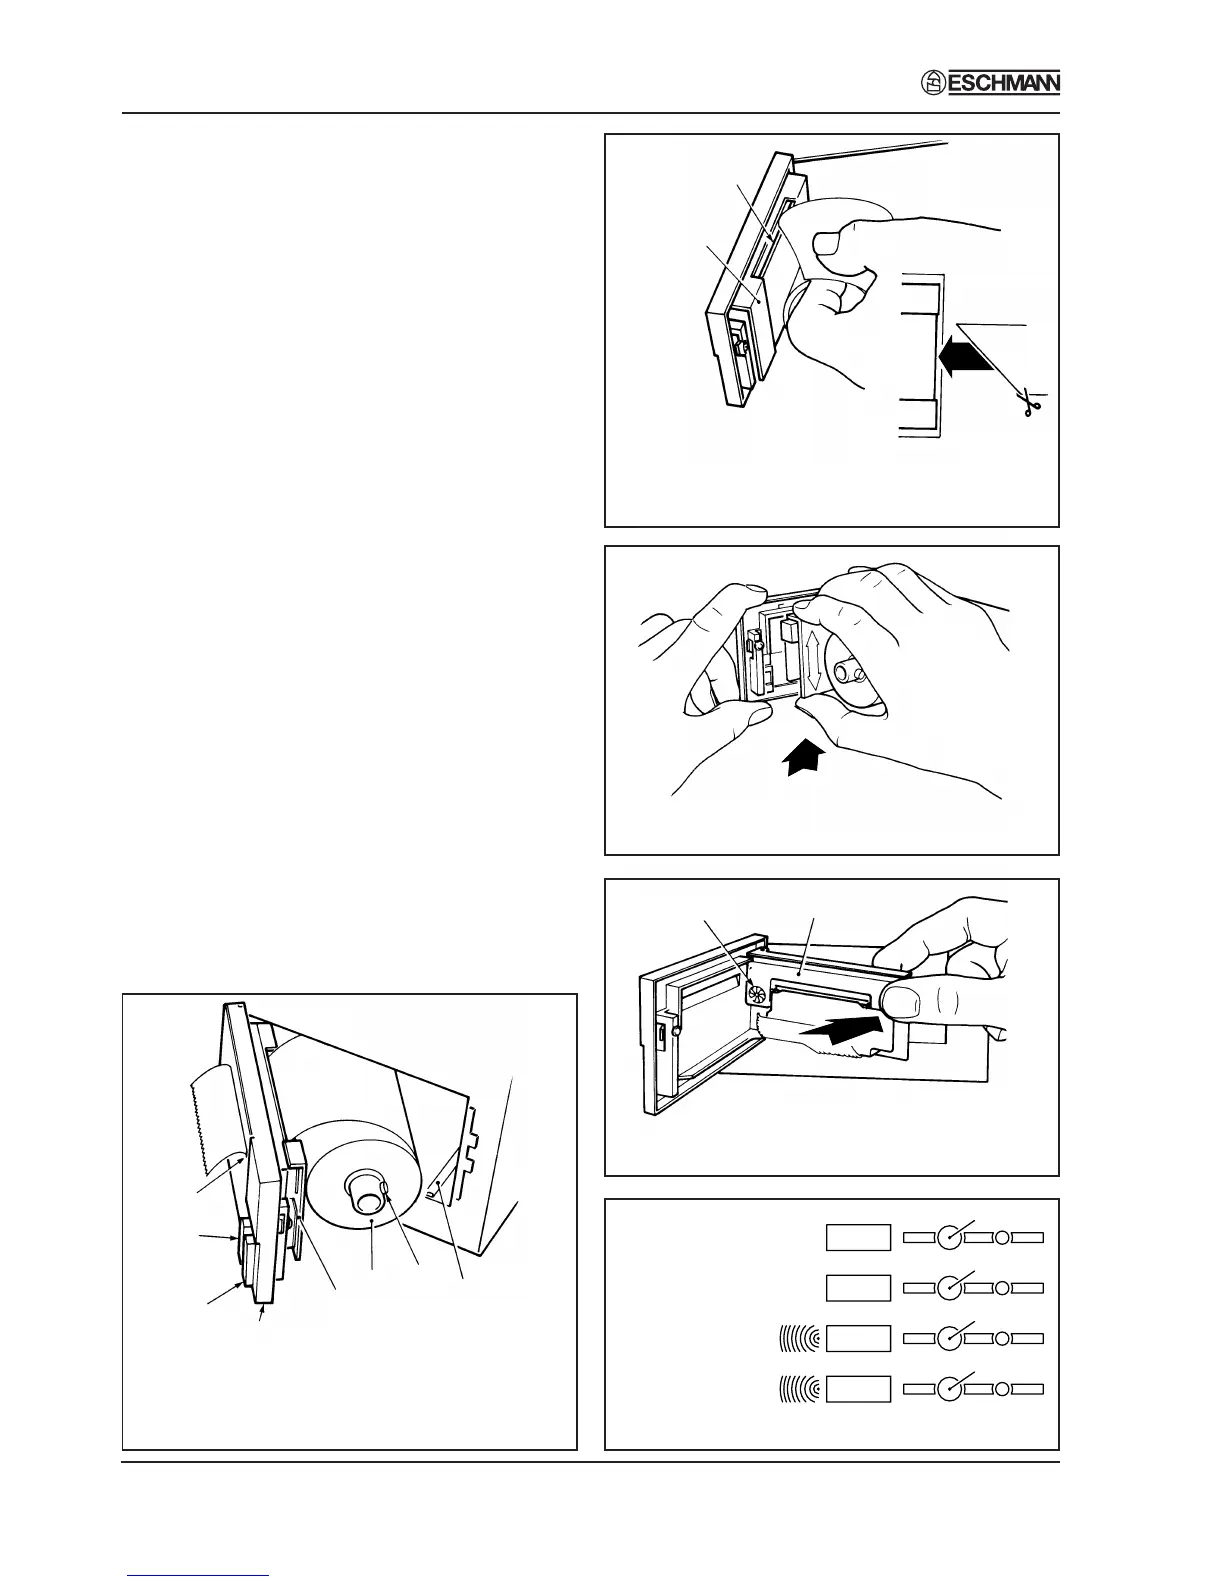
1. Printer Door
2. Door Latch
3. Paper Feed Button
4. Paper Roll
Fig. A1. Printer
1
2
1. Paper Insert Slot
2. Printer Mechanism Chassis
Fig. A2. Paper Feed
Fig. A3. Ribbon Cartridge
Fig. A4. Ribbon Cartridge in Position
1
2
1. Ribbon Cartridge
2. Faceted Disc
Fig. A5. Setting Date and time
switch 1
switch 2
switch 3
switch 4
134°C
134°C
121°C
121°C
Programmes
without drying
Programmes
with drying
{
{
Spares Pack
A spares pack is available comprising:
♦Five paper rolls
♦Two ribbon cartridges
The spares pack is available from Eschmann
Equipment please quote REF 87-034-05.
Setting Date and Time (Fig. A5)
1. To change the clock setting (e.g. from GMT to
BST or the reverse) proceed as follows:
a. Select mains ‘on/off switch to ‘0’ (off).
b. Push and hold switch 1 and switch 4 simultaneously
then select ‘on/off’ switch to ‘I’ (on).
c. The display will read ‘01’.
d. Then proceed as described in paragraph 2 (a) to (g).
2. To set the date and time proceed as follows:
a. If closed, open chamber door.
b. Display reads ‘01’. Push and hold switch 1. Observe
that number changes to 02,03 etc. through to 12.
Also note that pushing and holding switch 2
makes the number decrease. Use switch 1 and
switch 2 to set the number corresponding to the
month (01=January etc.). Push switch 3 to retain
selection.
c. Display reads ‘dy01’. Again use switch 1 and
switch 2 to display the day of the month (push
switch 3 to retain the day). Note: The computer
will prevent entry of dates such as 31st Nov.
d. Display reads ‘yr00’. Use switch 1 and switch 2
to set any year from 00 to 99 (e.g. 97=1997).
Then push switch 3 to retain it.
e. Display reads ‘hr00’. Use switch 1 and switch
2 to set the hour - the system utilises a 24 hour
clock. Then push switch 3 to retain it.
f. Display reads ‘in00’ (minutes). Use switch 1
and switch 2 to show current minutes and push
switch 3 to retain it.
g. The clock is now set.
5. Printer Mechanism
6. Spring-Loaded Retainer
Button
7. Paper Feed Actuator Arm
8. Paper Tear Bar