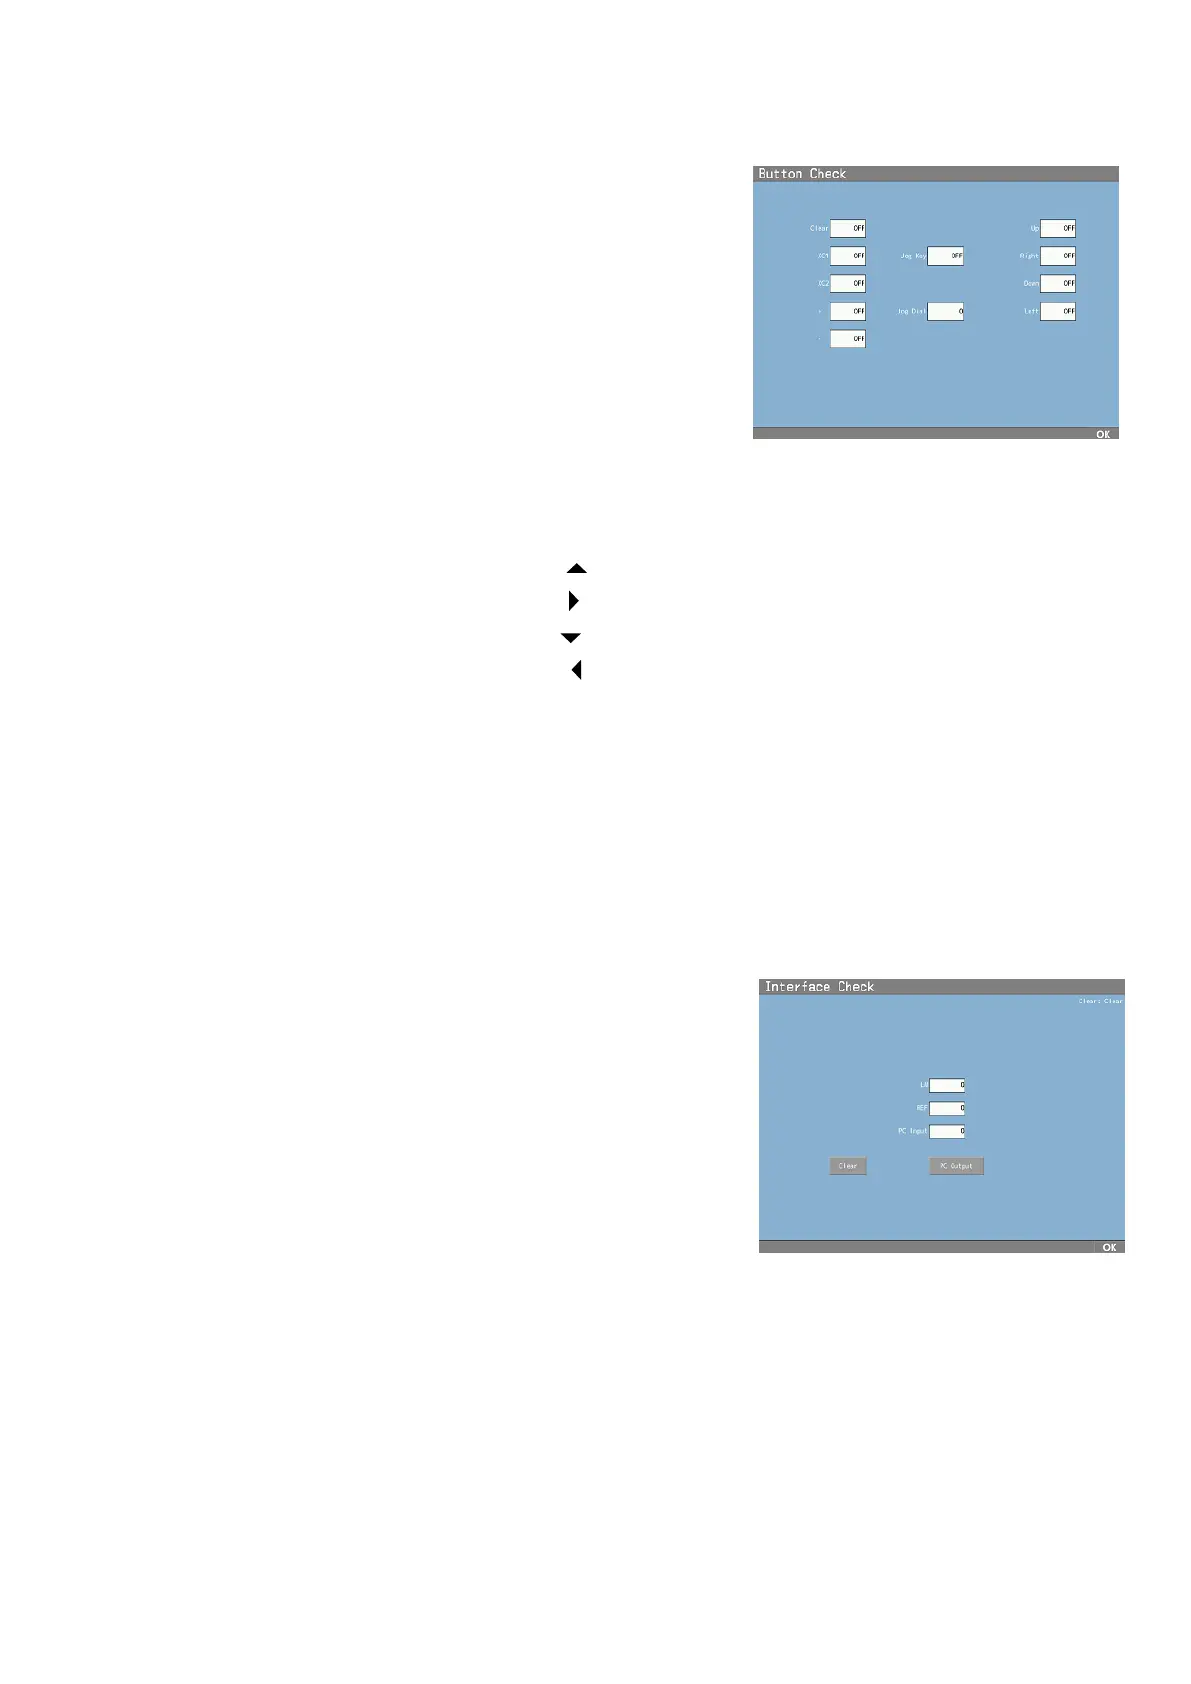
4) Button Check
It is switched to the screen on the right by selecting
this menu. It checks the performance of the buttons.
It displays “ON” by pressing each button and
displays “OFF” by releasing each button on the
controller.
: Display “ON” by pressing “Clear key”
: Display “ON” by pressing “XC1” key”
: Display “ON” by pressing “XC2 key”
: Display “ON” by pressing “+ key”
: Display “ON” by pressing “- key”
: Display “ON” by pressing of selection key
: Display “ON” by pressing of selection key
: Display “ON” by pressing of selection key
: Display “ON” by pressing of selection key
: Display “ON” by pressing the dial push key
: The numbers increase/ decrease by rotating the dial switch
Failure of the operation board assy etc. might be the cause when “ON” is not displayed
even though pressing each button or “ON” is displayed even though no buttons are pressed.
5) Printer Check
It performs test printing. It checks performance of the printer.
6) Interface Check
The screen on the right appears by selecting this menu.
It checks the communication with the exterior devices.
The volume of the sent data is displayed when
receiving the data of APH550.
: Display the volume of the data
received from the lensmeter.
: Display the volume of the data when
receiving the data from the autoref.
: Display the volume of the data when receiving the data from the PC
: Send the sample data to the PC
The setting of the communication is same with the one of the “Arrange Mode”.
Change it in the “Arrange Mode” if it is needed.