Lens Tubes - 19° to 50° 17
For maximum gel life with specific lens tubes, refer to the tables below.
Assembling the lens tube
Tools Required:
• #2 Phillips head screwdriver
Step 1: Place the left and right lens tubes (1 & 2) face up on your work surface. Align the
tubes so the colorframe grooves are to your left.
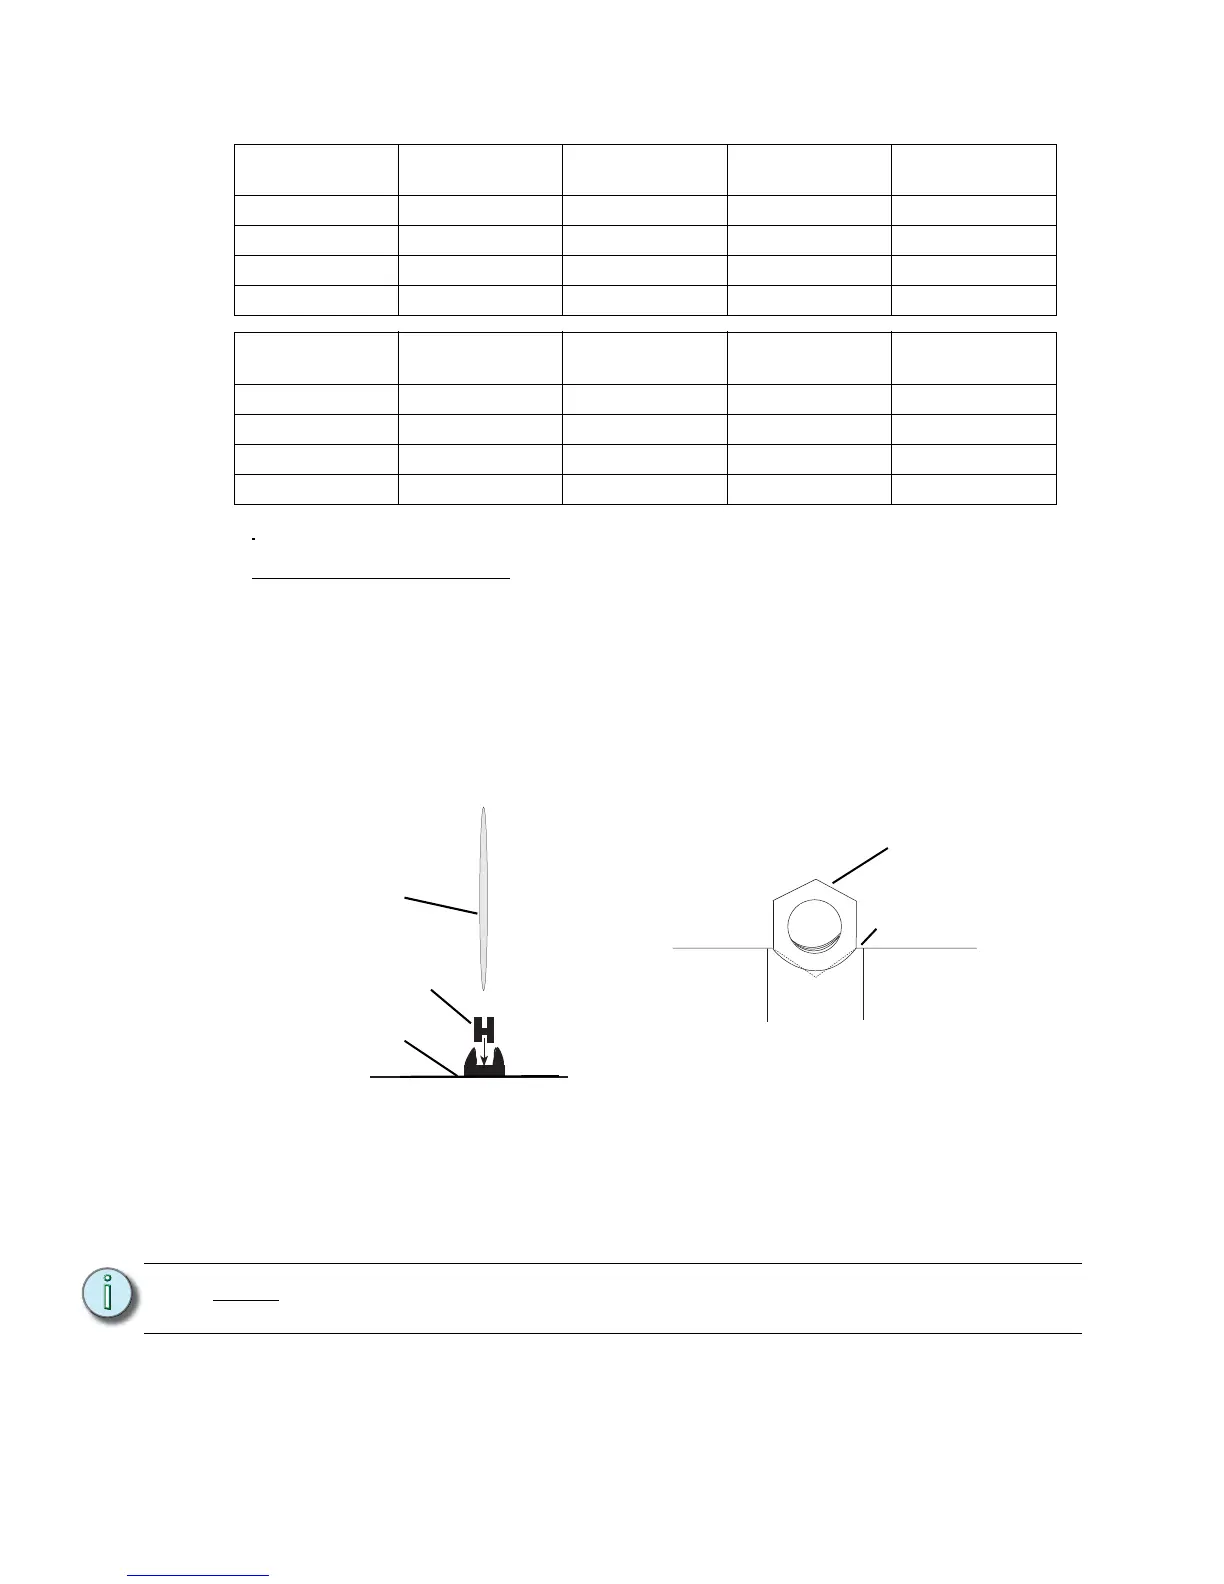
Step 2: Install lens support pads (11) as required inside both lens tubes. Four pads are
required per lens. Insert pads short-side down, as shown in Figure 14.
Step 3: Install the 1/4-20 hex nut (14) in the left lens tube as shown.
Step 4: Install the short end of the gel retainer clip (8) in the left lens tube (1).
Step 5: Position the clip in the forward, locked position, then install the retainer spring
(15) on the clip.
Step 6: Install the required lens (or lenses) (3, 4, 5, 6, 7, or 8) in the correct position as
shown on Figure 15.
Step 7: See Figure 14. Invert the right lens tube (2) and hold it above the left lens tube
(1). Fit the clip (8) and spring (15) into the right lens tube. Gently place the right
lens tube onto the left lens tube, making sure that the 1/4-20 hex nut and
Lens Tube Soft Focus Back
(Lamp “flat”)
Sharp Focus
(Lamp “cosine”)
Soft Focus Forward
(Lamp “peak”)
Soft Focus Forward
(Lamp “cosine”)
19° worse better better not applicable
26° worse better better not applicable
36° better better worse not applicable
50° worse better better not applicable
ED Lens Tube Soft Focus Back
(Lamp “flat”
Sharp Focus
(Lamp “cosine”)
Soft Focus Forward
(Lamp “peak”)
Soft Focus Forward
(Lamp “cosine”)
19° worse better better not applicable
26° better better worse not applicable
36° better better worse not applicable
50° better better worse not applicable
Note:
Install the lens with the painted dot facing the front of the tube. Seat the lens in the
support pads so the dot remains visible.
 Loading...