Lens Tube - 90° 27
Assembling lens tube - 90°
Lens Markings and Positions
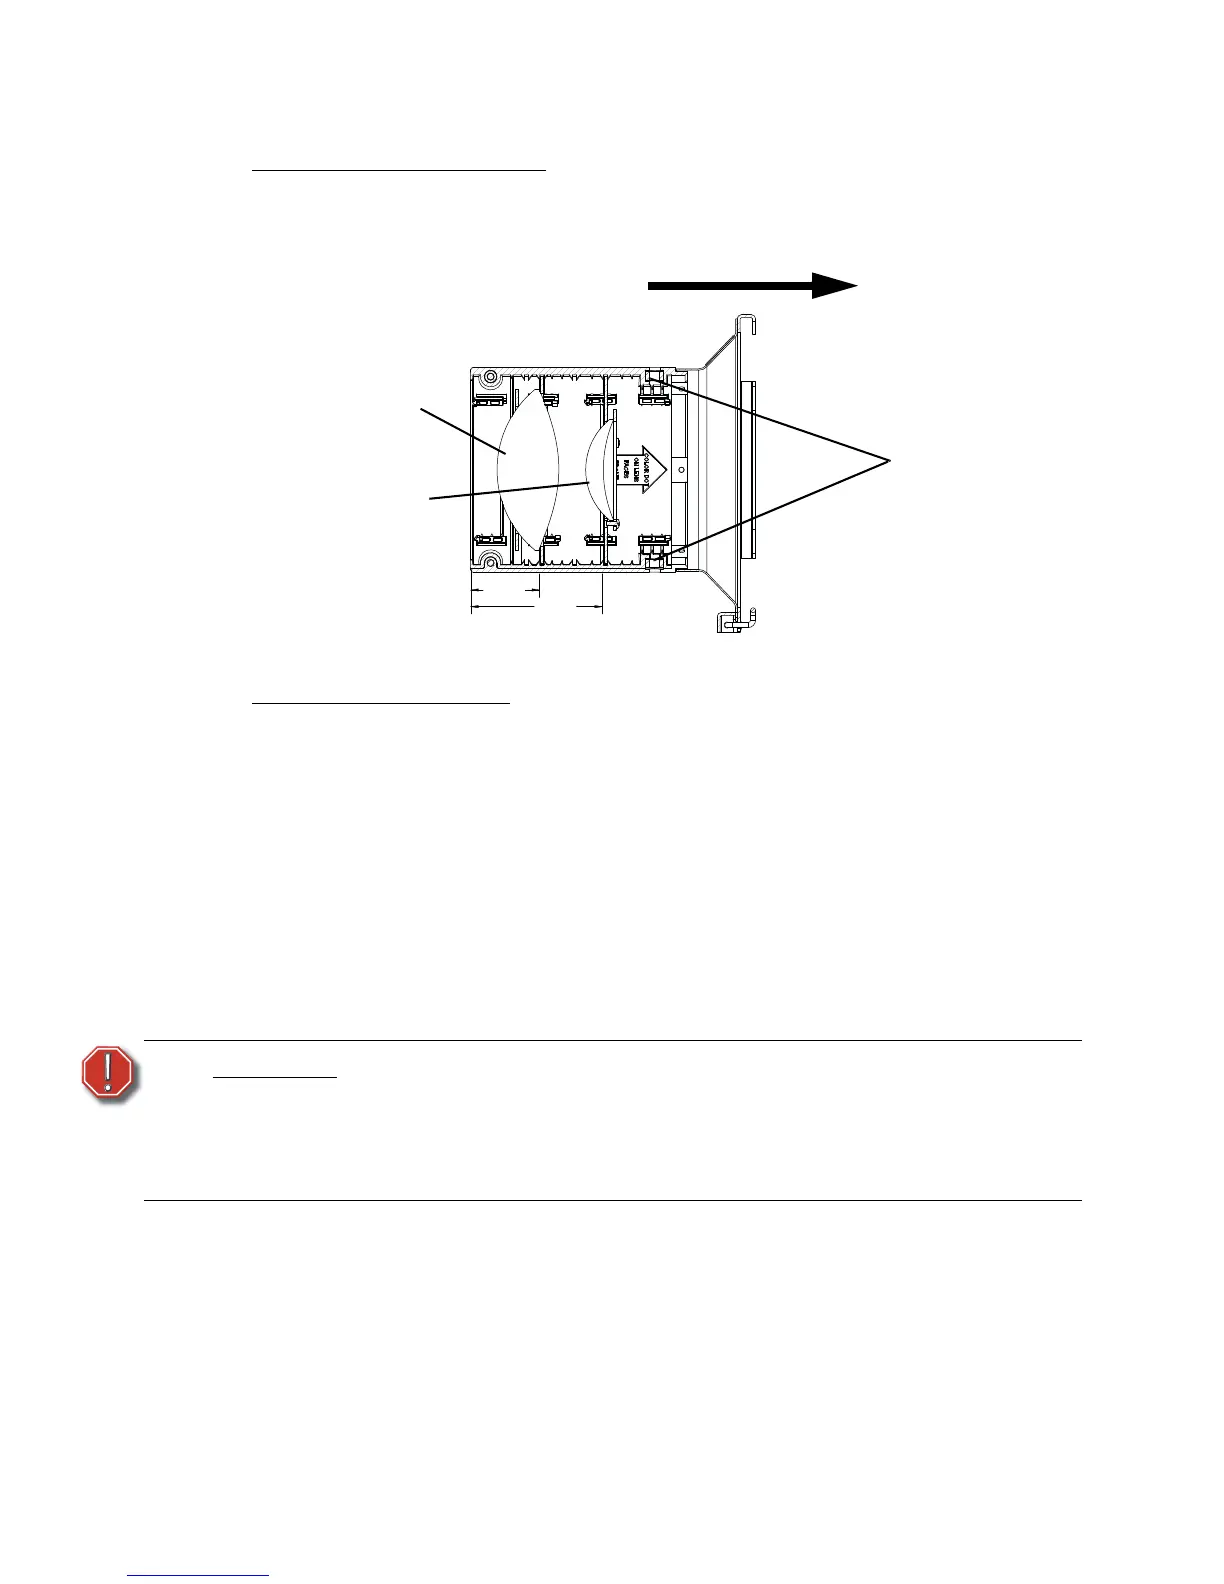
The 90° lenses are color-coded for identification. The rear lens has two purple dots and the
front lens has one purple dot. The lens positions are color-coded within the lens casting to
match the colored dots on the lenses (see Figure 26).
Assembling the lens tube
Tools Required:
• #2 Phillips head screwdriver
Step 1: See Figure 25. Place rear lens (2) into mounting plate (1) with paint dots facing
forward. Center the lens in the mounting plate and secure with the retaining ring
(3) and screws (7). Lightly tighten all three screws while maintaining lens
position, then tighten screws securely.
Step 2: See Figure 25. Place front lens (2) into mounting plate (11) with paint dots facing
forward. Center the lens in the mounting plate and secure with the retaining ring
(10) and screws (7). Lightly tighten all three screws while maintaining lens
position, then tighten screws securely.
Cleaning glass lens - 90°
Remove dust with a blast of oil-free air or wipe with a clean, lint-free cloth. Isopropyl alcohol,
distilled water or a 50%-50% mixture of each can be used to clean the glass surface.
WARNING:
Do not use ammonia-based or other harsh commercial cleaners. Clean lens
and reflector only as directed.
Commercially available glass cleaning agents should be avoided as they
may contain ammonia, other harsh chemical detergents or abrasive agents.
These cleaners may damage the glass surface and the Anti-Reflective
coatings. Do not immerse or soak the glass in any cleaning solution.
Install rear lens assembly in slot
labeled “90° DEG REAR LENS”.
Colored dots faces front.
Install front lens assembly in slot
labeled “90° DEG FRONT LENS”.
Colored dot faces front.
1.74
3.34
REF
REF
 Loading...