13
MAN20001587-01-02/23 (translation of the original operating instructions)
Operating Instructions
Transponder-Coded Safety Switch CTS-C1-BP/BR-FLX
EN
7. Manual release
Some situations require the guard locking to be released manually (e.g. malfunctions or an emergency). A function test must
be performed after release.
More information on this topic can be found in the standard ENISO14119:2013, section 5.7.5.1. The device can feature
the following release functions:
7.1. Auxiliary release
If malfunctions occur, the guard locking can be released with the auxiliary release irre-
spective of the state of the solenoid.
Important!
Ì The actuator must not be under tensile stress during manual
release.
Ì To prevent tampering, the auxiliary release must be sealed with
sealing lacquer, for example, before the switch is set up.
Ì Loss of the release function due to mounting errors or damage
during mounting.
Ì Check the release function every time after mounting.
Ì The auxiliary release is not a safety function.
Ì The correct function must be checked at regular intervals.
Ì Observe the notes on any available data sheets.
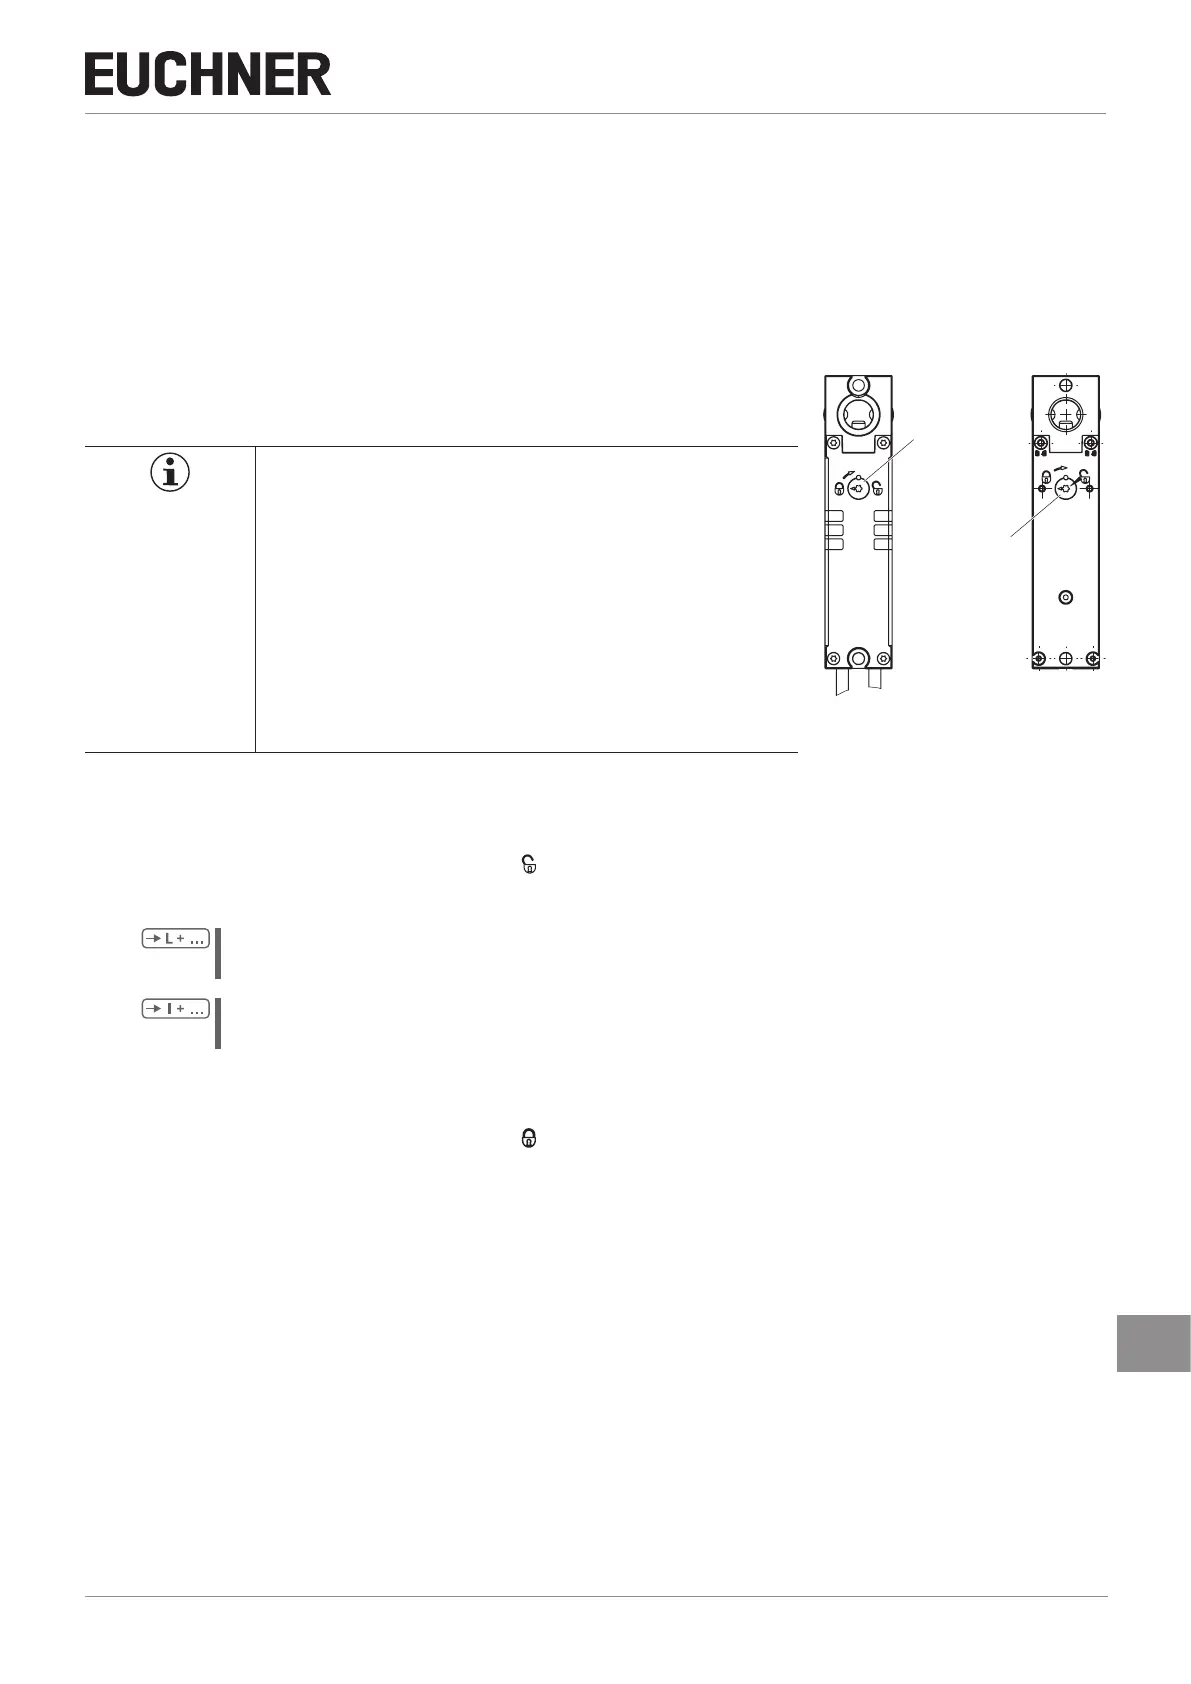
7.1.1. Actuating auxiliary release
1. Remove seal or make a hole.
2. Using a screwdriver, turn the auxiliary release to in the direction of the arrow.
¨ If the guard locking was activated, it is unlocked.
The following applies to active guard lock monitoring:
¨ The guard locking signal OL and the safety outputs are switched off.
The following applies to inactive guard lock monitoring:
¨ The guard locking signal OL is switched off.
¨ The STATE LED ashes alternately white/orange slowly.
The LOCK LED ashes orange slowly.
3. Using a screwdriver, turn the auxiliary release to in the opposite direction to the arrow to reset.
4. Seal with sealing lacquer.
5. Close guard or apply voltage to the solenoid.
¨ The device operates normally again.
6. Check correct function of the device.
Auxiliary release
on the front
Auxiliary release
on the rear